Pentax 19231 T30 Operating Manual - Page 142
Direct Printing with PictBridge, Connecting the Camera to the Printer
 |
UPC - 027075126640
View all Pentax 19231 manuals
Add to My Manuals
Save this manual to your list of manuals |
Page 142 highlights
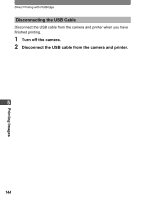
Direct Printing with PictBridge Direct Printing with PictBridge By connecting the camera to a PictBridge-compatible printer with the provided USB cable, you can print images directly from the camera without using a PC. Connect the camera to the printer and use the camera to choose the images you want to print, the number of copies, and whether you want the date to appear on the print. Caution • It is recommended that you use the optional AC adapter kit when printing images directly from the camera. The printer may not work properly or image data may be lost if the camera battery runs out of power while the camera is connected to the printer. • Do not disconnect the USB cable during data transfer. • Depending on the printer model, not all the settings made on the camera (such as date and DPOF settings) may be executed. • Printing an index of images, where multiple images appear on a single sheet, may not be possible unless the printer supports index printing. For 5 index prints, you may need to use a PC. Connecting the Camera to the Printer 1 Select [PictBridge] for the [USB Connection] mode. Refer to "Changing the USB Connection Mode" (p.160) for details of how to set the [USB Connection] mode. 2 Turn off the camera. 3 Connect the camera to the printer using the USB cable provided. 4 Turn the printer on. 5 When the printer is ready to print, turn the camera on. Select printing mode The Printing Mode Selection screen appears. Print All Print DPOF One Setting Printing Images 140
-
 1
1 -
2
-
3
-
4
-
5
-
6
-
7
-
8
-
9
-
10
-
11
-
12
-
13
-
14
-
15
-
16
-
17
-
18
-
19
-
20
-
21
-
22
-
23
-
24
-
25
-
26
-
27
-
28
-
29
-
30
-
31
-
32
-
33
-
34
-
35
-
36
-
37
-
38
-
39
-
40
-
41
-
42
-
43
-
44
-
45
-
46
-
47
-
48
-
49
-
50
-
51
-
52
-
53
-
54
-
55
-
56
-
57
-
58
-
59
-
60
-
61
-
62
-
63
-
64
-
65
-
66
-
67
-
68
-
69
-
70
-
71
-
72
-
73
-
74
-
75
-
76
-
77
-
78
-
79
-
80
-
81
-
82
-
83
-
84
-
85
-
86
-
87
-
88
-
89
-
90
-
91
-
92
-
93
-
94
-
95
-
96
-
97
-
98
-
99
-
100
-
101
-
102
-
103
-
104
-
105
-
106
-
107
-
108
-
109
-
110
-
111
-
112
-
113
-
114
-
115
-
116
-
117
-
118
-
119
-
120
-
121
-
122
-
123
-
124
-
125
-
126
-
127
-
128
-
129
-
130
-
131
-
132
-
133
-
134
-
135
-
136
-
 137
137 -
 138
138 -
 139
139 -
 140
140 -
 141
141 -
 142
142 -
 143
143 -
 144
144 -
 145
145 -
 146
146 -
 147
147 -
148
-
149
-
150
-
151
-
152
-
153
-
154
-
155
-
156
-
157
-
158
-
159
-
160
-
161
-
162
-
163
-
164
-
165
-
166
-
167
-
168
-
169
-
170
-
171
-
172
-
173
-
174
-
175
-
176
-
177
-
178
-
179
-
180
-
181
-
182
-
183
-
184
-
185
-
186
-
187
-
188
-
189
-
190
-
191
-
192
 |
 |
