Ricoh 2045 General Settings Guide
Ricoh 2045 - Type Print Server Manual
 |
UPC - 026649003776
View all Ricoh 2045 manuals
Add to My Manuals
Save this manual to your list of manuals |
Ricoh 2045 manual content summary:
- Ricoh 2045 | General Settings Guide - Page 1
Operating Instructions General Settings Guide Getting Started Combined Function Operations Document Server User Tools (System Settings) Troubleshooting Remarks Entering Text Security Specifications For safe and correct use of this machine, please be sure to read the Safety Information in this manual - Ricoh 2045 | General Settings Guide - Page 2
/2045e Operating Instructions General Settings Guide Overseas Affiliates U.S.A. RICOH CORPORATION 5 Dedrick Place West Caldwell, New Jersey 07006 Phone: +1-973-882-2000 The Netherlands RICOH EUROPE B.V. Groenelaan 3, 1186 AA, Amstelveen Phone: +31-(0)20-5474111 United Kingdom RICOH UK LTD. Ricoh - Ricoh 2045 | General Settings Guide - Page 3
are employed in this manual. With this machine refer to the metric version. For good copy quality, Savin/Gestetner recommends that you use genuine Savin/Gestetner toner. Gestetner shall not be responsible for any damage or expense that might result from the use of parts other than genuine Savin - Ricoh 2045 | General Settings Guide - Page 4
/336/EEC and its amending directives and the Low Voltage Directive 73/23/EEC and its amending directives." In accordance with IEC 60417, this machine uses the following symbols for the main power switch: a means POWER ON. c means STAND BY. Copyright © 2003 - Ricoh 2045 | General Settings Guide - Page 5
, see the relevant parts of the manual. Note r Manuals provided are specific to machine type. r Adobe Acrobat Reader is necessary to view the manuals as a PDF file. r Two CD-ROMs are provided: • CD-ROM 1 "Operating Instructions for Printer/Scanner" • CD-ROM 2 "Scanner Driver & Document Management - Ricoh 2045 | General Settings Guide - Page 6
for DeskTopBinder V2 Lite DeskTopBinder V2 Lite is a utility included on the CD-ROM labeled "Scanner Driver & Document Management Utilities". • DeskTopBinder V2 Lite Setup Guide (PDF file - CD-ROM2) Describes installation of, and the operating environment for DeskTopBinder V2 Lite in detail. This - Ricoh 2045 | General Settings Guide - Page 7
V2 Professional*/Lite, you can search, check, print, and delete stored documents using your computer. You can also retrieve stored documents scanned in scanner mode. With file format converter*, you can even download documents stored in copy and printer functions to your computer. See Network - Ricoh 2045 | General Settings Guide - Page 8
send documents created in computer applications to another party's fax machine directly, without performing a print job (LAN-Fax). See Facsimile Reference . iv • You can send scan files to a specified destination using e-mail (Sending scan file by e-mail). See Scanner Reference. - Ricoh 2045 | General Settings Guide - Page 9
V2 Professional*/Lite, you can save scan files in specified destinations on network computers (Using the network delivery scanner function). See Scanner Reference. • You can send scan files directly to folders (Sending scan file by Scan to Folder). See Scanner Reference. Monitoring the Machine Via - Ricoh 2045 | General Settings Guide - Page 10
What You Can Do with This Machine iii Copier, Facsimile, Printer, and Scanner Functions iii Utilizing Stored Documents iii Paperless Fax Transmission and Reception iv Fax Transmission and Reception Through the Internet iv Using the Scanner in a Network Environment iv Administrating the Machine - Ricoh 2045 | General Settings Guide - Page 11
Changing Stored Document's File Name, User Name, or Password 38 Selecting a Document 38 Searching for Stored Documents 39 Printing Stored Documents 40 Deleting Stored Documents 43 Viewing Stored Documents Using a Web Browser 43 Downloading Stored Documents 44 Settings for the Document Server - Ricoh 2045 | General Settings Guide - Page 12
-Sheet Finisher 129 2 Tray Finisher ...130 Booklet Finisher ...132 Removing Jammed Staples 134 1000-Sheet Finisher 134 2 Tray Finisher ...135 Booklet Finisher ...136 y Removing Punch Waste 138 6. Remarks Dos and Don'ts 139 Toner ...140 Handling Toner...140 Toner Storage ...140 Used Toner ...140 - Ricoh 2045 | General Settings Guide - Page 13
152 For Administrator...152 For User ...153 9. Specifications Main unit ...155 Options ...159 Exposure Glass Cover 159 Auto Document Feeder 159 1000-Sheet Finisher 160 2 Tray Finisher ...161 Punch Kit...162 Booklet Finisher ...163 Bridge Unit ...164 Internal Tray 2 (1 bin tray 165 Large - Ricoh 2045 | General Settings Guide - Page 14
x - Ricoh 2045 | General Settings Guide - Page 15
of their conformity. The CE Declaration of Conformity is available on the Internet at URL: http://www.ricoh.co.jp/fax/ce_doc/. This product is only for use in EEA or other authorized countries. Outdoor use of this product in Belgium, France, Germany, Italy, or the Netherlands is prohibited. 1 - Ricoh 2045 | General Settings Guide - Page 16
®, Windows® and Windows NT® are registered trademarks of Microsoft Corporation in the United States and/or other countries. Acrobat® is a registered trademark of Adobe Systems Incorporated. Bluetooth™ is a trademark of the Bluetooth SIG, Inc. (Special Interest Group) and is used by RICOH Company - Ricoh 2045 | General Settings Guide - Page 17
contains NetBSD operating system: For the most part, the software constituting the NetBSD operating system is not in the public domain; its authors retain their copyright. The following text shows the copyright notice used for many of the NetBSD source code. For exact copyright notice applicable for - Ricoh 2045 | General Settings Guide - Page 18
is licensed by the product manufacturer under separate agreement(s). d) The source code of the modified code of the Sablotron 0.82 is available at: http://support-download.com/services/device/sablot/notice082.html e) The source code of the Sablotron software is available at: http://www.gingerall.com - Ricoh 2045 | General Settings Guide - Page 19
R. Thorpe. • The software was developed by the University of California, Berkeley. • This product includes software developed by Chris Provenzano, the Univer- sity of California, Berkeley, and contributors. JPEG LIBRARY • The software installed on this product is based in part on the work of the - Ricoh 2045 | General Settings Guide - Page 20
use in source and binary forms, with or without modification, are permitted provided that the following conditions are met: A Redistributions of source code the following acknowledgment: "This product includes software developed by Computing Services at Carnegie Mellon University (http://www.cmu.edu - Ricoh 2045 | General Settings Guide - Page 21
of any kind. These notices must be retained in any copies of any part of this documentation and/or software. MD5 Copyright (C) 1991-2, RSA Data Security, this software or this function. License is also granted to make and use derivative works provided that such works are identified as "derived from - Ricoh 2045 | General Settings Guide - Page 22
How to Read This Manual Symbols The following set of symbols is used in this manual. R WARNING: This symbol indicates a potentially hazardous situation that might result in death or serious injury when you misuse the machine without following the instructions under this symbol. Be sure to read the - Ricoh 2045 | General Settings Guide - Page 23
this manual, the following important symbols are used: R WARNING: Indicates a potentially hazardous situation which, if instructions your machine needs service or repair. • The external housing of your machine has been damaged. • Do not incinerate spilled toner or used toner. Toner dust might ignite - Ricoh 2045 | General Settings Guide - Page 24
plug from the wall outlet, always pull the plug (not the cable). • Do not allow paper clips, staples, or other small metallic objects to fall inside the machine. • Keep toner (used or unused) and toner bottle out of the reach of children. • For environmental reasons, do not dispose of the machine or - Ricoh 2045 | General Settings Guide - Page 25
Positions of RWARNING and RCAUTION labels This machine has labels for RWARNING and RCAUTION at the positions shown below. For safety, please follow the instructions and handle the machine as indicated. 11 - Ricoh 2045 | General Settings Guide - Page 26
system for developing and introducing switch is turned off. Receiving fax messages and printing from a computer are possible. If you want lower the exposure glass cover or the ADF. The default interval before entering Off mode or Sleep mode can be manual, the Off mode is called the Auto Off mode. 12 - Ricoh 2045 | General Settings Guide - Page 27
Mode Priority"in "General Features 2/4", Copy Reference. Specifications Low-power Mode, Off Mode Low-power mode, Sleep mode Copier only Fax, printer and scanner installed Type 1 Type 2 Type 1 Type 2 Power 5 W 5 W - consumption Default 1 minute - interval Recovery 10 seconds or 15 - Ricoh 2045 | General Settings Guide - Page 28
Machine Types This machine comes in two models which vary in copy speed. To ascertain which model you have, see the inside front cover. Copy speed Type 1 35 copies/minute (A4K, 81/2" × 11"K) Type 2 45 copies/minute (A4K, 81/2" × 11"K) 14 - Ricoh 2045 | General Settings Guide - Page 29
1. Getting Started Guide to Components 1. Exposure glass cover (optional) or Auto Document Feeder (ADF) (optional) See p.18 "External Options". (The illustration shows the ADF.) 2. Exposure glass Place originals face down here for copying. 3. Internal tray Copied, printed paper or fax messages are - Ricoh 2045 | General Settings Guide - Page 30
paper here. nal Options". 13. Paper tray unit (optional ) copies) Allows you to print on both sides of a piece paper in copier and printer func- tion. 1. Bypass tray Use when copying onto OHP transparencies, adhesive labels - Ricoh 2045 | General Settings Guide - Page 31
Guide to Components 1 1. Ventilation holes Prevent overheating. Do not obstruct the ventilation holes by placing objects near them or leaning things against them. If the machine overheats, a fault might occur. 17 - Ricoh 2045 | General Settings Guide - Page 32
be delivered here face down. 5. Large Capacity Tray (LCT) Holds up to 1,500 sheets of paper. 6. Paper tray unit Consists of two paper trays. 7. Bridge unit Relays copies to the finisher. 8. 2 Tray finisher Sorts, stacks, and staples copies. You can also punch copies. (The Punch function is optional - Ricoh 2045 | General Settings Guide - Page 33
to use the facsimile function. 1 B Printer/Scanner unit Allows you to use the printer and scanner functions. C User account enhance unit Allows you to increase memory for storing user codes. D File format converter Allows you to download documents stored using the copier and printer functions - Ricoh 2045 | General Settings Guide - Page 34
Press to check or print the counter value. See p.146 "Counter". 4. Display panel Displays operation status, error messages, and function menus. 5. {Check Modes} key Press to check settings. 6. {Program} key (copier/facsimi- le/scanner mode) Press to register frequently used settings, or to recall - Ricoh 2045 | General Settings Guide - Page 35
is lit or blinking. Doing so may damage the hard disk. • Printer: • Scanner: 11. Operation switch Press to turn the power on (the On indicator prints to check print quality before mak- ing multiple sets. 13. {Start} key Press to start copying. Start scanning or printing documents stored using - Ricoh 2045 | General Settings Guide - Page 36
status, error messages, and function menus. 1 Important r A force or impact of more than 30 N (about 3 kgf) will damage the display panel. Note r The following display is of a machine with the optional 2 Tray finisher and LCT installed. The copying screen is displayed as default after power - Ricoh 2045 | General Settings Guide - Page 37
side of the control panel) Press to activate the machine. When the machine has finished warming up, you can make copies. A Make sure the power cord is firm off. When the fax unit (optional) is installed, fax files in memory may be lost if you turn this switch off. Use this switch only when necessary - Ricoh 2045 | General Settings Guide - Page 38
Getting Started Turning On the Power A Press the operation switch. 1 The On indicator goes on. Note r Even if you press the operation switch, the indicator does not go out, but blinks in the following cases: • When the exposure glass cover or ADF is open. • During communication with external - Ricoh 2045 | General Settings Guide - Page 39
unit (optional) is installed Saving Energy When the main power switch is turned off while using the fax func- -Energy Saver Mode 1 tion, waiting fax and print Energy Saver mode after copying has finished or the last operation is service call message appears • When paper is jammed • When the cover - Ricoh 2045 | General Settings Guide - Page 40
• When toner is being replen- ished 1 • When the User Tools/Coun- ter/Inquiry screen is displayed • When fixed warm-up is in progress • When the facsimile, printer, or other functions are active • When operations were suspended during printing • When the On-hook dialing function is in use - Ricoh 2045 | General Settings Guide - Page 41
• During immediate transmission • When accessing User Tools • During interrupt copying • During On hook dialing for fax transmission • While scanning an original r The copying screen is displayed as default after power on. You can change this default setting. See p.51 "Function Priority". 27 - Ricoh 2045 | General Settings Guide - Page 42
Function Operations -System Reset The machine returns automatically to its initial condition when the job is finished, after a certain period of time has elapsed. This function is called "System Reset". 2 Note r You can change the System Reset time. See p.58 "System Auto Reset Timer". 28 - Ricoh 2045 | General Settings Guide - Page 43
data, you can make operations for copying. Note r See p.51 "Print Priority" for setting function priority. As default, [Display Mode] is set to first priority. r When the optional 1000-sheet finisher, 2 Tray finisher or booklet finisher is in- stalled on the machine, you can specify the output tray - Ricoh 2045 | General Settings Guide - Page 44
want to select Copier Facsimile Printer Scanner Web Document Server Professional/Lite DeskTopBinder V2 Document Server Reception Print Sending a Fax from Document Server Printing from Document Server Printing from Document Server Scanning a Document to Store in Document Server Using the - Ricoh 2045 | General Settings Guide - Page 45
you want to select Copier Facsimile Printer Scanner Multi-Access Web Document Server Professional/Lite DeskTopBinder V2 Document Server Reception Interrupt Copying Print 2 Using the control panel Printing Scanning Stapling Printing Data Reception Printing Received Data Memory - Ricoh 2045 | General Settings Guide - Page 46
Combined Function Operations Function you want to select Copier Facsimile Printer Scanner Reception Interrupt Copying Print 2 Using the control panel Printing Scanning Stapling Printing Data Reception Printing Received Data Memory Reception Immediate Transmission Memory Transmission - Ricoh 2045 | General Settings Guide - Page 47
Reference . *3 You can send stored documents from scanner mode. See "Sending Stored Files by Email or Scan to Folder, or Delivering", Scanner Reference. Note r The following table shows the capacity of the Document Server. Copier Printer Scanner Facsimile Number of pages for Number of files each - Ricoh 2045 | General Settings Guide - Page 48
screen. 3. The numbers of originals, copies, and printed pages. 4. The operation keys. 5. The functions under which the documents were stored. The icons below show the functions active when the documents were stored in the Document Server. Mode Icon Copier Facsimile Printer Scanner -- 34 - Ricoh 2045 | General Settings Guide - Page 49
codes, see p.70 "User Code". v Password You can set a password for stored documents, and use it to prevent others printing them. When a password is set for the documents, appears next to the documents. Reference To store documents without using Document Server functions, see the manuals by default. - Ricoh 2045 | General Settings Guide - Page 50
display. To delete saved images and cancel the job, press [Stop]. r When a password is set, appears on the left side of the file name. r After scanning, stored documents appear on the Select Files to Print display. If this display does not appear, press [Scanning Finished]. r When placing an - Ricoh 2045 | General Settings Guide - Page 51
]. To set or change the password A Press [Scan Original]. The Scan Original display appears. B Press [Password]. Reference p.147 "Entering Text" To change the file name A Press [Scan Original]. The Scan Original display appears. B Press [File Name]. C Enter a password using the number keys (four - Ricoh 2045 | General Settings Guide - Page 52
print. B Select the document with the user name, file name, or password you want to change. 3 Note r If a password is already set for the document, enter that password [Change User Name], or [Change Password]. E Enter the new file name, user name, or password using the letter keys or number keys, - Ricoh 2045 | General Settings Guide - Page 53
Documents print them. 3 r If you want to change the print- You can use either using your computer. A Select a document to display its detailed information. Reference Manuals for DeskTopBinder V2 Professional/Lite or Help Note r If a password is already set for the document, enter that password - Ricoh 2045 | General Settings Guide - Page 54
Only files beginning with the name entered appear in the Select Files to Print display. 40 Note r Print settings made for printing in copier or printer function remain after printing and applied to the next job. Print settings made in facsimile mode, however, do not remain. r If you select multiple - Ricoh 2045 | General Settings Guide - Page 55
Top to Bottom • Booklet • Magazine v Cover handling • Cover/Slip sheet • Edit/Stamp v Finish • Sort • Stack • Staple • Punch (optional) r If you print more than one set using the Sort function, you can check the print result by printing out only the first set. See p.42 "Sample copy". r When multiple - Ricoh 2045 | General Settings Guide - Page 56
. If more than one document is selected, the first page of each is printed. A Select the document. Note r If a password is already set for the document, enter that password, and then press [OK]. r You can search for the document using [Search by User Name] or [Search by File Name] at the left top - Ricoh 2045 | General Settings Guide - Page 57
Guide. A Press the {Document Server} key. B Select the document to delete. Note r If a password is already set for the document, enter that password can print the first page of a document to check its contents. See p.42 "Printing first page". r Press the selected line again to cancel the print job. - Ricoh 2045 | General Settings Guide - Page 58
Stored Documents Note r File format converter is required when downloading documents stored in copier or printer mode. A Start a Web browser. 3 B ] list. D Click the properties button of the document you want to download. E Select [PDF], [JPEG], or [Multi-page TIFF] in the [File format] list - Ricoh 2045 | General Settings Guide - Page 59
p.59 "Key Operator Tools".) Items Default General Features Warm Up Notice ON Copier Tray 1 Cover Sheet Tray Off Slip Sheet Tray Off Timer Settings Copier/Document Server Auto Reset Timer 60 seconds Key Operator Tools Auto Delete File Yes After 3 day(s) Delete All Files -- Password - Ricoh 2045 | General Settings Guide - Page 60
Document Server 3 46 - Ricoh 2045 | General Settings Guide - Page 61
Tone Warm Up Notice Copy Count Display Function Priority Print Priority Function Reset Timer Output: Copier Output: Document Server Output: Facsimile Output: Printer Prepare Stapling Size Setting Default ON ON Up Copier Display mode 3 Seconds Internal Tray 1 Internal Tray 1 Internal Tray - Ricoh 2045 | General Settings Guide - Page 62
v Timer Settings (See p.58 "Timer Settings".) Default Auto Off Timer 1 minute(s) Panel Off Timer 1 minute(s) System Auto Reset Timer 60 seconds Copier/Document Server Auto Reset Timer 60 seconds Facsimile Auto Reset Timer 30 seconds Scanner Auto Reset Timer 60 seconds Set Date -- Set - Ricoh 2045 | General Settings Guide - Page 63
Default User Code Management Copier OFF Document Server OFF Facsimile OFF Scanner OFF Printer Auto Program Key Counter Management All OFF External Charge Unit Management -- Key Operator Code OFF Extended Security Display/Print All Files -- Password Management for Stored Files - Ricoh 2045 | General Settings Guide - Page 64
press the {User ways quit User Tools when you have finished. See p.50 "Quitting Tools/Counter} key. User Tools Default Settings Note r If a key operator code is already set, the key operator code entry display appears. Enter the key operator code, and then press [OK]. See p.60 "Key Operator Code - Ricoh 2045 | General Settings Guide - Page 65
switch is turned on, or when System Reset mode is turned on. Note r Default: Copier v Print Priority Gives print priority to the mode displayed. Reference p.29 "Multi-Access" Note r Default: Display mode r When [Interleave] is selected, the current print job will be interrupted after a maximum - Ricoh 2045 | General Settings Guide - Page 66
func- tions. Note r Default: Set Time r The Function Reset Timer setting is ignored if Interleave is set for Print Priority (see p.51 "Print Priority"). r When you select [Set Time], enter the time (3-30 seconds, in 1 second increments) using the number keys. r The default time is three seconds - Ricoh 2045 | General Settings Guide - Page 67
v Output: Copier (copier) You can specify a tray to which documents are delivered. 4 1. Finisher Upper Tray 2. Finisher Shift Tray 3. Finisher Shift Tray 1 4. Finisher Shift Tray 2 5. Finisher Upper Tray 6. Finisher Shift Tray 7. Internal Tray 1 8. Internal Tray 2 Note r Default: Internal Tray - Ricoh 2045 | General Settings Guide - Page 68
delivered. Note r Default: Internal Tray 1 r The output trays set on the printer driver have priority over the output tray specified above. r For details about output trays, see p.53 "Output: Copier (copier)". v Prepare Stapling When the booklet finisher is installed, perform a stapling test (five - Ricoh 2045 | General Settings Guide - Page 69
v Paper Tray Priority: Copier (copier/Document Server) You can specify the tray to supply paper for output. Note r Default: Tray 1 v Paper Tray Priority: Facsimile (facsimile) You can specify the tray to supply paper for output. Note r Default: Tray 1 v Paper Tray Priority: Printer (printer) You can - Ricoh 2045 | General Settings Guide - Page 70
Default: No display v Paper Type: Tray 1-4 4 Sets the display so you can see what type of paper is loaded in each paper tray. The print function use . Limitation r [Auto Paper Select] can only be selected for the copier function if [No display] and [Recycled paper] are selected. If [No] - Ricoh 2045 | General Settings Guide - Page 71
Paper Select. Limitation 4 r [Auto Paper Select] can only be selected for the copier function if [No display] and [Recycled paper] are selected. If [No] is copy method for two-sided copying. Note r Default: • Tray to Program: Off r Functions using the cover sheet tray setting are the front - Ricoh 2045 | General Settings Guide - Page 72
increments, using the number keys. v Copier/Document Server Auto Reset Timer (copier/Document Server) Specifies the time to elapse before copier and Document Server modes reset. Note r If [OFF] is selected, the machine does not automatically switch to the user code entry screen. r Default: ON - Ricoh 2045 | General Settings Guide - Page 73
for users. User codes must be registered for user code management. See p.70 "User Code". Note r Default: Copier/OFF, Document Server/OFF, Facsimile/OFF, Scanner/OFF, Printer/Auto Program r By using Auto Program for the printer, you can keep a print log for each user code entered from the driver. 59 - Ricoh 2045 | General Settings Guide - Page 74
/OFF, Facsimile/OFF, Scanner/OFF, Printer/OFF v External Charge Unit Management Use the external charge unit to manage usage charges. Note r Default: Copier/OFF, Document Server/OFF, Facsimile/OFF, Scanner/OFF, Printer/OFF v Key Operator Code Specifies whether or not to use passwords (max. eight - Ricoh 2045 | General Settings Guide - Page 75
Can Change with User Tools v Display/Print Counter Allows you to view and print the number of prints. • Display/Print Counter Displays the number of prints for each function (Total, Copier, Facsimile, Printer, A3/DLT, Duplex, and Staple). • Print Counter List Prints out a list of the number of - Ricoh 2045 | General Settings Guide - Page 76
, folder, protection code • [Delete] Deletes a user. Note r You can register up to 100 user codes. If you add the optional user account enhance unit, you can register up to 500 user codes. r You can also register and manage data in the Address Book, using SmartNetMonitor for Admin (printer option - Ricoh 2045 | General Settings Guide - Page 77
group name, key display, title selection, registration number or protection code. You can also protect folders. • [Delete] Deletes a group. Note r You can register up to 100 groups. r You can also group users (destinations) using a - Ricoh 2045 | General Settings Guide - Page 78
) key you want to move. Note r You can select a user using the number keys. F Press the user (destination) key that is in place, and the other users' keys will shift also. Note r You can select a user using the number keys. v Address Book: Edit Title You can edit the title to easily find a user - Ricoh 2045 | General Settings Guide - Page 79
the document, allowing access. • Temporarily disabling document security Password-protected documents can be temporarily accessed, without entering the password. Note r Default: Do not Unlock r Select [Unlock] only when you forget the password. After accessing the document, be sure to select [Do - Ricoh 2045 | General Settings Guide - Page 80
) Specify whether or not to use Auto Off. Note r Default: ON v Program/Change LDAP Server Programming an LDAP server allows you to look up e-mail destinations from the LDAP server Address Book directly. This function is available when you send scan files by e-mail in scanner mode. You can program - Ricoh 2045 | General Settings Guide - Page 81
p.70 "User Code" 2. Protect Dest. Reference p.69 "When using the scanner function" p.69 "Registering Sender Information" 3. Group Use this to display the group that the selected user (destination) belongs to. You can group registered fax destinations, e-mail destinations, and folders to manage them - Ricoh 2045 | General Settings Guide - Page 82
4 p.68 "When using the fax function" Reference p.70 "User Code" p.69 "When using the scanner v When using the fax function function" to ON, the registered 7. Folder destination name, preceded by "To", is printed at the top of the Reference p.69 "When using the scanner page when it is received - Ricoh 2045 | General Settings Guide - Page 83
name, and password. To send files directly to shared folders, select the destination key as it appears on the initial scanner function display, so you can specify the folder. Select SMB when sending files to shared Windows folders. Register the user name and key display name. This is useful when - Ricoh 2045 | General Settings Guide - Page 84
r The number of copies scanned in using the scanner function is counted for each user code. This al- lows you to check each user's usage. r To automatically register the printer driver user code, select [Auto Program] for the printer in User Code Management. To use the user code set in User Tools - Ricoh 2045 | General Settings Guide - Page 85
or key display, and then press [OK]. H Enter the user code using the number keys, and then press [#]. Note r You can use the same user name as that assigned to the documents using the Docu- ment Server function. For this, the user code is not nec- essary. See p.33 "Document Note Server - Ricoh 2045 | General Settings Guide - Page 86
user (destination) key, or enter the registered number using the number keys. Changing the user code A Press [User Code]. B Press [Change], and then enter the new user code using the number keys. C Press [#]. To change the available functions A Press [User Code]. B Press the key to select the func - Ricoh 2045 | General Settings Guide - Page 87
[Print Counter], [Transmission Counter] or [Scanner Counter]. Counters for individual function usage under each user code appear. To delete a user (destination) A Press [Delete]. B Select a user (destination) you want to delete. Press the user (destination) key, or enter the registered number using - Ricoh 2045 | General Settings Guide - Page 88
Each User Code You can print out the number of prints made under each user code using [Print Counter], [Transmission Counter] or [Scanner Counter]. G Select the function usage you want to print from [Print Counter], [Transmission Counter], and [Scanner Counter]. H Press [Print]. To print the number - Ricoh 2045 | General Settings Guide - Page 89
from the left side of the display. User Code To clear the number of prints for all user codes A Press [Clear] under All User Codes. B Select the function usage you want to clear from [Print Coun- ter], [Transmission Counter] and [Scanner Counter]. 4 C Press [OK]. Note r Press [Select all on - Ricoh 2045 | General Settings Guide - Page 90
send documents You can select to print a fax header on fax messages the other party re- scanned in using the fax function. ceives. The default is "1st Name". • It support a similar function called "SUB Code". You can also program an SID Code (Sender ID) under this function. A by e-mail using - Ricoh 2045 | General Settings Guide - Page 91
(destination) name or key display, and then press [OK]. Note r You can use the user name when selecting a fax destination. r You can register the user code after the user name. For details, see p.70 "User Code". C Press [Key Operator Tools], and then press [TNext]. D Press [Address Book Management - Ricoh 2045 | General Settings Guide - Page 92
Code A Press [Adv. Features], and then select [SEP Code]. B Press [Change] under RX SEP Code. C Enter a SEP Code using the number keys, and then press [OK]. D To enter a password, press [Change] under Password (PWD). E Enter a password using and standard messages are printed on the fax message when - Ricoh 2045 | General Settings Guide - Page 93
message to print on the second 4 Press the user (destination) key, or enter the registered number using the number keys. then press [OK]. Note I Press [OK you press , you can search for a user by user name/index, user code, fax destination, or e- Note r When a group is registered, you - Ricoh 2045 | General Settings Guide - Page 94
[Custom Message] to enter the new message. D Press [OK]. E Press [Change] under Line 3. C Enter the new SUB Code, and then press [OK]. D To change the password, press [Change] under Password (SID). F Select the new standard message, and then press [OK]. G Press [OK]. H Press [OK]. E Enter the new - Ricoh 2045 | General Settings Guide - Page 95
key, or enter the registered number using the number keys. C Press [ Code". F Press the {User Tools/Counter} key. D Press [Address Book Management]. To delete only the fax number A Select the fax destination you want to delete. Press the user (destination) key, or enter the registered number using - Ricoh 2045 | General Settings Guide - Page 96
the e-mail address as the sender address when sending scan files in scanner mode. If you do this, set a protection code on the sender address to prevent use by other people. See p.93 "Registering a Protection Code". • You can select an e-mail address from an LDAP server, and then register it - Ricoh 2045 | General Settings Guide - Page 97
[OK]. H Press [Change] under E-mail Ad- dress. Note r You can use the user name when selecting an address to send an e-mail to. r You can register the user code after the user name. For details, see p.70 "User Code". I Enter the e-mail address. Reference p.147 "Entering Text" To select the - Ricoh 2045 | General Settings Guide - Page 98
user you want to change. Press the user (destination) key, or enter the registered number using the number keys. Note r If you press , you can search for a user by user name/index, user code, fax destination, or email address. F Press [E-mail]. G Enter the items. To change the e-mail address - Ricoh 2045 | General Settings Guide - Page 99
after finishing your settings, all previous entries are cleared. r You can register up to 50 folders per group. Files cannot be sent to a group with over 50 folders registered. Reference For details about network settings, see Network Guide. For details about Scan to Folder, see Scanner Reference - Ricoh 2045 | General Settings Guide - Page 100
p.86 "To locate the folder manu- Note ally" r You can use the user name as the folder name. p.87 "Using Browse Network to locate the folder" r You can register the user code after the user name. For details, see p.70 "User Code". Reference To locate the folder manually A Press [Change] under - Ricoh 2045 | General Settings Guide - Page 101
D Enter the user name. 4 Note r This is a user name which is authorized to access the folder. Using Browse Network to locate the folder A Press [Browse Network]. E Enter the user's password, and then press [OK]. The Browse Network display reappears. The client computers sharing the same network - Ricoh 2045 | General Settings Guide - Page 102
to change. Press the user (destination) key, or 4 enter the registered number using the number keys. Note r If you press , you can search for a user by user name/index, user code, fax destination, or email address. F Press [Folder]. G Select the items you want to change. To change the protocol - Ricoh 2045 | General Settings Guide - Page 103
Key Operator Tools], and then press [TNext]. Note r To register a shared folder configured in Windows, see p.85 "Using SMB to Connect". D Press [Address Book Management]. To register an FTP folder To delete only the registered folder A Press the {User Tools/Counter} key. A Select a user of the - Ricoh 2045 | General Settings Guide - Page 104
Enter the user (destination) name or key display, and then press [OK]. Note r You can use the user name as the folder name. r You can register the user code after the user name. For details, see p.70 "User Code". Reference p.147 "Entering Text" To select the title A To associate a user with a title - Ricoh 2045 | General Settings Guide - Page 105
want to change. Press the user (destination) key, or enter the registered number using the number keys. Note r If you press , you can search for a user by user name/index, user code, fax destination, or email address. F Press [Folder]. G Select the items you want to change. To change the protocol - Ricoh 2045 | General Settings Guide - Page 106
Enter the new password, and then press [OK]. C Press [Key Operator Tools], and then press [TNext]. Note r To change the port number, D Press [Address Book Management]. press [Change] under Port No.. Enter the new port To delete only the registered number using the number folder 4 keys, and - Ricoh 2045 | General Settings Guide - Page 107
To a Single User A Press the {User Tools/Counter} key. B Press [System Settings]. To protect the folder A Press [Protect] under Folder. G Press [Change] under Protection Code. H Enter a protection code using the number keys, and then press [#]. Note r You can enter up to eight digits. I Press [OK - Ricoh 2045 | General Settings Guide - Page 108
Program/Change/ Delete Group]. 4 E Press the group key you want to register a protection code to. F Press [Protect Dest.]. G Press [Protect] under Folder. H Press [Change] under Protection Code. I Enter a protection code using the number keys, and then press [#]. Note r You can enter up to eight - Ricoh 2045 | General Settings Guide - Page 109
register up to 500 groups. r When using Scan to Folder function, you cannot send scan files to a G Enter the group name, and then press [OK]. group with over 50 folders registered. The Key Display name sets automatically. 4 r You can set a protection code to prevent unauthorized access to the - Ricoh 2045 | General Settings Guide - Page 110
the number keys. F Press [Group]. G Press the highlighted group key. enter the registered number using the number keys. Note r If you press , you can search for a user by user name/index, user code, fax destination, or email address. F Press [Group]. G Select a group to which you want to register - Ricoh 2045 | General Settings Guide - Page 111
change the registration number A Press [Change] under Registration No.. Press [OK]. Changing a Group Name B Enter the new registration number using the number keys. C Press [#]. 4 G Press [OK]. A Press the {User Tools/Counter} key. B Press [System Settings]. Deleting a Group C Press [Key - Ricoh 2045 | General Settings Guide - Page 112
by e-mail, Transfer Stations must be machines of the same make as this, and have both the Transfer Station and Internet Fax functions. r You cannot use Transfer Request without programming the fax number or e-mail address of the Requesting Party in the Address Book (Quick Dial or Speed Dial) of the - Ricoh 2045 | General Settings Guide - Page 113
or Groups in the Transfer Station. Quick Dial A Press [qQuick Dial]. B Enter the number stored in the Quick Dial of the Transfer Station using the number keys. 4 For example, to select the destination stored in Quick Dial 01 of the Transfer Station, enter {0}{1}. C To specify an additional - Ricoh 2045 | General Settings Guide - Page 114
A Press [Receiving Station]. B Select the Receiving Station you want to change. C Press [Clear] to clear the number, and then enter the new number using the number keys. G Press [OK]. H Press [Exit]. To change the Transfer Request name and key display A Press [Change] under Transfer Request Name or - Ricoh 2045 | General Settings Guide - Page 115
Book: Program/Change/ Delete Transfer Request]. E Press [Delete]. F Select a Transfer Request you want to delete. Press the Transfer Request key, or enter the registered number using the number keys. G Press [Yes]. H Press [Exit]. Registering the Transfer Request 4 101 - Ricoh 2045 | General Settings Guide - Page 116
send scan files by e-mail using scanner function. Note r Select [ON] in the Use LDAP Server setting to use this function. See p.66 "Use LDAP Server". 4 r This function supports LDAP level of ABC company (here, "ou" stands for organization unit, and "o" stands for company). C Press [OK]. 102 - Ricoh 2045 | General Settings Guide - Page 117
with LDAP Version 2. r When [ON] or [High Security] is selected, the administrator account name and password is required to access the LDAP server. r When [High Security] is selected, you can use a generic password unique to the network. If you do this, the server also requires the same setting. For - Ricoh 2045 | General Settings Guide - Page 118
LDAP Version is 2. r When [ON] or [High Security] is selected, the administrator account name and password is required to access the LDAP server. r When [High Security] is selected, you can use a generic password unique to the network. If you do this, the server also requires the same setting. For - Ricoh 2045 | General Settings Guide - Page 119
B Press [Change] under User Name. C Enter the new user name, and then press [OK]. D Press [Change] under Password. E Enter the new password, and then press [OK]. Note r The user name and password are of a user who is authorized to access the LDAP server. r You can press [Connection Test] to check if - Ricoh 2045 | General Settings Guide - Page 120
User Tools (System Settings) 4 106
-
 1
1 -
 2
2 -
 3
3 -
 4
4 -
 5
5 -
 6
6 -
 7
7 -
8
-
9
-
10
-
11
-
12
-
13
-
14
-
15
-
16
-
17
-
18
-
19
-
20
-
21
-
22
-
23
-
24
-
25
-
26
-
27
-
28
-
29
-
30
-
31
-
32
-
33
-
34
-
35
-
36
-
37
-
38
-
39
-
40
-
41
-
42
-
43
-
44
-
45
-
46
-
47
-
48
-
49
-
50
-
51
-
52
-
53
-
54
-
55
-
56
-
57
-
58
-
59
-
60
-
61
-
62
-
63
-
64
-
65
-
66
-
67
-
68
-
69
-
70
-
71
-
72
-
73
-
74
-
75
-
76
-
77
-
78
-
79
-
80
-
81
-
82
-
83
-
84
-
85
-
86
-
87
-
88
-
89
-
90
-
91
-
92
-
93
-
94
-
95
-
96
-
97
-
98
-
99
-
100
-
101
-
102
-
103
-
104
-
105
-
106
-
107
-
108
-
109
-
110
-
111
-
112
-
113
-
114
-
115
-
116
-
117
-
118
-
119
-
120
 |
 |
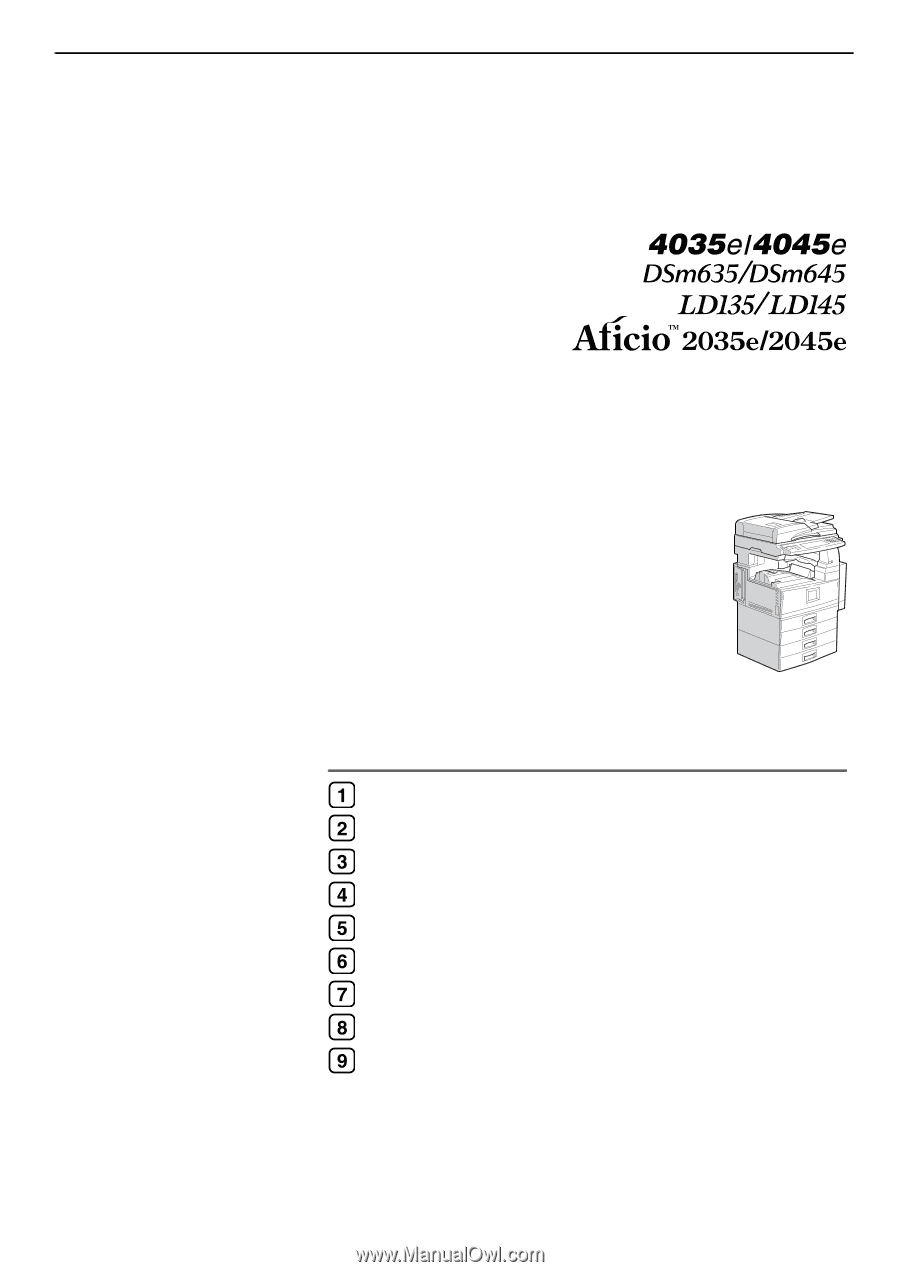
Operating Instructions
General Settings Guide
For safe and correct use of this machine, please be sure to read the Safety Information in this
manual before you use it.
Getting Started
Combined Function Operations
Document Server
User Tools (System Settings)
Troubleshooting
Remarks
Entering Text
Security
Specifications