Samsung SCH-R560 User Manual (user Manual) (ver.f10) (English) - Page 53
Erase a Group, Deleting a Contacts Entry, Metro411
 |
View all Samsung SCH-R560 manuals
Add to My Manuals
Save this manual to your list of manuals |
Page 53 highlights
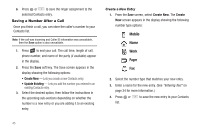
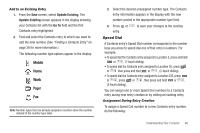
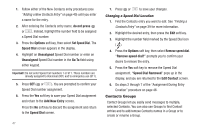
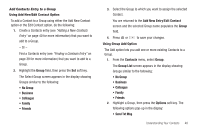
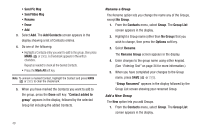
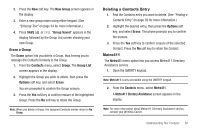
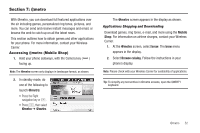
2. Press the New soft key. The New Group screen appears in the display. 3. Enter a new group name using either keypad. (See "Entering Text" on page 34 for more information.) 4. Press SAVE ( or ). "Group Saved" appears in the display followed by the Group List screen showing your new Group. Erase a Group The Erase option lets you delete a Group, thus freeing you to reassign the Contacts formerly in the Group. 1. From the Contacts menu, select Group. The Group List screen appears in the display. 2. Highlight the Group you wish to delete, then press the Options soft key, and select Erase. You are prompted to confirm the Group erasure. 3. Press the Yes soft key to confirm erasure of the highlighted Group. Press the No soft key to retain the Group. Note: When you delete a Group, the assigned Contacts entries return to No Group. Deleting a Contacts Entry 1. Find the Contacts entry you want to delete. (See "Finding a Contacts Entry" on page 39 for more information.) 2. Highlight the desired entry, then press the Options soft key, and select Erase. The phone prompts you to confirm the erasure. 3. Press the Yes soft key to confirm erasure of the selected Contact. Press the No soft key to retain the Contact. Metro411 The Metro411 menu option lets you access Metro411 Directory Assistance service. 1. Open the QWERTY keypad. Note: Metro411 is only accessible using the QWERTY keypad. 2. From the Contacts menu, select Metro411. A Metro411 Diretory Assistance screen appears in the display. Note: For more information about Metro411 Directory Assistance service, contact your Wireless Carrier. Understanding Your Contacts 50
-
 1
1 -
2
-
3
-
4
-
5
-
6
-
7
-
8
-
9
-
10
-
11
-
12
-
13
-
14
-
15
-
16
-
17
-
18
-
19
-
20
-
21
-
22
-
23
-
24
-
25
-
26
-
27
-
28
-
29
-
30
-
31
-
32
-
33
-
34
-
35
-
36
-
37
-
38
-
39
-
40
-
41
-
42
-
43
-
44
-
45
-
46
-
47
-
 48
48 -
 49
49 -
 50
50 -
 51
51 -
 52
52 -
 53
53 -
 54
54 -
 55
55 -
 56
56 -
 57
57 -
 58
58 -
59
-
60
-
61
-
62
-
63
-
64
-
65
-
66
-
67
-
68
-
69
-
70
-
71
-
72
-
73
-
74
-
75
-
76
-
77
-
78
-
79
-
80
-
81
-
82
-
83
-
84
-
85
-
86
-
87
-
88
-
89
-
90
-
91
-
92
-
93
-
94
-
95
-
96
-
97
-
98
-
99
-
100
-
101
-
102
-
103
-
104
-
105
-
106
-
107
-
108
-
109
-
110
-
111
-
112
-
113
-
114
-
115
-
116
-
117
-
118
-
119
-
120
-
121
-
122
-
123
-
124
-
125
-
126
-
127
-
128
-
129
-
130
-
131
-
132
-
133
-
134
-
135
-
136
-
137
-
138
-
139
-
140
-
141
-
142
-
143
-
144
-
145
-
146
-
147
-
148
-
149
-
150
-
151
-
152
-
153
-
154
-
155
-
156
-
157
-
158
-
159
-
160
-
161
-
162
-
163
-
164
-
165
-
166
-
167
 |
 |