Sony PMW200 User Manual (PMW-100 Memory Camcorder Operation Manual for Firmwar - Page 22
Using AC Power (DC IN Power), Turning the Power On/Off, Setting the Clock
 |
View all Sony PMW200 manuals
Add to My Manuals
Save this manual to your list of manuals |
Page 22 highlights
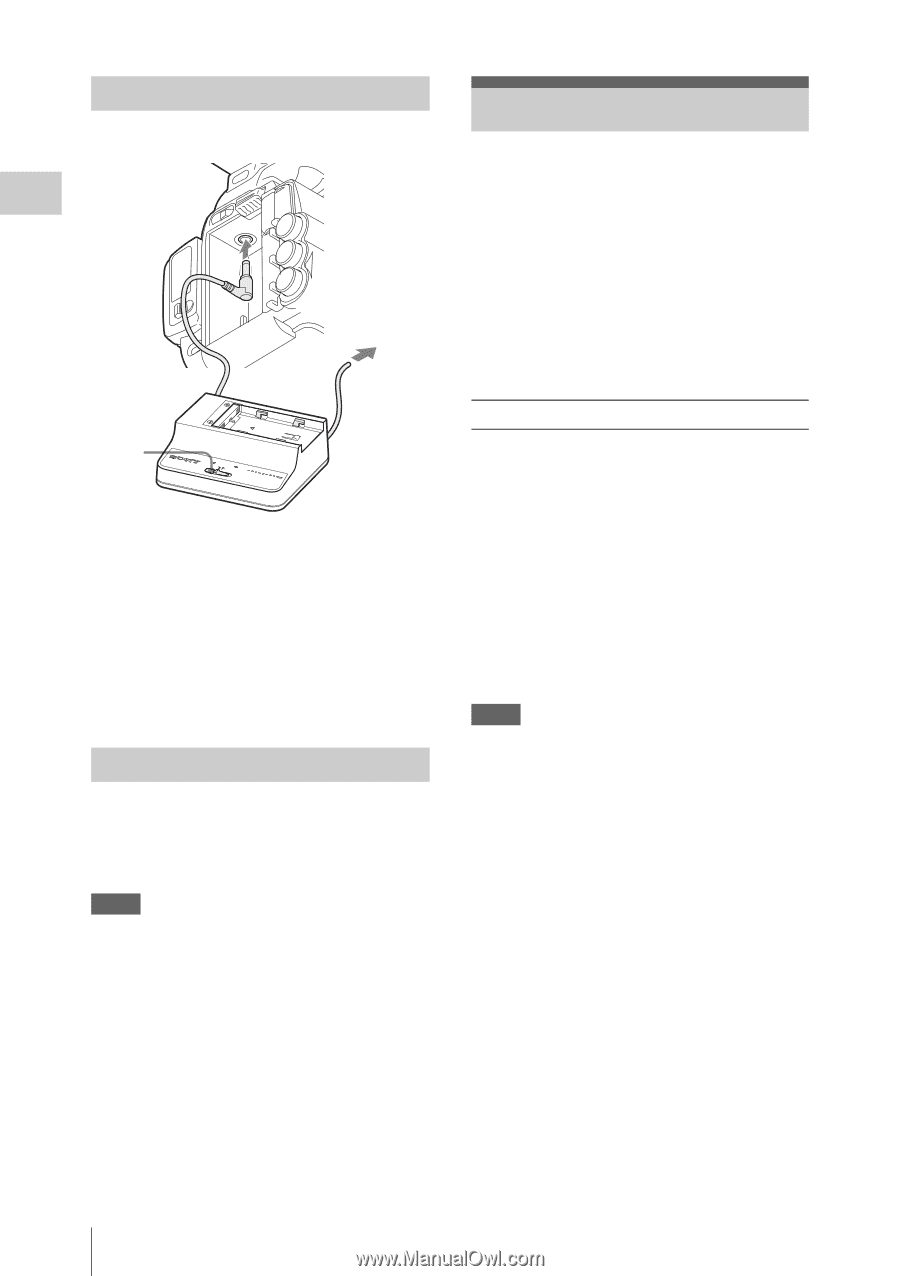
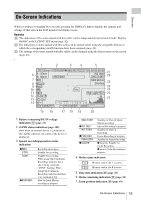
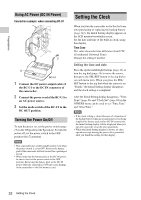
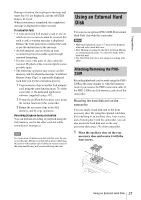
Preparations Using AC Power (DC IN Power) Connection example: when connecting BC-U1 1 2 3 DC OUT CHARGE 0% BBCA-TUT1ERY 80 CHARGER 100 BC-U1 1 Connect the DC power output cable of the BC-U1 to the DC IN connector of the camcorder. 2 Connect the power cord of the BC-U1 to an AC power source. 3 Set the mode switch of the BC-U1 to the DC OUT position. Turning the Power On/Off To turn the power on, set the power switch (page 13) to the ON position (the ? position). To turn the power off, set the power switch to the OFF position (the 1 position). Notes • This camcorder uses a little standby power even when the power switch is set to OFF. Remove the battery pack if the camcorder will not be used for a prolonged period. • When removing the battery pack or the DC IN power, be sure to first set the power switch to the OFF position. Removing the battery pack or the DC IN power while the camcorder is ON may cause damage to the camcorder or the SxS memory card. Setting the Clock When you turn the camcorder on for the first time after purchasing or replacing the backup battery (page 122), the Initial Setting display appears on the LCD monitor/viewfinder screen. Set the date and time of the built-in clock, using this display. Time Zone The value shows the time difference from UTC (Coordinated Universal Time). Change the setting if needed. Setting the time and date Press the up/down/left/right buttons (page 15) or turn the jog dial (page 16) to move the cursor, then press the SEL/SET button or the jog dial to set each menu item. When you press the SEL/ SET button or the jog dial when the cursor is on "Finish," the Initial Setting display disappears and the clock setting is completed. After the Initial Setting display disappears, "Time Zone" (page 96) and "Clock Set" (page 96) in the OTHERS menu can be used to set "Time Zone" and "Date/Time." Notes • If the clock setting is cleared because of exhaustion of the backup battery while no operation power was being supplied (no battery pack and no DC IN connection), the Initial Setting display will be displayed when you turn the camcorder on at the next opportunity. • While the Initial Setting display is shown, no other operation except turning the power off is permitted until you finish the setting for this display. 22 Setting the Clock
-
 1
1 -
2
-
3
-
4
-
5
-
6
-
7
-
8
-
9
-
10
-
11
-
12
-
13
-
14
-
15
-
16
-
 17
17 -
 18
18 -
 19
19 -
 20
20 -
 21
21 -
 22
22 -
 23
23 -
 24
24 -
 25
25 -
 26
26 -
 27
27 -
28
-
29
-
30
-
31
-
32
-
33
-
34
-
35
-
36
-
37
-
38
-
39
-
40
-
41
-
42
-
43
-
44
-
45
-
46
-
47
-
48
-
49
-
50
-
51
-
52
-
53
-
54
-
55
-
56
-
57
-
58
-
59
-
60
-
61
-
62
-
63
-
64
-
65
-
66
-
67
-
68
-
69
-
70
-
71
-
72
-
73
-
74
-
75
-
76
-
77
-
78
-
79
-
80
-
81
-
82
-
83
-
84
-
85
-
86
-
87
-
88
-
89
-
90
-
91
-
92
-
93
-
94
-
95
-
96
-
97
-
98
-
99
-
100
-
101
-
102
-
103
-
104
-
105
-
106
-
107
-
108
-
109
-
110
-
111
-
112
-
113
-
114
-
115
-
116
-
117
-
118
-
119
-
120
-
121
-
122
-
123
-
124
-
125
-
126
-
127
-
128
-
129
-
130
-
131
-
132
-
133
-
134
-
135
-
136
-
137
-
138
-
139
-
140
-
141
-
142
 |
 |