Sony PMW200 User Manual (PMW-100 Memory Camcorder Operation Manual for Firmwar - Page 50
Clip Continuous Recording (UDF Only), Preparatory settings, Performing Frame Recording
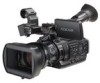 |
View all Sony PMW200 manuals
Add to My Manuals
Save this manual to your list of manuals |
Page 50 highlights
Recording • Frame Recording mode cannot be used when the items "DVCAM" or "HDV" are set for "SDI/HDMI/i.LINK I/O Select" (page 90) in the VIDEO SET menu, and the video format of "Format" in "System" (page 99) in the OTHERS menu is set to other than "HQ mode/ 23.98P." Preparatory settings Before starting Frame Recording, make the necessary settings in the CAMERA SET menu (page 85) in advance. Performing Frame Recording When the preparatory settings are completed, you can start recording. 1 Press the REC START/STOP button. When the number of frames you specified with the menu are recorded, the camcorder automatically enters FRM STBY (Frame Rec Standby) status. 2 Press the REC START/STOP button again. Each time you press the REC START/STOP button, the camcorder records the specified number of frames then enters FRM STBY status. Notes • Recording cannot be stopped until the specified number of frames are recorded. If the power switch is set to OFF during recording, the power is only shut off after the specified number of frames are recorded. • The Rec Review function cannot be used while recording in Frame Rec mode is in progress. • You cannot change the "Number of Frames" setting while recording in Frame Rec mode is in progress. To change it, pause the recording. • The timecode is recorded in Rec Run mode (page 94) during Frame Recording. • Some extra frames may be recorded if you stop recording or switch the card slot while recording is paused in Frame Rec mode. • "Setting" for "Frame Rec" is automatically set to "Off" when you set the power switch to OFF, while the "Number of Frames" setting is maintained. Clip Continuous Recording (UDF Only) Clips are normally created individually for each time you start and stop recording, but you can also continue recording to a single clip regardless of the number of times you start and stop recording 50 Useful Functions by using the Clip Continuous Recording function, which will add recordings to the same clip until the function is disabled or turned off. This is convenient for when you do not want to create a large number of short clips, or when you do not want to be restricted by a maximum number of clips. A recording start mark is added to each point at which you resume recording, making it easy to search for each point. Preparatory settings Before starting Clip Continuous Recording, make the necessary settings to "Clip Cont. Rec" (page 85) in the CAMERA SET menu in advance. When you set "Setting" to "On," the Clip Continuous Recording function is enabled, and "CONT" appears on the screen (page 19). You can also assign "Clip Cont. Rec" to an assignable button (page 49), and set "Setting" to "On"/"Off" by pressing the button. Notes • Clip Continuous Recording cannot be set to "On" simultaneously with Picture Cache Recording, Interval Recording, Frame Recording, or Slow & Quick Motion. When you set Clip Continuous Recording to "On," these other functions are forcibly set to "Off." • Clip Continuous Recording cannot be used while recording. • This function cannot be used with FAT. Performing Clip Continuous Recording When the preparatory settings are completed, you can start recording. Press the REC START/STOP button. When recording starts, the "CONT" indication on the screen changes to "zREC" (with z in red). Notes • If you remove the SxS memory card or the battery while recording or standing by to record (the "CONT" indication appears), the SxS memory card must be restored. Only remove the SxS memory card after Clip Continuous Recording is complete. If "CONT" is flashing (1 time per second), you can remove the SxS memory card. • Record for at least 2 seconds before you stop recording. To disable Clip Continuous Recording mode While standing by to record, set "Setting" in "Clip Cont. Rec" (page 85) in the CAMERA SET menu to "Off."
-
 1
1 -
2
-
3
-
4
-
5
-
6
-
7
-
8
-
9
-
10
-
11
-
12
-
13
-
14
-
15
-
16
-
17
-
18
-
19
-
20
-
21
-
22
-
23
-
24
-
25
-
26
-
27
-
28
-
29
-
30
-
31
-
32
-
33
-
34
-
35
-
36
-
37
-
38
-
39
-
40
-
41
-
42
-
43
-
44
-
 45
45 -
 46
46 -
 47
47 -
 48
48 -
 49
49 -
 50
50 -
 51
51 -
 52
52 -
 53
53 -
 54
54 -
 55
55 -
56
-
57
-
58
-
59
-
60
-
61
-
62
-
63
-
64
-
65
-
66
-
67
-
68
-
69
-
70
-
71
-
72
-
73
-
74
-
75
-
76
-
77
-
78
-
79
-
80
-
81
-
82
-
83
-
84
-
85
-
86
-
87
-
88
-
89
-
90
-
91
-
92
-
93
-
94
-
95
-
96
-
97
-
98
-
99
-
100
-
101
-
102
-
103
-
104
-
105
-
106
-
107
-
108
-
109
-
110
-
111
-
112
-
113
-
114
-
115
-
116
-
117
-
118
-
119
-
120
-
121
-
122
-
123
-
124
-
125
-
126
-
127
-
128
-
129
-
130
-
131
-
132
-
133
-
134
-
135
-
136
-
137
-
138
-
139
-
140
-
141
-
142
 |
 |