Brother International WP700D Owners Manual - English - Page 86
Merge, Printing
 |
View all Brother International WP700D manuals
Add to My Manuals
Save this manual to your list of manuals |
Page 86 highlights
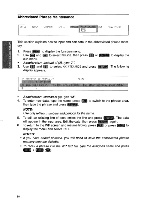
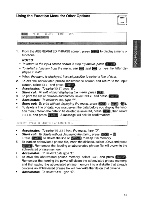
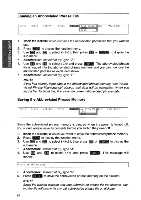
Merge Printing When copies of the same letter must be sent to a number of people, the merge printing function extracts the different data, such as addresses and salutations, from the Merge file you want to use and incorporates it into the master letter. It then prints as many different copies as there are lines of data (records) with an asterisk in the Merge file. Proceed as follows: 1. Refer to "Starting File Print" on page 65 to print the master document. 2. When the print menu screen appears, set the MERGE PRINT option to YES. (See "Starting File Print" on page 65.) At this point, you may also change other settings on the menu as well. Pressing (RETURN to exit the print menu screen when the MERGE PRINT option has been set to YES will display the MAIL MERGE INDEX screen, listing all the Merge files on the current diskette. If the Merge file you want to use is not on the current diskette, insert the correct diskette. > PRINT FILE:XXXXXXXX ADDRESS2.MRG (XX.X) . X ) REMAIN:XXX.XK ADDRESS3.MRG (XX.X) 3. Select the Merge file that you want to use with the master document and press RETURN to start printing. You may also press CANCEL at this point to return the system to the WP INDEX screen. All the functions available during normal file printing are also available during merge printing. (See "Printing a Document" on page 65.) NOTES: • If there is no data in the Merge file corresponding to a merge symbol in the text file, a single space will be printed. • Printing of merge data is done according to the mode (NORMAL, BOLD, UNDERLINE, etc.) in effect when the merge symbol was entered. 78
-
 1
1 -
2
-
3
-
4
-
5
-
6
-
7
-
8
-
9
-
10
-
11
-
12
-
13
-
14
-
15
-
16
-
17
-
18
-
19
-
20
-
21
-
22
-
23
-
24
-
25
-
26
-
27
-
28
-
29
-
30
-
31
-
32
-
33
-
34
-
35
-
36
-
37
-
38
-
39
-
40
-
41
-
42
-
43
-
44
-
45
-
46
-
47
-
48
-
49
-
50
-
51
-
52
-
53
-
54
-
55
-
56
-
57
-
58
-
59
-
60
-
61
-
62
-
63
-
64
-
65
-
66
-
67
-
68
-
69
-
70
-
71
-
72
-
73
-
74
-
75
-
76
-
77
-
78
-
79
-
80
-
 81
81 -
 82
82 -
 83
83 -
 84
84 -
 85
85 -
 86
86 -
 87
87 -
 88
88 -
 89
89 -
 90
90 -
 91
91 -
92
-
93
-
94
-
95
-
96
-
97
-
98
-
99
-
100
-
101
-
102
-
103
-
104
-
105
-
106
-
107
-
108
-
109
-
110
-
111
-
112
-
113
-
114
-
115
-
116
-
117
-
118
-
119
-
120
-
121
-
122
-
123
-
124
-
125
-
126
-
127
-
128
-
129
-
130
-
131
-
132
-
133
-
134
-
135
-
136
-
137
-
138
-
139
-
140
-
141
-
142
-
143
-
144
-
145
-
146
-
147
-
148
-
149
-
150
-
151
-
152
-
153
-
154
-
155
-
156
-
157
-
158
-
159
-
160
-
161
-
162
-
163
-
164
-
165
-
166
-
167
-
168
-
169
-
170
-
171
-
172
 |
 |
