D-Link DNS-1250-04 User Manual for DNS-1250-04 - Page 102
Viewing Backup Schedules, 4.2.4 Changing a Scheduled Backup, Schedule List
 |
View all D-Link DNS-1250-04 manuals
Add to My Manuals
Save this manual to your list of manuals |
Page 102 highlights
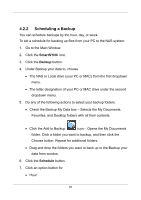
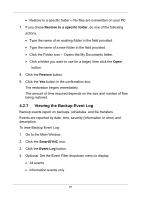
Day Day of the week 8. Choose the corresponding values from the dropdown menus: Number of hours Time of day in hours and minutes Time of day and day of the week 9. Click the Add button. The newly created schedule appears in the Schedule List. The backed up files will appear on the NAS in a folder named BACKUPDATA_your username. You can also click the Start button to run a scheduled backup immediately. 4.2.3 Viewing Backup Schedules To view the list of current schedules: 1. Go to the Main Window. 2. Click the SmartSYNC icon. 3. Click the Schedule List button. The list of all backup schedules appears. 4.2.4 Changing a Scheduled Backup You can schedule backups by the hour, day, or week. To change the scheduled backup of files from your PC to the NAS system: 1. Go to the Main Window. 2. Click the SmartSYNC icon. 3. Click the Schedule List button. 94
-
 1
1 -
2
-
3
-
4
-
5
-
6
-
7
-
8
-
9
-
10
-
11
-
12
-
13
-
14
-
15
-
16
-
17
-
18
-
19
-
20
-
21
-
22
-
23
-
24
-
25
-
26
-
27
-
28
-
29
-
30
-
31
-
32
-
33
-
34
-
35
-
36
-
37
-
38
-
39
-
40
-
41
-
42
-
43
-
44
-
45
-
46
-
47
-
48
-
49
-
50
-
51
-
52
-
53
-
54
-
55
-
56
-
57
-
58
-
59
-
60
-
61
-
62
-
63
-
64
-
65
-
66
-
67
-
68
-
69
-
70
-
71
-
72
-
73
-
74
-
75
-
76
-
77
-
78
-
79
-
80
-
81
-
82
-
83
-
84
-
85
-
86
-
87
-
88
-
89
-
90
-
91
-
92
-
93
-
94
-
95
-
96
-
 97
97 -
 98
98 -
 99
99 -
 100
100 -
 101
101 -
 102
102 -
 103
103 -
 104
104 -
 105
105 -
 106
106 -
 107
107 -
108
-
109
-
110
-
111
-
112
-
113
-
114
-
115
-
116
-
117
-
118
-
119
-
120
-
121
-
122
-
123
-
124
 |
 |
