D-Link DNS-1250-04 User Manual for DNS-1250-04 - Page 52
Deleting a Logical Drive, Redundancy Check, Storage, Logical Drive, Delete, Confirm, Caution
 |
View all D-Link DNS-1250-04 manuals
Add to My Manuals
Save this manual to your list of manuals |
Page 52 highlights
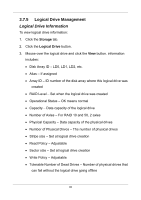
Disk Activity LED Disk Status LED Deleting a Logical Drive To delete a logical drive: 1. Click the Storage tab. 2. Click the Logical Drive button. 3. Mouse-over the disk array you want and click the Delete button. 4. Click the Confirm button. Caution When you delete a logical drive, you also delete all the data in the logical drive. Backup important data before you delete a logical drive. Redundancy Check To run Redundancy Check on a logical drive: 1. Click the AdminTool tab 2. Click the Background Activity button. The list of background activities appears. 3. Mouse-over Redundancy Check and click the Start button. 4. Check the boxes to the left of the logical drives you want to run. 5. Check the options you want. Auto Fix - Attempts to repair the problem when it finds an error Pause on Error - The process stops when it finds a non-repairable error 44
-
 1
1 -
2
-
3
-
4
-
5
-
6
-
7
-
8
-
9
-
10
-
11
-
12
-
13
-
14
-
15
-
16
-
17
-
18
-
19
-
20
-
21
-
22
-
23
-
24
-
25
-
26
-
27
-
28
-
29
-
30
-
31
-
32
-
33
-
34
-
35
-
36
-
37
-
38
-
39
-
40
-
41
-
42
-
43
-
44
-
45
-
46
-
 47
47 -
 48
48 -
 49
49 -
 50
50 -
 51
51 -
 52
52 -
 53
53 -
 54
54 -
 55
55 -
 56
56 -
 57
57 -
58
-
59
-
60
-
61
-
62
-
63
-
64
-
65
-
66
-
67
-
68
-
69
-
70
-
71
-
72
-
73
-
74
-
75
-
76
-
77
-
78
-
79
-
80
-
81
-
82
-
83
-
84
-
85
-
86
-
87
-
88
-
89
-
90
-
91
-
92
-
93
-
94
-
95
-
96
-
97
-
98
-
99
-
100
-
101
-
102
-
103
-
104
-
105
-
106
-
107
-
108
-
109
-
110
-
111
-
112
-
113
-
114
-
115
-
116
-
117
-
118
-
119
-
120
-
121
-
122
-
123
-
124
 |
 |
