D-Link DNS-1250-04 User Manual for DNS-1250-04 - Page 17
Install only the counter-sunk screws supplied with the NAS, Install four screws per drive.
 |
View all D-Link DNS-1250-04 manuals
Add to My Manuals
Save this manual to your list of manuals |
Page 17 highlights
Handle 2. Carefully lay the physical drive into the drive carrier and align the screw holes of the drive and carrier. Physical drive Physical drive power and data connector 3. Insert the screws through the holes in the drive carrier and into the sides of the physical drive. Install only the counter-sunk screws supplied with the NAS system. Install four screws per drive. Snug each screw. Be careful not to over-tighten. 9
-
 1
1 -
2
-
3
-
4
-
5
-
6
-
7
-
8
-
9
-
10
-
11
-
 12
12 -
 13
13 -
 14
14 -
 15
15 -
 16
16 -
 17
17 -
 18
18 -
 19
19 -
 20
20 -
 21
21 -
 22
22 -
23
-
24
-
25
-
26
-
27
-
28
-
29
-
30
-
31
-
32
-
33
-
34
-
35
-
36
-
37
-
38
-
39
-
40
-
41
-
42
-
43
-
44
-
45
-
46
-
47
-
48
-
49
-
50
-
51
-
52
-
53
-
54
-
55
-
56
-
57
-
58
-
59
-
60
-
61
-
62
-
63
-
64
-
65
-
66
-
67
-
68
-
69
-
70
-
71
-
72
-
73
-
74
-
75
-
76
-
77
-
78
-
79
-
80
-
81
-
82
-
83
-
84
-
85
-
86
-
87
-
88
-
89
-
90
-
91
-
92
-
93
-
94
-
95
-
96
-
97
-
98
-
99
-
100
-
101
-
102
-
103
-
104
-
105
-
106
-
107
-
108
-
109
-
110
-
111
-
112
-
113
-
114
-
115
-
116
-
117
-
118
-
119
-
120
-
121
-
122
-
123
-
124
 |
 |
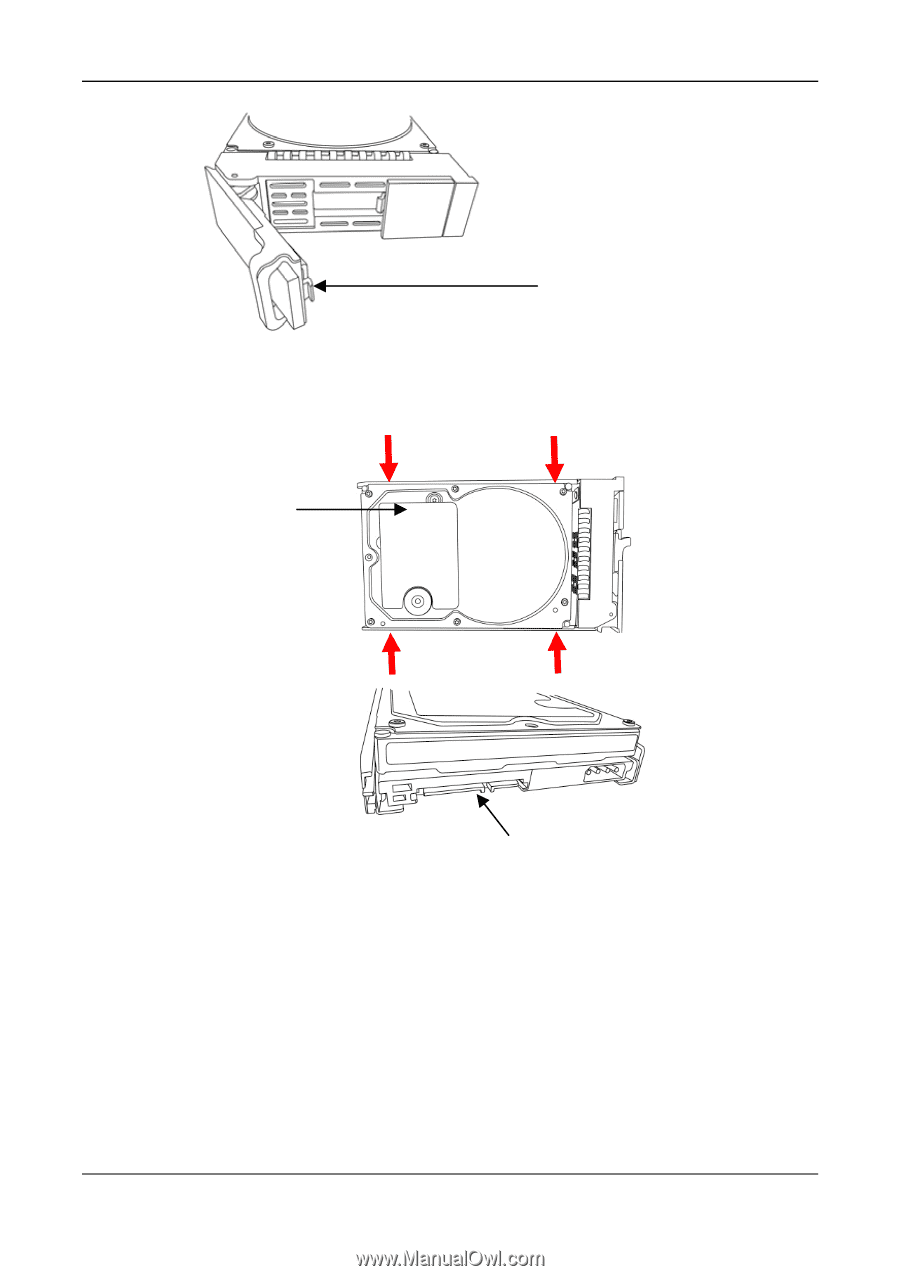
Handle
2.
Carefully lay the physical drive into the drive carrier and align the
screw holes of the drive and carrier.
Physical drive
Physical drive power and
data connector
3.
Insert the screws through the holes in the drive carrier and into the
sides of the physical drive.
Install only the counter-sunk screws supplied with the NAS
system.
Install four screws per drive.
Snug each screw. Be careful not to over-tighten.
9