D-Link DNS-1250-04 User Manual for DNS-1250-04 - Page 30
Level 0: Disabled, 1E
 |
View all D-Link DNS-1250-04 manuals
Add to My Manuals
Save this manual to your list of manuals |
Page 30 highlights
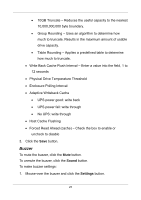
To make controller settings: 1. Mouse-over the controller and click the Settings button. 2. Make setting changes as required. Enter, change or delete the alias in the Alias field Enable SMART Log - Check the box to enable or uncheck to disable SMART Polling Interval - Enter a value into the field, 1 to 1440 minutes HDD Power Levels - Choose time periods from the dropdown menus. Level 0: Disabled Level 1: Park the read/write heads Level 2: Lowers disk rotation speed Level 3: Spins down the disk (stops rotation) Coercion - Check the box to enable or uncheck to disable. This feature is designed for fault-tolerant logical drives (RAID 1, 1E, 5, 10, 50, and 60). It is generally recommended to use physical drives of the same size in your disk arrays. When this is not possible, the system adjusts for the size differences by reducing or coercing the capacity of the larger drives to match the smaller ones. Coercion Method - Choose a method from the dropdown menu: GB Truncate - Default. Reduce the useful capacity to the nearest 1,000,000,000 byte boundary. 22
-
 1
1 -
2
-
3
-
4
-
5
-
6
-
7
-
8
-
9
-
10
-
11
-
12
-
13
-
14
-
15
-
16
-
17
-
18
-
19
-
20
-
21
-
22
-
23
-
24
-
 25
25 -
 26
26 -
 27
27 -
 28
28 -
 29
29 -
 30
30 -
 31
31 -
 32
32 -
 33
33 -
 34
34 -
 35
35 -
36
-
37
-
38
-
39
-
40
-
41
-
42
-
43
-
44
-
45
-
46
-
47
-
48
-
49
-
50
-
51
-
52
-
53
-
54
-
55
-
56
-
57
-
58
-
59
-
60
-
61
-
62
-
63
-
64
-
65
-
66
-
67
-
68
-
69
-
70
-
71
-
72
-
73
-
74
-
75
-
76
-
77
-
78
-
79
-
80
-
81
-
82
-
83
-
84
-
85
-
86
-
87
-
88
-
89
-
90
-
91
-
92
-
93
-
94
-
95
-
96
-
97
-
98
-
99
-
100
-
101
-
102
-
103
-
104
-
105
-
106
-
107
-
108
-
109
-
110
-
111
-
112
-
113
-
114
-
115
-
116
-
117
-
118
-
119
-
120
-
121
-
122
-
123
-
124
 |
 |