Dell A960 All In One Personal Printer User's Guide - Page 10
Use the, Power, Stop/Clear Cancel, Number of Copies, Quality, Lighter/Darker, Select, Speed Dial
 |
View all Dell A960 All In One Personal Printer manuals
Add to My Manuals
Save this manual to your list of manuals |
Page 10 highlights
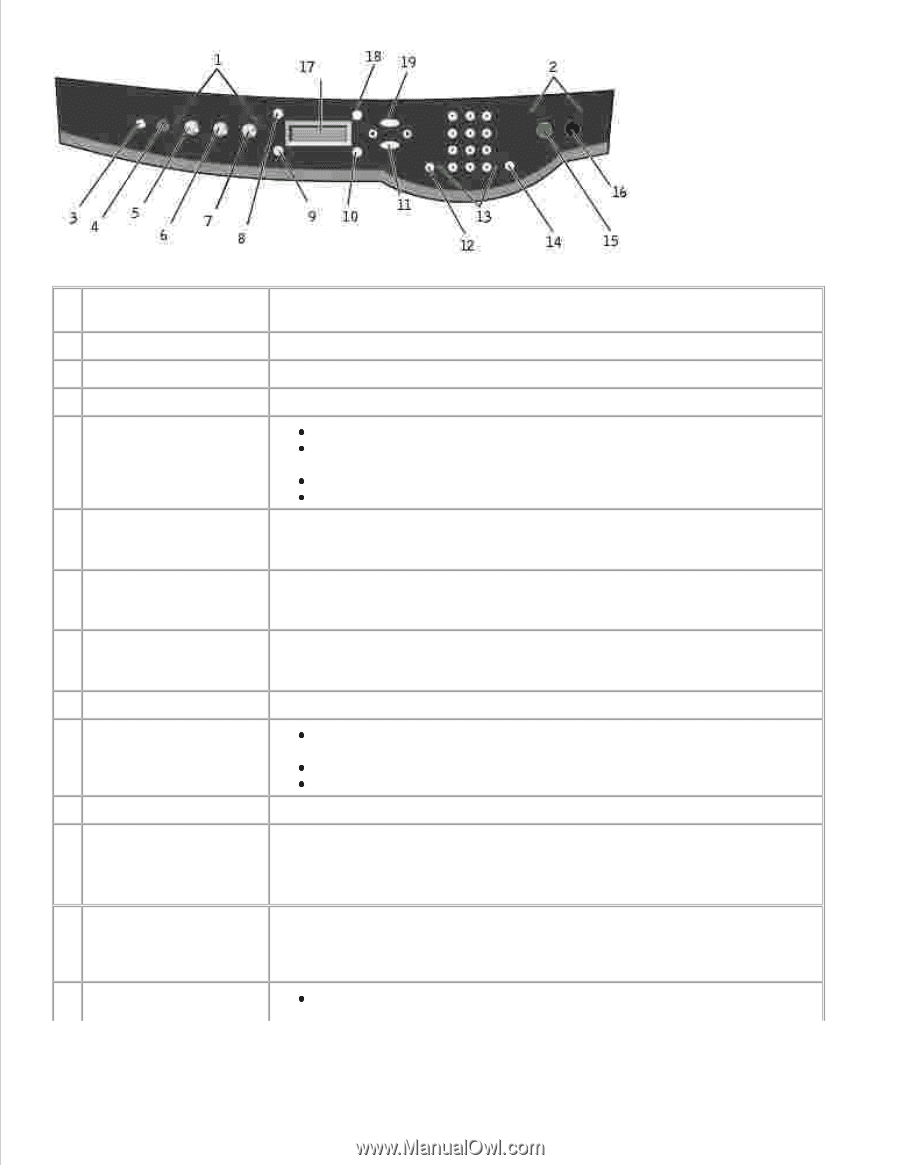
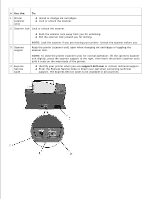
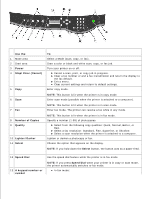
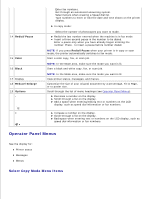
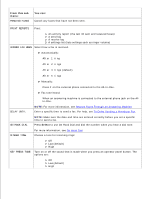
Use the: 1 Mode area 2 Start area 3 Power 4 Stop/Clear (Cancel) 5 Copy 6 Scan 7 Fax 8 Number of Copies 9 Quality 10 Lighter/Darker 11 Select To: Select a Mode (scan, copy, or fax). Start a color or black and white scan, copy, or fax job. Turn your printer on or off. Cancel a scan, print, or copy job in progress. Clear a fax number or end a fax transmission and return the display to the fax default. Exit a menu. Clear current settings and return to default settings. Enter copy mode. NOTE: This button is lit when the printer is in copy mode. Enter scan mode (possible when the printer is attached to a computer). NOTE: This button is lit when the printer is in scan mode. Enter fax mode. The printer can receive a fax while in any mode. NOTE: This button is lit when the printer is in fax mode. Specify a number (1-99) of photocopies. Select from the following copy qualities: Quick, Normal, Better, or Best. Select a fax resolution: Standard, Fine, Superfine, or Ultrafine. Select a scan resolution when the printer is attached to a computer. Lighten or darken a photocopy or fax. Choose the option that appears on the display. NOTE: If you hold down the Select button, the button acts as a paper feed. 12 Speed Dial 13 A keypad number or symbol Use the speed dial feature while the printer is in fax mode. NOTE: If you press Speed Dial when your printer is in copy or scan mode, the printer automatically switches to fax mode. In fax mode:
-
 1
1 -
2
-
3
-
4
-
 5
5 -
 6
6 -
 7
7 -
 8
8 -
 9
9 -
 10
10 -
 11
11 -
 12
12 -
 13
13 -
 14
14 -
 15
15 -
16
-
17
-
18
-
19
-
20
-
21
-
22
-
23
-
24
-
25
-
26
-
27
-
28
-
29
-
30
-
31
-
32
-
33
-
34
-
35
-
36
-
37
-
38
-
39
-
40
-
41
-
42
-
43
-
44
-
45
-
46
-
47
-
48
-
49
-
50
-
51
-
52
-
53
-
54
-
55
-
56
-
57
-
58
-
59
-
60
-
61
-
62
-
63
-
64
-
65
-
66
-
67
-
68
-
69
-
70
-
71
-
72
-
73
-
74
-
75
-
76
-
77
-
78
-
79
-
80
-
81
-
82
-
83
-
84
-
85
-
86
-
87
-
88
-
89
-
90
-
91
-
92
-
93
-
94
-
95
 |
 |