Dell A960 All In One Personal Printer User's Guide - Page 62
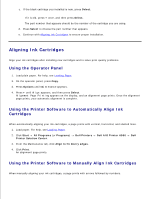
Aligning Ink Cartridges, Using the Operator Panel
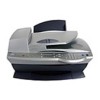 |
View all Dell A960 All In One Personal Printer manuals
Add to My Manuals
Save this manual to your list of manuals |
Page 62 highlights
c. If the black cartridge you installed is new, press Select. If it is old, press + once, and then press Select. The part number that appears should be the number of the cartridge you are using. d. Press Select to choose the part number that appears. e. Continue with Aligning Ink Cartridges to ensure proper installation. Aligning Ink Cartridges Align your ink cartridges after installing new cartridges and to solve print quality problems. Using the Operator Panel 1. Load plain paper. For help, see Loading Paper. 2. On the operator panel, press Copy. 3. Press Options until Maintenance appears. 4. Press + until Align appears, and then press Select. Alignment Page Printing appears on the display, and an alignment page prints. Once the alignment page prints, your automatic alignment is complete. Using the Printer Software to Automatically Align Ink Cartridges When automatically aligning your ink cartridges, a page prints with vertical, horizontal, and slanted lines. 1. Load paper. For help, see Loading Paper. 2. Click Start All Programs (or Programs) Dell Printers Dell AIO Printer A960 Dell Printer Solution Center. 3. From the Maintenance tab, click Align to fix blurry edges. 4. Click Print. An alignment page prints. Using the Printer Software to Manually Align Ink Cartridges When manually aligning your ink cartridges, a page prints with arrows followed by numbers. 1.
-
 1
1 -
2
-
3
-
4
-
5
-
6
-
7
-
8
-
9
-
10
-
11
-
12
-
13
-
14
-
15
-
16
-
17
-
18
-
19
-
20
-
21
-
22
-
23
-
24
-
25
-
26
-
27
-
28
-
29
-
30
-
31
-
32
-
33
-
34
-
35
-
36
-
37
-
38
-
39
-
40
-
41
-
42
-
43
-
44
-
45
-
46
-
47
-
48
-
49
-
50
-
51
-
52
-
53
-
54
-
55
-
56
-
 57
57 -
 58
58 -
 59
59 -
 60
60 -
 61
61 -
 62
62 -
 63
63 -
 64
64 -
 65
65 -
 66
66 -
 67
67 -
68
-
69
-
70
-
71
-
72
-
73
-
74
-
75
-
76
-
77
-
78
-
79
-
80
-
81
-
82
-
83
-
84
-
85
-
86
-
87
-
88
-
89
-
90
-
91
-
92
-
93
-
94
-
95
 |
 |