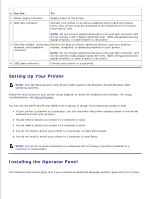
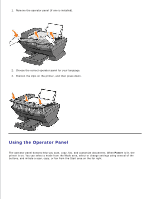
Dell A960 All In One Personal Printer User's Guide - Page 11
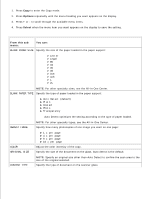
Operator Panel Menus, Select Copy Mode Menu Items
 |
View all Dell A960 All In One Personal Printer manuals
Add to My Manuals
Save this manual to your list of manuals |
Page 11 highlights
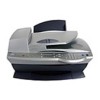
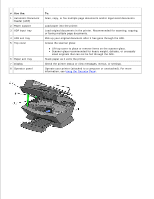
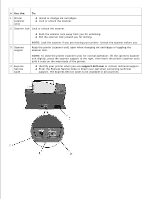
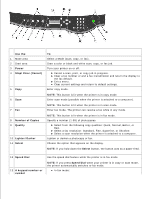
14 Redial/Pause 15 Color 16 Black 17 Display 18 Reduce/Enlarge 19 Options - + Enter fax numbers. Get through an automated answering system. Select letters when creating a Speed dial list. Type numbers to enter or edit the date and time shown on the printer display. In copy mode: Select the number of photocopies you want to make. Redial the last number entered when the machine is in fax mode. Insert a three-second pause in the number to be dialed. Enter a pause only when you have already begun entering the number. Press - to insert a pause before number dialed. NOTE: If you press Redial/Pause when your printer is in copy or scan mode, the printer automatically switches to fax mode. Start a color copy, fax, or scan job. NOTE: In the Mode area, make sure the mode you want is lit. Start a black and white copy, fax, or scan job. NOTE: In the Mode area, make sure the mode you want is lit. View printer status, messages, and menus. Customize the size of your original document by a percentage, Fit to Page, or to poster size. Scroll through the list of menu headings (see Operator Panel Menus). Decrease a number on the display. Scroll through a list on the display. Add a space when entering/editing text or numbers on the LCD display, such as speed dial information or fax numbers. Increase a number on the display. Scroll through a list on the display. Backspace when entering text or numbers on the LCD display, such as speed dial information or fax numbers. Operator Panel Menus See the display for: Printer status Messages Menus Select Copy Mode Menu Items 1. 2.
-
 1
1 -
2
-
3
-
4
-
5
-
 6
6 -
 7
7 -
 8
8 -
 9
9 -
 10
10 -
 11
11 -
 12
12 -
 13
13 -
 14
14 -
 15
15 -
 16
16 -
17
-
18
-
19
-
20
-
21
-
22
-
23
-
24
-
25
-
26
-
27
-
28
-
29
-
30
-
31
-
32
-
33
-
34
-
35
-
36
-
37
-
38
-
39
-
40
-
41
-
42
-
43
-
44
-
45
-
46
-
47
-
48
-
49
-
50
-
51
-
52
-
53
-
54
-
55
-
56
-
57
-
58
-
59
-
60
-
61
-
62
-
63
-
64
-
65
-
66
-
67
-
68
-
69
-
70
-
71
-
72
-
73
-
74
-
75
-
76
-
77
-
78
-
79
-
80
-
81
-
82
-
83
-
84
-
85
-
86
-
87
-
88
-
89
-
90
-
91
-
92
-
93
-
94
-
95
 |
 |