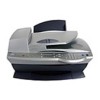
Dell A960 All In One Personal Printer User's Guide - Page 63
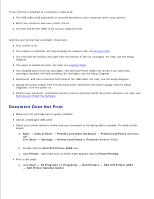
Start, All Programs, Programs, Printers, AIO Printer A960, Printer Solution Center.
 |
View all Dell A960 All In One Personal Printer manuals
Add to My Manuals
Save this manual to your list of manuals |
Page 63 highlights
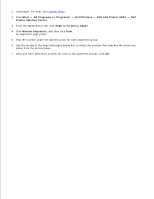
1. Load paper. For help, see Loading Paper. 2. Click Start All Programs (or Programs) Dell Printers Dell AIO Printer A960 Dell Printer Solution Center. 3. From the Maintenance tab, click Align to fix blurry edges. 4. Click Manual Alignment, and then click Print. An alignment page prints. 5. Find the number under the darkest arrow for each alignment group. 6. Use the arrows in the Align Cartridges dialog box to select the number that matches the arrow you chose from the printed page. 7. Once you have selected a number for each of the alignment groups, click OK.
-
 1
1 -
2
-
3
-
4
-
5
-
6
-
7
-
8
-
9
-
10
-
11
-
12
-
13
-
14
-
15
-
16
-
17
-
18
-
19
-
20
-
21
-
22
-
23
-
24
-
25
-
26
-
27
-
28
-
29
-
30
-
31
-
32
-
33
-
34
-
35
-
36
-
37
-
38
-
39
-
40
-
41
-
42
-
43
-
44
-
45
-
46
-
47
-
48
-
49
-
50
-
51
-
52
-
53
-
54
-
55
-
56
-
57
-
 58
58 -
 59
59 -
 60
60 -
 61
61 -
 62
62 -
 63
63 -
 64
64 -
 65
65 -
 66
66 -
 67
67 -
 68
68 -
69
-
70
-
71
-
72
-
73
-
74
-
75
-
76
-
77
-
78
-
79
-
80
-
81
-
82
-
83
-
84
-
85
-
86
-
87
-
88
-
89
-
90
-
91
-
92
-
93
-
94
-
95
 |
 |

Load paper. For help, see
Loading Paper
.
1.
Click
Start
All Programs
(or
Programs
)
Dell
Printers
Dell
AIO Printer A960
Dell
Printer Solution Center.
2.
From the Maintenance tab, click
Align to fix blurry edges
.
3.
Click
Manual Alignment
, and then click
Print
.
An alignment page prints.
4.
Find the number under the darkest arrow for each alignment group.
5.
Use the arrows in the Align Cartridges dialog box to select the number that matches the arrow you
chose from the printed page.
6.
Once you have selected a number for each of the alignment groups, click
OK
.
7.