Dell A960 All In One Personal Printer User's Guide - Page 40
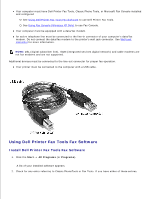
Access the Fax Setup Utility, Dell AIO Printer
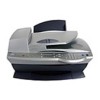 |
View all Dell A960 All In One Personal Printer manuals
Add to My Manuals
Save this manual to your list of manuals |
Page 40 highlights
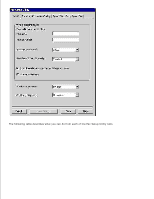
4. 5. Select or de-select the Enable Send and Enable Receive check boxes as desired. 6. Click Next. NOTE: De-selecting the Enable Send check box prevents you from sending faxes. Selecting the Enable Receive check box allows you to receive faxes. 7. Enter your TSID information, and then click Next. 8. Enter your CSID information, and then click Next. 9. Click to select Print it on. Use the drop-down menu to the right of this field to select Dell AIO Printer A960 if you want to print all received faxes. 10. To create an archive copy of each fax, click to select Store a copy in a folder, and then use the Browse button to select the desired archive location. 11. Click Next, confirm your settings, and click Finish. Access the Fax Setup Utility Click Start All Programs (or Programs) Dell Printers Dell AIO Printer A960 Fax Setup Utility From the Dell All-In-One Center, click the Maintain/Troubleshoot tab, and then click Display the Fax Setup Utility.
-
 1
1 -
2
-
3
-
4
-
5
-
6
-
7
-
8
-
9
-
10
-
11
-
12
-
13
-
14
-
15
-
16
-
17
-
18
-
19
-
20
-
21
-
22
-
23
-
24
-
25
-
26
-
27
-
28
-
29
-
30
-
31
-
32
-
33
-
34
-
 35
35 -
 36
36 -
 37
37 -
 38
38 -
 39
39 -
 40
40 -
 41
41 -
 42
42 -
 43
43 -
 44
44 -
 45
45 -
46
-
47
-
48
-
49
-
50
-
51
-
52
-
53
-
54
-
55
-
56
-
57
-
58
-
59
-
60
-
61
-
62
-
63
-
64
-
65
-
66
-
67
-
68
-
69
-
70
-
71
-
72
-
73
-
74
-
75
-
76
-
77
-
78
-
79
-
80
-
81
-
82
-
83
-
84
-
85
-
86
-
87
-
88
-
89
-
90
-
91
-
92
-
93
-
94
-
95
 |
 |