Dell A960 All In One Personal Printer User's Guide - Page 27
Print Photos, Print Collated Copies, Print, Preferences, Properties, Start, All Programs, Programs
 |
View all Dell A960 All In One Personal Printer manuals
Add to My Manuals
Save this manual to your list of manuals |
Page 27 highlights
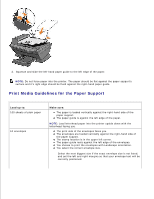
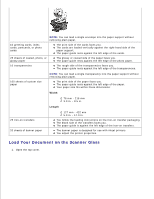
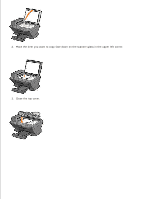
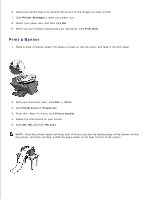
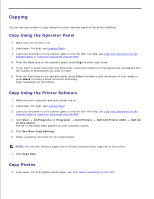
4. 5. On the three tabs along the left side (Quality/Copies, Paper Setup, and Print Layout) of the Print Properties screen, confirm the selections, and then click OK. 6. Click OK or Print (depending on the program or operating system). Print Photos 1. Load paper. For help loading photo paper, see Print Media Guidelines for the Paper Support. 2. With your document open, click File Print. 3. Click Preferences or Properties. 4. Select the paper size. 5. If using photo paper, make sure the glossy side is facing you when you insert the paper into the paper support. 6. Click Print. 7. Remove your photos from the paper exit tray as they are printed to prevent them from sticking together or smearing. NOTE: Before putting your prints in a nonadhesive photo album or framing them, allow sufficient time for the prints to dry thoroughly (12 to 24-hours, depending on the ambient conditions). This will maximize the life of your prints. Print Collated Copies When your printer is attached to your computer, you can print black and white or color collated photocopies. To print collated photocopies: 1. Make sure you have paper loaded in the paper support. 2. Click Start All Programs (or Programs) Dell Printers In-One Center. The All-In-One Main Page appears on your computer screen. Dell AIO Printer A960 Dell All- 3. Click See More Copy Settings. 4. Select the Collate Copies check box. 5. Click Copy Now. When you are using your printer without a computer, you can print black and white collated photocopies: 1. Make sure you have paper loaded in the paper support. 2. Press Copy. 3. 4.
-
 1
1 -
2
-
3
-
4
-
5
-
6
-
7
-
8
-
9
-
10
-
11
-
12
-
13
-
14
-
15
-
16
-
17
-
18
-
19
-
20
-
21
-
 22
22 -
 23
23 -
 24
24 -
 25
25 -
 26
26 -
 27
27 -
 28
28 -
 29
29 -
 30
30 -
 31
31 -
 32
32 -
33
-
34
-
35
-
36
-
37
-
38
-
39
-
40
-
41
-
42
-
43
-
44
-
45
-
46
-
47
-
48
-
49
-
50
-
51
-
52
-
53
-
54
-
55
-
56
-
57
-
58
-
59
-
60
-
61
-
62
-
63
-
64
-
65
-
66
-
67
-
68
-
69
-
70
-
71
-
72
-
73
-
74
-
75
-
76
-
77
-
78
-
79
-
80
-
81
-
82
-
83
-
84
-
85
-
86
-
87
-
88
-
89
-
90
-
91
-
92
-
93
-
94
-
95
 |
 |