Dell A960 All In One Personal Printer User's Guide - Page 48
Using the Printer Software, Using Your Speed Dial List, On Hook Dial, Speed Dial, Start, All Programs
 |
View all Dell A960 All In One Personal Printer manuals
Add to My Manuals
Save this manual to your list of manuals |
Page 48 highlights
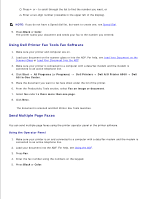
1. Press Fax. 2. Press Speed Dial. 3. The first speed dial number in the list appears. 4. Scroll through the list using the + or - button or use the keypad to enter the two-digit speed dial number. Using the Printer Software 1. Click Start All Programs (or Programs) Dell Printers Dell AIO Printer A960 Fax Setup Utility. 2. Click the Speed Dial tab. 3. Follow the instructions on the Speed Dial tab to add a new number to your speed dial list. Using Your Speed Dial List 1. Press Speed Dial, and then: Use the + or - button to scroll through the speed dial list to find the desired fax number, and then press Fax. Press the keypad buttons to enter a two-digit number (viewable in the upper left corner of the display), and then press Fax. 2. When the default screen appears, press Options. 3. Press Select. 4. Enter the information about when you want your fax to send. 5. Press Select again, and then press 1 for AM or 2 for PM. The default screen appears again. NOTE: You can repeat this process to enter more numbers to which you want to send a delayed fax. On Hook Dial 1. On the operator panel, press Fax. 2. Press Options repeatedly until On Hook Dial appears. 3. Press Select to make the printer go off hook. 4. Enter the number to which you want to send a fax. 5. Press the keypad numbers to navigate an automated answering system. 6.
-
 1
1 -
2
-
3
-
4
-
5
-
6
-
7
-
8
-
9
-
10
-
11
-
12
-
13
-
14
-
15
-
16
-
17
-
18
-
19
-
20
-
21
-
22
-
23
-
24
-
25
-
26
-
27
-
28
-
29
-
30
-
31
-
32
-
33
-
34
-
35
-
36
-
37
-
38
-
39
-
40
-
41
-
42
-
 43
43 -
 44
44 -
 45
45 -
 46
46 -
 47
47 -
 48
48 -
 49
49 -
 50
50 -
 51
51 -
 52
52 -
 53
53 -
54
-
55
-
56
-
57
-
58
-
59
-
60
-
61
-
62
-
63
-
64
-
65
-
66
-
67
-
68
-
69
-
70
-
71
-
72
-
73
-
74
-
75
-
76
-
77
-
78
-
79
-
80
-
81
-
82
-
83
-
84
-
85
-
86
-
87
-
88
-
89
-
90
-
91
-
92
-
93
-
94
-
95
 |
 |