Dell PowerConnect W-IAP92 Dell Instant 6.1.2.3-2.0.0.0 User Guide - Page 87
Customizing a Splash Finish, Network, Security, Welcome, Policy
 |
View all Dell PowerConnect W-IAP92 manuals
Add to My Manuals
Save this manual to your list of manuals |
Page 87 highlights
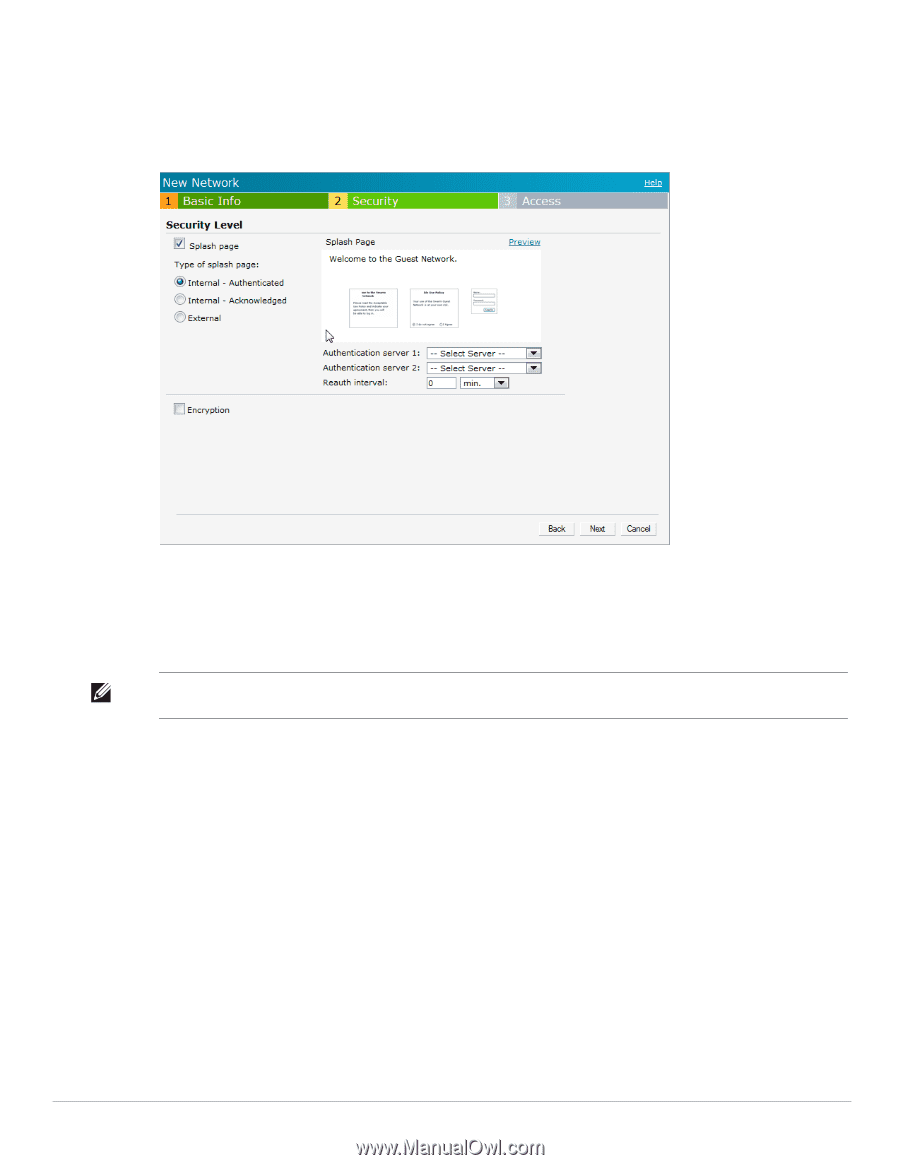
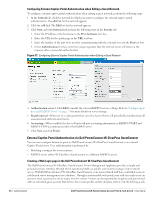
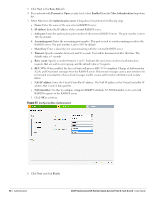
4. Select an external RADIUS server from the Authentication server drop-down list to authenticate user credentials at run time. If there is no external RADIUS server in the drop-down list, click New to add a RADIUS server. 5. Click Next and then click Finish. Figure 68 Configuring Internal Captive Portal with External Radius Server Authentication Customizing a Splash Page A splash page is a web page that is displayed to a guest user when they are trying to access the internet. The appearance of a splash page can be customized as required. To customize a splash page, perform the following steps: NOTE: The current release does not support per SSID splash page. When multiple SSIDs are configured to use customized splash page, changes to the page will be reflected on all SSIDs. 1. In the Network tab, click the network for which you want to customize the splash page. The edit link for the network appears. 2. Click the edit link. The Edit box for the network appears. 3. Click Next and perform the following steps in the Security tab: 1. To change the color of the splash page, click the Splash page rectangle and select the required color from the Background Color palette. 2. To change the welcome text, click the first square in the splash page, type the required text in the Welcome text box, and click OK. The welcome text should not exceed 127 characters. 3. To change the policy text, click the second square in the splash page, type the required text in the Policy text box, and click OK. The policy text should not exceed 255 characters. Dell PowerConnect W-Series Instant Access Point 6.1.2.3-2.0.0.0 | User Guide Authentication | 87
-
 1
1 -
2
-
3
-
4
-
5
-
6
-
7
-
8
-
9
-
10
-
11
-
12
-
13
-
14
-
15
-
16
-
17
-
18
-
19
-
20
-
21
-
22
-
23
-
24
-
25
-
26
-
27
-
28
-
29
-
30
-
31
-
32
-
33
-
34
-
35
-
36
-
37
-
38
-
39
-
40
-
41
-
42
-
43
-
44
-
45
-
46
-
47
-
48
-
49
-
50
-
51
-
52
-
53
-
54
-
55
-
56
-
57
-
58
-
59
-
60
-
61
-
62
-
63
-
64
-
65
-
66
-
67
-
68
-
69
-
70
-
71
-
72
-
73
-
74
-
75
-
76
-
77
-
78
-
79
-
80
-
81
-
 82
82 -
 83
83 -
 84
84 -
 85
85 -
 86
86 -
 87
87 -
 88
88 -
 89
89 -
 90
90 -
 91
91 -
 92
92 -
93
-
94
-
95
-
96
-
97
-
98
-
99
-
100
-
101
-
102
-
103
-
104
-
105
-
106
-
107
-
108
-
109
-
110
-
111
-
112
-
113
-
114
-
115
-
116
-
117
-
118
-
119
-
120
-
121
-
122
-
123
-
124
-
125
-
126
-
127
-
128
-
129
-
130
-
131
-
132
-
133
-
134
-
135
-
136
-
137
-
138
-
139
-
140
-
141
-
142
-
143
-
144
-
145
-
146
-
147
-
148
-
149
-
150
-
151
-
152
-
153
-
154
-
155
-
156
-
157
-
158
 |
 |