Dell PowerConnect W-IAP92 Dell Instant 6.1.2.3-2.0.0.0 User Guide - Page 91
Configuring the RADIUS Server in Instant, Mac Authentication, Configuring Mac Authentication
 |
View all Dell PowerConnect W-IAP92 manuals
Add to My Manuals
Save this manual to your list of manuals |
Page 91 highlights
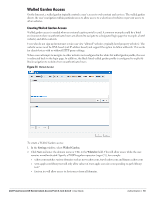
login page on the Dell PowerConnect W-ClearPass GuestConnect Visitor Management Appliance you are able to provide a customized graphical login page for visitors accessing the network. Refer to the RADIUS Services chapter in the Dell PowerConnect W-ClearPass GuestConnect Deployment Guide for information on setting up the Radius Web Login feature. Configuring the RADIUS Server in Instant To configure Instant to point to Dell PowerConnect W-ClearPass GuestConnect as an external Captive Portal server, perform the following steps: 1. Navigate to the Networks tab in the UI, click the New link. The New Network box appears. 2. In the Basic Info tab, perform the following steps: a. Type a name for the network in the Name (SSID) text box. Example: ECP b. Select Guest from the Primary usage options. 3. Click Next to continue. 4. In the Security tab, select External and update the following fields. a. Enter the IP address of the Dell PowerConnect W-ClearPass GuestConnect server in the IP or hostname field. The IP address is 10.65.77.245. b. Enter /page_name.php in the URL field. This URL must correspond to the Page Name configured in the Dell PowerConnect W-ClearPass GuestConnect RADIUS Web Login page. For example, if the Page Name is aruba, then the URL should be /aruba.php in the Instant UI. c. Enter the Port number (generally should be 80). The Dell PowerConnect W-ClearPass GuestConnect server uses this port for HTTP services. d. To create an external RADIUS server, select New from the Authentication server 1 drop-down list. Refer to "Configuring an External RADIUS Server" on page 79 to update the RADIUS server fields. 5. The new network appears in the Networks tab. Click the wireless network icon and select the new network. 6. Open any browser and type any URL. Instant redirects the URL to Dell PowerConnect W-ClearPass GuestConnect login page. 7. Login to the network with the username and password specified used while configuring the RADIUS server in step d. Mac Authentication Media Access Control (Mac) authentication is used to authenticate devices based on their physical Mac addresses. It is an early form of filtering. Mac authentication requires that the Mac address of a machine must match a manually defined list of addresses. This form of authentication does not scale past a handful of devices, because it is difficult to maintain the list of Mac addresses. Additionally, it is easy to change the Mac address of a station to match one on the accepted list. This spoofing is trivial to perform with built-in driver tools, and it should not be relied upon to provide security. Mac authentication can be used alone, but typically it is combined with other forms of authentication, such as WEP authentication. Because Mac addresses are easily observed during transmission and easily changed on the client, this form of authentication should be considered nothing more than a minor hurdle that will not deter the determined intruder. It is recommended against the use of Mac based authentication. Configuring Mac Authentication To enable Mac Authentication for a wireless network, perform the following steps: 1. In the Network tab, click the network for which you want to enable Mac authentication. The edit link for the network appears. 2. Click the edit link. The Edit box for the network appears. Dell PowerConnect W-Series Instant Access Point 6.1.2.3-2.0.0.0 | User Guide Authentication | 91
-
 1
1 -
2
-
3
-
4
-
5
-
6
-
7
-
8
-
9
-
10
-
11
-
12
-
13
-
14
-
15
-
16
-
17
-
18
-
19
-
20
-
21
-
22
-
23
-
24
-
25
-
26
-
27
-
28
-
29
-
30
-
31
-
32
-
33
-
34
-
35
-
36
-
37
-
38
-
39
-
40
-
41
-
42
-
43
-
44
-
45
-
46
-
47
-
48
-
49
-
50
-
51
-
52
-
53
-
54
-
55
-
56
-
57
-
58
-
59
-
60
-
61
-
62
-
63
-
64
-
65
-
66
-
67
-
68
-
69
-
70
-
71
-
72
-
73
-
74
-
75
-
76
-
77
-
78
-
79
-
80
-
81
-
82
-
83
-
84
-
85
-
 86
86 -
 87
87 -
 88
88 -
 89
89 -
 90
90 -
 91
91 -
 92
92 -
 93
93 -
 94
94 -
 95
95 -
 96
96 -
97
-
98
-
99
-
100
-
101
-
102
-
103
-
104
-
105
-
106
-
107
-
108
-
109
-
110
-
111
-
112
-
113
-
114
-
115
-
116
-
117
-
118
-
119
-
120
-
121
-
122
-
123
-
124
-
125
-
126
-
127
-
128
-
129
-
130
-
131
-
132
-
133
-
134
-
135
-
136
-
137
-
138
-
139
-
140
-
141
-
142
-
143
-
144
-
145
-
146
-
147
-
148
-
149
-
150
-
151
-
152
-
153
-
154
-
155
-
156
-
157
-
158
 |
 |