Epson 9600 Service Manual - Page 64
BK ink cartridge replacement
 |
UPC - 010343841888
View all Epson 9600 manuals
Add to My Manuals
Save this manual to your list of manuals |
Page 64 highlights
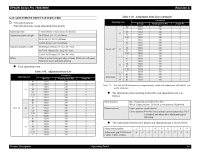
EPSON Stylus Pro 7600/9600 Revision A 1.4.3.35 BK ink cartridge replacement CHECK P O IN T „ This menu is only displayed for pigment model. It is not displayed for dye model. „ The printer is not turned off during sequence even if Power button is pushed. 1. Select "BK INK CHANGE" in "MAINTENANCE" of panel setting menu and start with "EXEC". 2. Select changing ink and push the Enter button. (The panel message is depended on installed ink combination at that time.) LCD panel message: "SELECT INK SET" Installed ink set Panel message MATTE-K+LIGHT-K #1 PHOTO:#2 LBK #1 MAT:#2 MAT MATTE-K+MATTE-K #1 MAT:#2 LBK #1 PHOTO:#2 LBK (2 cartridges) PHOTO-K+LIGHT-K #1 MAT:#2 LBK #1 MAT:#2 MAT (2 cartridges) 3. The printer checks available quantity of all color ink remaining for initial filling except changing slot. 1. When ink remaining is enough, go to (4). When ink remaining is not enough, following message is displayed, and corresponded slot LED blinks. LCD panel message: "NOT ENOUGH INK" "RELEASE INK LEVER" 2. Following message is indicated, and corresponded slot LED blinks until lever is released, and new ink cartridge is installed. LCD panel message: "REPLACE WITH NEW CARTRIDGE" 3. Following message is displayed, when new ink cartridge is installed, and CSIC is contacted. LCD panel message: "SET INK LEVER" 4. The printer reads CSIC of installed cartridge after the lever is locked. a) When all ink remaining except changing slot is enough for initial filling, go to step 4. b) When wrong ink cartridge is installed, following message is displayed every 1 second, corresponded slot LED blinks, and go back to step 3-2. LCD panel message: "WRONG CARTRIDGE" "RELEASE INK LEVER" c) When installed ink cartridge is not enough for initial filling, following message is displayed every 1 second, corresponded slot LED blinks, and go back to step 3-2. LCD panel message: "NOT ENOUGH INK" "RELEASE INK LEVER" 4. Following messages are displayed every 1 second repeatedly, and all slot LEDs are OFF, after necessary ink remaining for initial filling is checked, LCD panel message: "REMOVE ALL INK CARTRIDGES" "RELEASE INK LEVER" 5. Following message is displayed after the lever is released. LCD panel message: "REMOVE ALL INK CARTRIDGES" NOTE: The message is indicated until all ink cartridges are removed. LED turns to ON after corresponded cartridge is removed. LEDs except changing slot are ON until cartridges are installed. 6. The printer checks available quantity of maintenance tank, after all cartridges are removed. NOTE: When 2 cartridges are selected to be changed for procedure (2), it counts available quantity of maintenance tank for 2 cartridges. 1. The printer checks CSIC of maintenance tank. When available quantity is enough, go to step 7. When available quantity is NOT enough, following messages are displayed every 1 second, and maintenance tank LED blinks until maintenance tank is replaced with new one. LCD panel message: "NOT ENOUGH SPACE IN MAINTE TANK" "REPLACE WITH NEW MAINTENANCE TANK" Product Description Operating Panel 64
-
 1
1 -
2
-
3
-
4
-
5
-
6
-
7
-
8
-
9
-
10
-
11
-
12
-
13
-
14
-
15
-
16
-
17
-
18
-
19
-
20
-
21
-
22
-
23
-
24
-
25
-
26
-
27
-
28
-
29
-
30
-
31
-
32
-
33
-
34
-
35
-
36
-
37
-
38
-
39
-
40
-
41
-
42
-
43
-
44
-
45
-
46
-
47
-
48
-
49
-
50
-
51
-
52
-
53
-
54
-
55
-
56
-
57
-
58
-
 59
59 -
 60
60 -
 61
61 -
 62
62 -
 63
63 -
 64
64 -
 65
65 -
 66
66 -
 67
67 -
 68
68 -
 69
69 -
70
-
71
-
72
-
73
-
74
-
75
-
76
-
77
-
78
-
79
-
80
-
81
-
82
-
83
-
84
-
85
-
86
-
87
-
88
-
89
-
90
-
91
-
92
-
93
-
94
-
95
-
96
-
97
-
98
-
99
-
100
-
101
-
102
-
103
-
104
-
105
-
106
-
107
-
108
-
109
-
110
-
111
-
112
-
113
-
114
-
115
-
116
-
117
-
118
-
119
-
120
-
121
-
122
-
123
-
124
-
125
-
126
-
127
-
128
-
129
-
130
-
131
-
132
-
133
-
134
-
135
-
136
-
137
-
138
-
139
-
140
-
141
-
142
-
143
-
144
-
145
-
146
-
147
-
148
-
149
-
150
-
151
-
152
-
153
-
154
-
155
-
156
-
157
-
158
-
159
-
160
-
161
-
162
-
163
-
164
-
165
-
166
-
167
-
168
-
169
-
170
-
171
-
172
-
173
-
174
-
175
-
176
-
177
-
178
-
179
-
180
-
181
-
182
-
183
-
184
-
185
-
186
-
187
-
188
-
189
-
190
-
191
-
192
-
193
-
194
-
195
-
196
-
197
-
198
-
199
-
200
-
201
-
202
-
203
-
204
-
205
-
206
-
207
-
208
-
209
-
210
-
211
-
212
-
213
-
214
-
215
-
216
-
217
-
218
-
219
-
220
-
221
-
222
-
223
-
224
-
225
-
226
-
227
-
228
-
229
-
230
-
231
-
232
-
233
-
234
-
235
-
236
-
237
-
238
-
239
-
240
-
241
-
242
-
243
-
244
-
245
-
246
-
247
-
248
-
249
-
250
-
251
-
252
-
253
-
254
-
255
-
256
-
257
-
258
-
259
-
260
-
261
-
262
-
263
-
264
-
265
-
266
-
267
-
268
-
269
-
270
-
271
-
272
-
273
-
274
-
275
-
276
-
277
-
278
-
279
-
280
-
281
-
282
-
283
-
284
-
285
-
286
-
287
-
288
-
289
-
290
-
291
-
292
-
293
-
294
-
295
-
296
-
297
-
298
-
299
-
300
-
301
-
302
-
303
-
304
-
305
-
306
-
307
-
308
-
309
-
310
-
311
-
312
-
313
-
314
-
315
-
316
-
317
-
318
-
319
-
320
-
321
-
322
-
323
-
324
-
325
-
326
-
327
-
328
-
329
-
330
-
331
-
332
-
333
-
334
-
335
-
336
 |
 |
