Epson 9600 Service Manual - Page 65
Insert Cartridge In Correct Slot
 |
UPC - 010343841888
View all Epson 9600 manuals
Add to My Manuals
Save this manual to your list of manuals |
Page 65 highlights
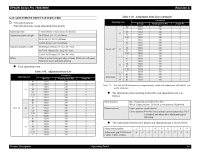
EPSON Stylus Pro 7600/9600 Revision A 2. The printer checks CSIC after maintenance tank is replaced. When CSIC detects that the maintenance tank have enough available quantity, got to step 7. When available quantity is NOT enough, repeat Procedure step 6-1 and step 6-2. 7. Following messages are displayed every 1 second, and #1 slot LED blinks, after available quantity of maintenance tank is checked. LCD panel message: "READY FOR DRAINING" "INSERT DRAINING CARTRIDGE IN #X" 8. The printer starts ejecting ink from corresponded ink tube. 1. Following message is displayed, and XX slot LED blinks, after draining cartridge is installed, and CSIC is connected. LCD panel message: "SET INK LEVER" 2. The printer checks CSIC after ink lever is set. When the cartridge is correct, go to step 8-3. When the cartridge is wrong, go to step 8-2-1. When the slot is wrong, go to step 8-2-2. 1. When a cartridge except draining cartridge is installed, following messages are displayed every 1 second, and XX slot LED blinks until the cartridge is removed. Go back to step 8-1. LCD panel message: "WRONG CARTRIDGE" "RELEASE INK LEVER" 2. When the cartridge is installed in a slot except XX, following messages are displayed every 1 second, and XX slot LED blinks until the cartridge is removed. Go back to step 8-1. LCD panel message: "INSERT CARTRIDGE IN CORRECT SLOT" "RELEASE INK LEVER" 3. Ink ejection starts and following message is displayed. LCD panel message: "DRAINING XXX%" (0%~100%) 4. Following messages are displayed every 1 second, and XX slot LED blinks, after corresponded ink tube ejection is completed. LCD panel message: "REMOVE DRAINING CARTRIDGE" "RELEASE INK LEVER" 9. Repeat step 8 when 2 cartridges are replaced. Slot [XX] changes to [K2], and LED shifts to #2. 10. Following message is displayed, and all slots LEDs blink, after the draining cartridge is removed. LCD panel message: "INSERT ALL INK CARTRIDGES" NOTE: Ink remaining for initial filling and wrong cartridge are checked as same as procedure step3 11. Following message is displayed and all slot LEDs blink after all cartridges are installed, and CSIC is connected. LCD panel message: "SET INK LEVER" 12. Ink filling starts automatically after all ink installation. LCD panel message: "INK CHARGING XXX%" 13. Ink filling completed. The manufacture logo, ink remaining, and printable pages, which are recorded in replaced ink cartridge CSIC, are displayed. 14. Paper is fed, and cleaning (CL2) is done only for the first printing after ink replacement. Product Description Operating Panel 65
-
 1
1 -
2
-
3
-
4
-
5
-
6
-
7
-
8
-
9
-
10
-
11
-
12
-
13
-
14
-
15
-
16
-
17
-
18
-
19
-
20
-
21
-
22
-
23
-
24
-
25
-
26
-
27
-
28
-
29
-
30
-
31
-
32
-
33
-
34
-
35
-
36
-
37
-
38
-
39
-
40
-
41
-
42
-
43
-
44
-
45
-
46
-
47
-
48
-
49
-
50
-
51
-
52
-
53
-
54
-
55
-
56
-
57
-
58
-
59
-
 60
60 -
 61
61 -
 62
62 -
 63
63 -
 64
64 -
 65
65 -
 66
66 -
 67
67 -
 68
68 -
 69
69 -
 70
70 -
71
-
72
-
73
-
74
-
75
-
76
-
77
-
78
-
79
-
80
-
81
-
82
-
83
-
84
-
85
-
86
-
87
-
88
-
89
-
90
-
91
-
92
-
93
-
94
-
95
-
96
-
97
-
98
-
99
-
100
-
101
-
102
-
103
-
104
-
105
-
106
-
107
-
108
-
109
-
110
-
111
-
112
-
113
-
114
-
115
-
116
-
117
-
118
-
119
-
120
-
121
-
122
-
123
-
124
-
125
-
126
-
127
-
128
-
129
-
130
-
131
-
132
-
133
-
134
-
135
-
136
-
137
-
138
-
139
-
140
-
141
-
142
-
143
-
144
-
145
-
146
-
147
-
148
-
149
-
150
-
151
-
152
-
153
-
154
-
155
-
156
-
157
-
158
-
159
-
160
-
161
-
162
-
163
-
164
-
165
-
166
-
167
-
168
-
169
-
170
-
171
-
172
-
173
-
174
-
175
-
176
-
177
-
178
-
179
-
180
-
181
-
182
-
183
-
184
-
185
-
186
-
187
-
188
-
189
-
190
-
191
-
192
-
193
-
194
-
195
-
196
-
197
-
198
-
199
-
200
-
201
-
202
-
203
-
204
-
205
-
206
-
207
-
208
-
209
-
210
-
211
-
212
-
213
-
214
-
215
-
216
-
217
-
218
-
219
-
220
-
221
-
222
-
223
-
224
-
225
-
226
-
227
-
228
-
229
-
230
-
231
-
232
-
233
-
234
-
235
-
236
-
237
-
238
-
239
-
240
-
241
-
242
-
243
-
244
-
245
-
246
-
247
-
248
-
249
-
250
-
251
-
252
-
253
-
254
-
255
-
256
-
257
-
258
-
259
-
260
-
261
-
262
-
263
-
264
-
265
-
266
-
267
-
268
-
269
-
270
-
271
-
272
-
273
-
274
-
275
-
276
-
277
-
278
-
279
-
280
-
281
-
282
-
283
-
284
-
285
-
286
-
287
-
288
-
289
-
290
-
291
-
292
-
293
-
294
-
295
-
296
-
297
-
298
-
299
-
300
-
301
-
302
-
303
-
304
-
305
-
306
-
307
-
308
-
309
-
310
-
311
-
312
-
313
-
314
-
315
-
316
-
317
-
318
-
319
-
320
-
321
-
322
-
323
-
324
-
325
-
326
-
327
-
328
-
329
-
330
-
331
-
332
-
333
-
334
-
335
-
336
 |
 |
