Epson PowerLite 8150i Administrator's Manual - Page 32
Connecting to a Network and Inserting the Memory Card, Preparing Your Network
 |
View all Epson PowerLite 8150i manuals
Add to My Manuals
Save this manual to your list of manuals |
Page 32 highlights
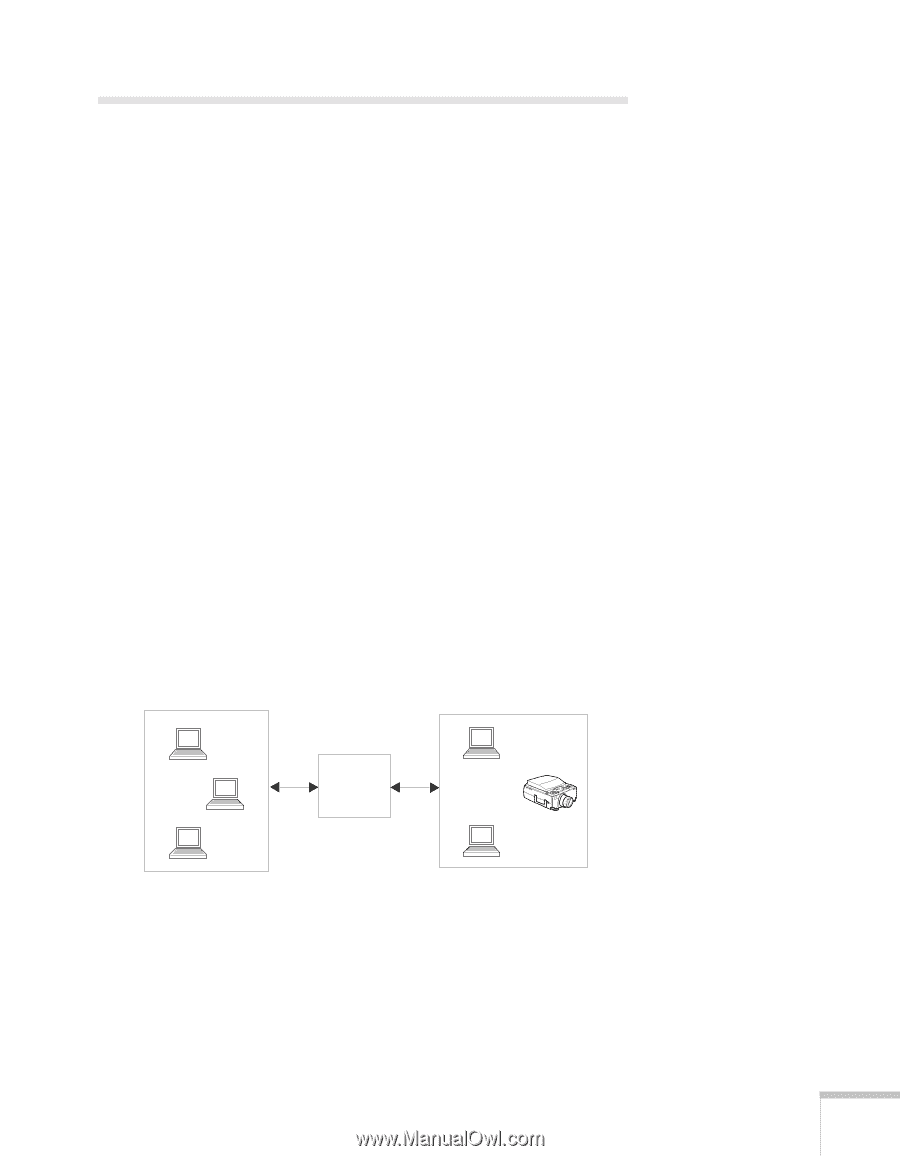
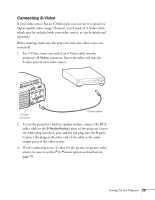
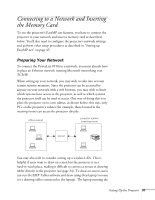
Connecting to a Network and Inserting the Memory Card To use the projector's EasyMP.net features, you have to connect the projector to your network and insert a memory card as described below. You'll also need to configure the projector's network settings and perform other setup procedures as described in "Setting up EasyMP.net" on page 45. Preparing Your Network To connect the PowerLite 8150i to a network, you must already have in place an Ethernet network running Microsoft networking over TCP/IP. When setting up your network, you may wish to take into account certain security measures. Since the projector can be accessed by anyone on your network with a web browser, you may wish to limit which systems have access to the projector, as well as which systems the projector itself can be used to access. One way of doing this is to place the projector on its own subnet, as shown below; this way, only PCs on the projector's subnet (for example, those located in the meeting room) can access the projector directly. office subnet projector subnet (meeting room) server You may also wish to consider setting up a wireless LAN. This is helpful if users want to draw on screen but the projector is in a hard-to-reach place, making it difficult to connect a mouse or drawing tablet directly to the projector (see page 34). To draw on screen, users can run the EMP Tablet software and draw using their laptop's mouse (or a drawing tablet connected to the laptop). The laptop running the Setting Up the Projector 31
-
 1
1 -
2
-
3
-
4
-
5
-
6
-
7
-
8
-
9
-
10
-
11
-
12
-
13
-
14
-
15
-
16
-
17
-
18
-
19
-
20
-
21
-
22
-
23
-
24
-
25
-
26
-
 27
27 -
 28
28 -
 29
29 -
 30
30 -
 31
31 -
 32
32 -
 33
33 -
 34
34 -
 35
35 -
 36
36 -
 37
37 -
38
-
39
-
40
-
41
-
42
-
43
-
44
-
45
-
46
-
47
-
48
-
49
-
50
-
51
-
52
-
53
-
54
-
55
-
56
-
57
-
58
-
59
-
60
-
61
-
62
-
63
-
64
-
65
-
66
-
67
-
68
-
69
-
70
-
71
-
72
-
73
-
74
-
75
-
76
-
77
-
78
-
79
-
80
-
81
-
82
-
83
-
84
-
85
-
86
-
87
-
88
-
89
-
90
-
91
-
92
-
93
-
94
-
95
-
96
-
97
-
98
-
99
-
100
-
101
-
102
-
103
-
104
-
105
-
106
-
107
-
108
-
109
-
110
-
111
-
112
-
113
-
114
-
115
-
116
-
117
-
118
-
119
-
120
-
121
-
122
-
123
-
124
-
125
-
126
-
127
-
128
-
129
-
130
-
131
-
132
-
133
-
134
-
135
 |
 |