Epson PowerLite 8150i Administrator's Manual - Page 56
Giving the Projector Access to the Network, Configuring a PC to Share Files
 |
View all Epson PowerLite 8150i manuals
Add to My Manuals
Save this manual to your list of manuals |
Page 56 highlights
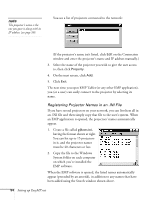
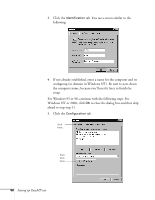
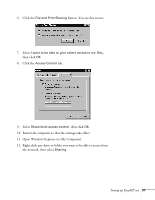
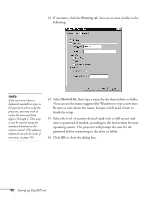
Giving the Projector Access to the Network Sometimes users may wish to use the projector as a client up access a remote system on the network. This is convenient, for example, when sharing "meeting minutes." Or if a server is set up between the office subnet and the projector subnet as shown on page 31, users will need to use the projector to download their presentations from the server. Follow the steps below to configure each system the projector needs to be able to access, and then register it on the projector. Configuring a PC to Share Files Whether you're setting up a server or individual PC, you'll first need to make sure it's named so that it can be identified on the network. Then you'll need to set it up for file sharing and choose the drives or folders you want to make available to the network. 1. Make sure the PC is already connected to the network and running Microsoft networking over TCP/IP. The computer should be able to communicate with the projector; you can check this as described in "Testing the Network Connection" on page 51. 2. Open the Network properties dialog box: s Windows 95, 98, NT: Right-click Network Neighborhood and select Properties. s Windows 2000: Right-click My Computer and select Properties. Setting up EasyMP.net 55
-
 1
1 -
2
-
3
-
4
-
5
-
6
-
7
-
8
-
9
-
10
-
11
-
12
-
13
-
14
-
15
-
16
-
17
-
18
-
19
-
20
-
21
-
22
-
23
-
24
-
25
-
26
-
27
-
28
-
29
-
30
-
31
-
32
-
33
-
34
-
35
-
36
-
37
-
38
-
39
-
40
-
41
-
42
-
43
-
44
-
45
-
46
-
47
-
48
-
49
-
50
-
 51
51 -
 52
52 -
 53
53 -
 54
54 -
 55
55 -
 56
56 -
 57
57 -
 58
58 -
 59
59 -
 60
60 -
 61
61 -
62
-
63
-
64
-
65
-
66
-
67
-
68
-
69
-
70
-
71
-
72
-
73
-
74
-
75
-
76
-
77
-
78
-
79
-
80
-
81
-
82
-
83
-
84
-
85
-
86
-
87
-
88
-
89
-
90
-
91
-
92
-
93
-
94
-
95
-
96
-
97
-
98
-
99
-
100
-
101
-
102
-
103
-
104
-
105
-
106
-
107
-
108
-
109
-
110
-
111
-
112
-
113
-
114
-
115
-
116
-
117
-
118
-
119
-
120
-
121
-
122
-
123
-
124
-
125
-
126
-
127
-
128
-
129
-
130
-
131
-
132
-
133
-
134
-
135
 |
 |