Epson PowerLite 8150i Administrator's Manual - Page 59
ll need it later to, Be sure to note down the name, because
 |
View all Epson PowerLite 8150i manuals
Add to My Manuals
Save this manual to your list of manuals |
Page 59 highlights
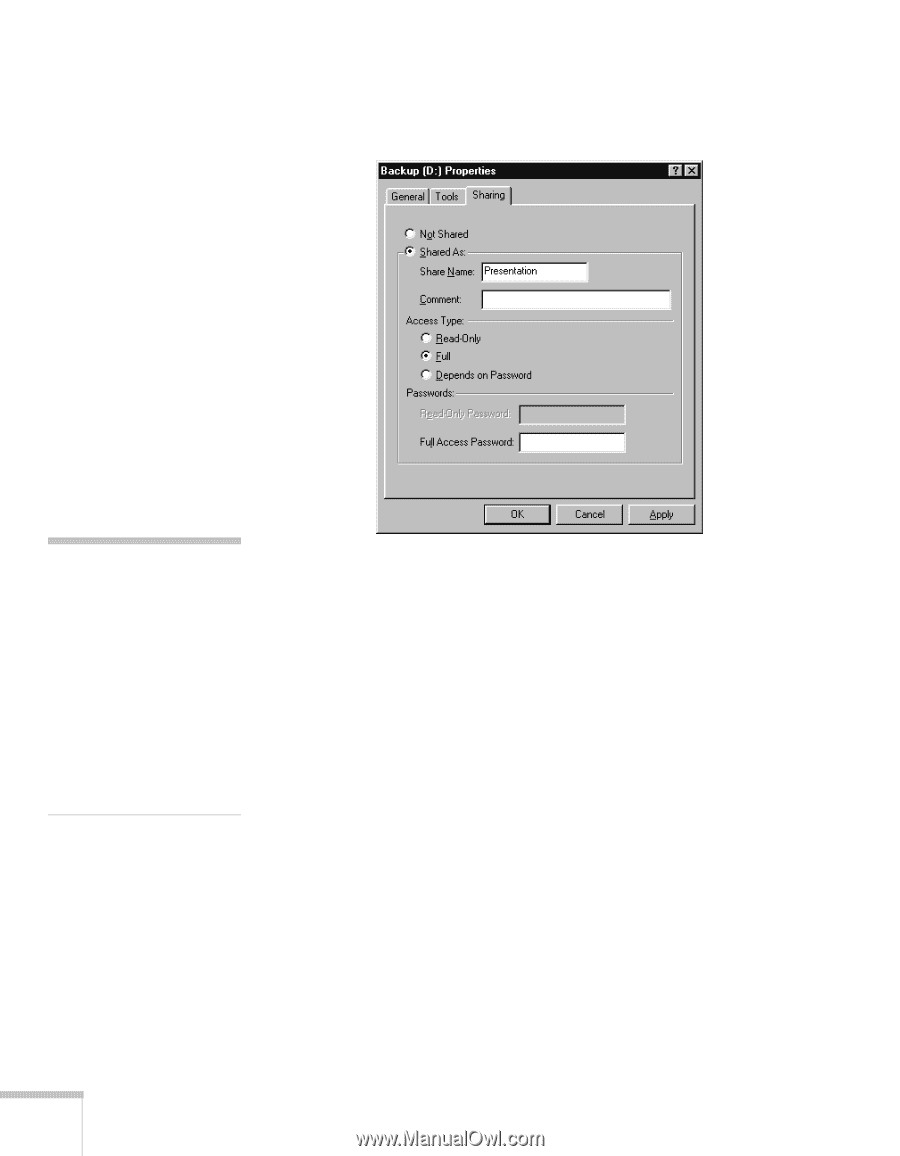
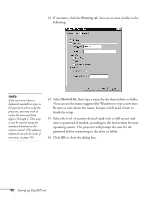
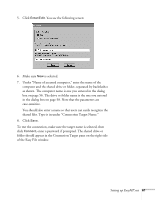
13. If necessary, click the Sharing tab. You see a screen similar to the following: note If the user won't have a keyboard available to type in the password when using the projector, you may wish to create the password from digits 1 through 5. That way, it can be entered using the numbered buttons on the remote control. (The software keyboard can also be used, if necessary; see page 50.) 14. Select Shared As, then type a name for the shared drive or folder. (You can use the name suggested by Windows or type a new one.) Be sure to note down the name, because you'll need it later to finish the setup. 15. Select the level of security desired (read-only or full access) and enter a password, if needed, according to the instructions for your operating system. The projector will prompt the user for the password before connecting to the drive or folder. 16. Click OK to close the dialog box. 58 Setting up EasyMP.net
-
 1
1 -
2
-
3
-
4
-
5
-
6
-
7
-
8
-
9
-
10
-
11
-
12
-
13
-
14
-
15
-
16
-
17
-
18
-
19
-
20
-
21
-
22
-
23
-
24
-
25
-
26
-
27
-
28
-
29
-
30
-
31
-
32
-
33
-
34
-
35
-
36
-
37
-
38
-
39
-
40
-
41
-
42
-
43
-
44
-
45
-
46
-
47
-
48
-
49
-
50
-
51
-
52
-
53
-
 54
54 -
 55
55 -
 56
56 -
 57
57 -
 58
58 -
 59
59 -
 60
60 -
 61
61 -
 62
62 -
 63
63 -
 64
64 -
65
-
66
-
67
-
68
-
69
-
70
-
71
-
72
-
73
-
74
-
75
-
76
-
77
-
78
-
79
-
80
-
81
-
82
-
83
-
84
-
85
-
86
-
87
-
88
-
89
-
90
-
91
-
92
-
93
-
94
-
95
-
96
-
97
-
98
-
99
-
100
-
101
-
102
-
103
-
104
-
105
-
106
-
107
-
108
-
109
-
110
-
111
-
112
-
113
-
114
-
115
-
116
-
117
-
118
-
119
-
120
-
121
-
122
-
123
-
124
-
125
-
126
-
127
-
128
-
129
-
130
-
131
-
132
-
133
-
134
-
135
 |
 |