Epson Stylus Pro 10000 - Photographic Dye Ink User Manual - Page 21
Charging takes about 4 minutes. Do not turn off the printer or interrupt
 |
View all Epson Stylus Pro 10000 - Photographic Dye Ink manuals
Add to My Manuals
Save this manual to your list of manuals |
Page 21 highlights
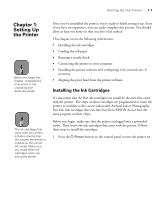
Setting Up the Printer | 1-3 Warning 5. Hold the cartridge so the arrow mark on the left side of the cartridge is pointing to the rear of the printer. Insert the cartridge into the slot. Don't force it. If ink gets on your hands, wash them thoroughly with soap and water. If ink gets in your eyes, flush them immediately with water. Note 6. Push the clamp back up into the locked position. If you can't insert the cartridge smoothly, you may have the wrong cartridge. Caution Never turn off the printer, change the position of the paper set lever, or open the lower cover or ink compartment cover while the Pause light is flashing. 7. Repeat steps 3 through 6 for the other ink cartridges. When you're done, close the ink compartment cover. The printer begins charging the advanced ink delivery system. The Pause light on the control panel flashes and the printer makes various sounds. Charging takes about 4 minutes. Do not turn off the printer or interrupt this important process or you'll use up more ink than necessary. When the Pause light stops flashing and Paper Out appears on the control panel display, you're ready to load the roll paper. 1-3
-
 1
1 -
2
-
3
-
4
-
5
-
6
-
7
-
8
-
9
-
10
-
11
-
12
-
13
-
14
-
15
-
 16
16 -
 17
17 -
 18
18 -
 19
19 -
 20
20 -
 21
21 -
 22
22 -
 23
23 -
 24
24 -
 25
25 -
 26
26 -
27
-
28
-
29
-
30
-
31
-
32
-
33
-
34
-
35
-
36
-
37
-
38
-
39
-
40
-
41
-
42
-
43
-
44
-
45
-
46
-
47
-
48
-
49
-
50
-
51
-
52
-
53
-
54
-
55
-
56
-
57
-
58
-
59
-
60
-
61
-
62
-
63
-
64
-
65
-
66
-
67
-
68
-
69
-
70
-
71
-
72
-
73
-
74
-
75
-
76
-
77
-
78
-
79
-
80
-
81
-
82
-
83
-
84
-
85
-
86
-
87
-
88
-
89
-
90
-
91
-
92
-
93
-
94
-
95
-
96
-
97
-
98
-
99
-
100
-
101
-
102
-
103
-
104
-
105
-
106
-
107
-
108
-
109
-
110
-
111
-
112
-
113
-
114
-
115
-
116
-
117
-
118
-
119
-
120
-
121
-
122
-
123
-
124
-
125
-
126
-
127
-
128
-
129
-
130
-
131
-
132
-
133
-
134
-
135
-
136
-
137
-
138
-
139
-
140
-
141
-
142
-
143
-
144
-
145
-
146
-
147
-
148
-
149
-
150
-
151
-
152
-
153
-
154
-
155
-
156
-
157
-
158
-
159
-
160
-
161
-
162
-
163
-
164
-
165
-
166
-
167
-
168
 |
 |
