Epson Stylus Pro 10000 - Photographic Dye Ink User Manual - Page 35
Setting Up on a Macintosh Network
 |
View all Epson Stylus Pro 10000 - Photographic Dye Ink manuals
Add to My Manuals
Save this manual to your list of manuals |
Page 35 highlights
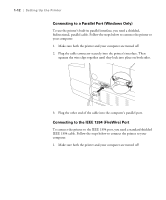
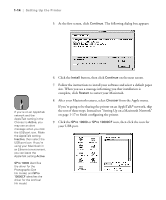
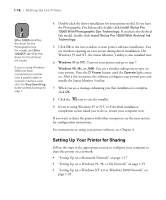
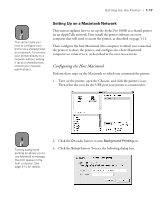
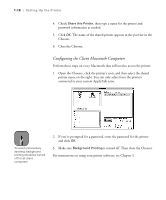
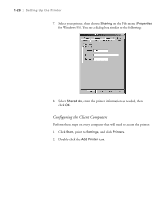
Setting Up the Printer | 1-17 Note This section tells you how to configure your printer as a shared printer on a network. To connect your printer directly to a network without setting it up as a shared printer, consult your network administrator. Setting Up on a Macintosh Network This section explains how to set up the Stylus Pro 10000 as a shared printer on an AppleTalk network. First install the printer software on every computer that will need to access the printer, as described on page 1-13. Then configure the host Macintosh (the computer to which you connected the printer) to share the printer, and configure the client Macintosh computers to connect to it, as described in the next two sections. Configuring the Host Macintosh Perform these steps on the Macintosh to which you connected the printer: 1. Turn on the printer, open the Chooser, and click the printer's icon. Then select the icon for the USB port your printer is connected to. Note Turning background printing on allows you to use Monitor3 to manage the print queue on the host computer. See page 3-14 for details. 2. Click the On radio button to turn Background Printing on. 3. Click the Setup button. You see the following dialog box. 1-17
-
 1
1 -
2
-
3
-
4
-
5
-
6
-
7
-
8
-
9
-
10
-
11
-
12
-
13
-
14
-
15
-
16
-
17
-
18
-
19
-
20
-
21
-
22
-
23
-
24
-
25
-
26
-
27
-
28
-
29
-
 30
30 -
 31
31 -
 32
32 -
 33
33 -
 34
34 -
 35
35 -
 36
36 -
 37
37 -
 38
38 -
 39
39 -
 40
40 -
41
-
42
-
43
-
44
-
45
-
46
-
47
-
48
-
49
-
50
-
51
-
52
-
53
-
54
-
55
-
56
-
57
-
58
-
59
-
60
-
61
-
62
-
63
-
64
-
65
-
66
-
67
-
68
-
69
-
70
-
71
-
72
-
73
-
74
-
75
-
76
-
77
-
78
-
79
-
80
-
81
-
82
-
83
-
84
-
85
-
86
-
87
-
88
-
89
-
90
-
91
-
92
-
93
-
94
-
95
-
96
-
97
-
98
-
99
-
100
-
101
-
102
-
103
-
104
-
105
-
106
-
107
-
108
-
109
-
110
-
111
-
112
-
113
-
114
-
115
-
116
-
117
-
118
-
119
-
120
-
121
-
122
-
123
-
124
-
125
-
126
-
127
-
128
-
129
-
130
-
131
-
132
-
133
-
134
-
135
-
136
-
137
-
138
-
139
-
140
-
141
-
142
-
143
-
144
-
145
-
146
-
147
-
148
-
149
-
150
-
151
-
152
-
153
-
154
-
155
-
156
-
157
-
158
-
159
-
160
-
161
-
162
-
163
-
164
-
165
-
166
-
167
-
168
 |
 |
