Epson Stylus Pro 10000 - Photographic Dye Ink User Manual - Page 32
If you're going to be sharing the printer on an AppleTalk, from the Apple menu.
 |
View all Epson Stylus Pro 10000 - Photographic Dye Ink manuals
Add to My Manuals
Save this manual to your list of manuals |
Page 32 highlights
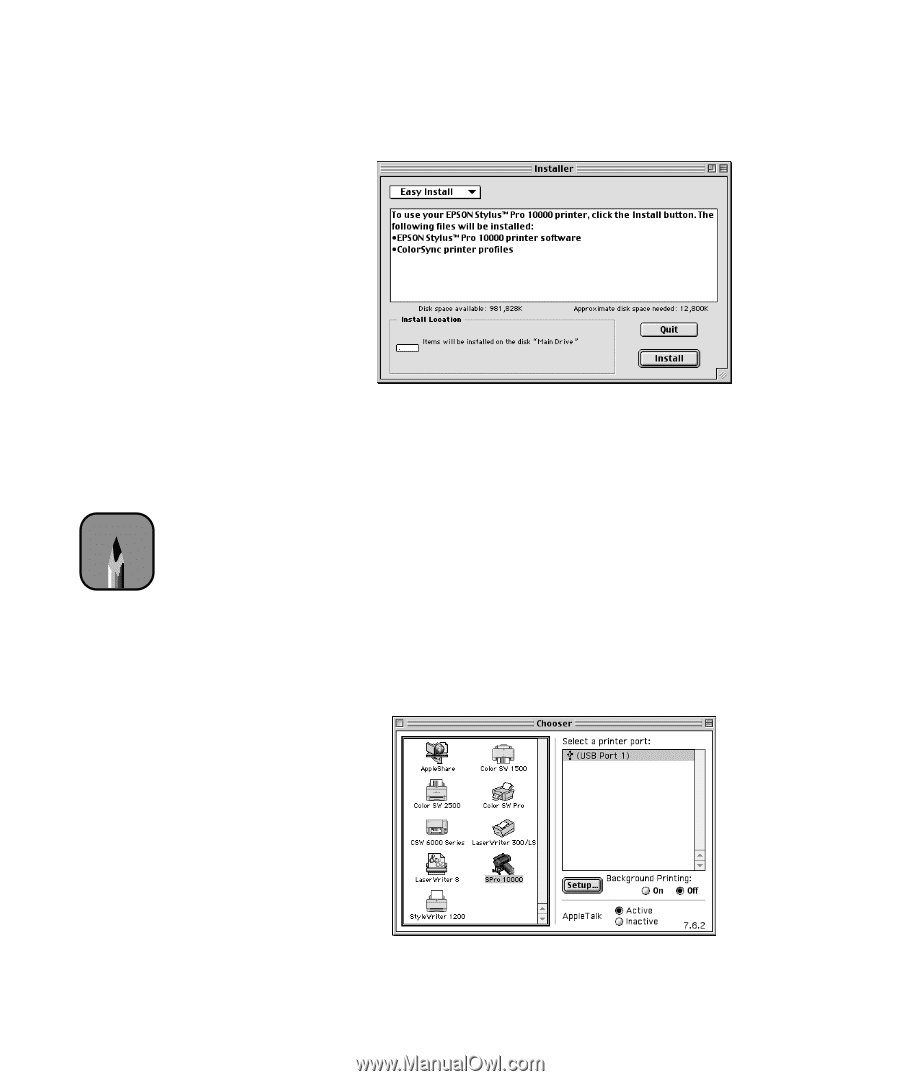
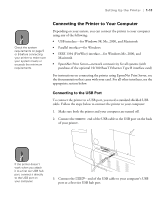
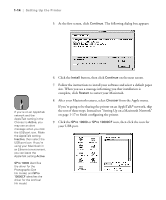
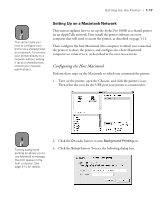
1-14 | Setting Up the Printer 5. At the first screen, click Continue. The following dialog box appears: Note If you're on an AppleTalk network and the AppleTalk setting in the Chooser is Active, you may see an alert message when you click the USB port icon. Make the AppleTalk setting Inactive, then select the USB port icon. If you're using your Macintosh in an Ethernet environment, you can leave the AppleTalk setting Active. SPro 10000 identifies the driver for the Photographic Dye Ink model, and SPro 10000CF identifies the driver for the Archival Ink model. 6. Click the Install button, then click Continue on the next screen. 7. Follow the instructions to install your software and select a default paper size. When you see a message informing you that installation is complete, click Restart to restart your Macintosh. 8. After your Macintosh restarts, select Chooser from the Apple menu. If you're going to be sharing the printer on an AppleTalk® network, skip the rest of these steps. Instead see "Setting Up on a Macintosh Network" on page 1-17 to finish configuring the printer. 9. Click the SPro 10000 or SPro 10000CF icon, then click the icon for your USB port. 1-14
-
 1
1 -
2
-
3
-
4
-
5
-
6
-
7
-
8
-
9
-
10
-
11
-
12
-
13
-
14
-
15
-
16
-
17
-
18
-
19
-
20
-
21
-
22
-
23
-
24
-
25
-
26
-
 27
27 -
 28
28 -
 29
29 -
 30
30 -
 31
31 -
 32
32 -
 33
33 -
 34
34 -
 35
35 -
 36
36 -
 37
37 -
38
-
39
-
40
-
41
-
42
-
43
-
44
-
45
-
46
-
47
-
48
-
49
-
50
-
51
-
52
-
53
-
54
-
55
-
56
-
57
-
58
-
59
-
60
-
61
-
62
-
63
-
64
-
65
-
66
-
67
-
68
-
69
-
70
-
71
-
72
-
73
-
74
-
75
-
76
-
77
-
78
-
79
-
80
-
81
-
82
-
83
-
84
-
85
-
86
-
87
-
88
-
89
-
90
-
91
-
92
-
93
-
94
-
95
-
96
-
97
-
98
-
99
-
100
-
101
-
102
-
103
-
104
-
105
-
106
-
107
-
108
-
109
-
110
-
111
-
112
-
113
-
114
-
115
-
116
-
117
-
118
-
119
-
120
-
121
-
122
-
123
-
124
-
125
-
126
-
127
-
128
-
129
-
130
-
131
-
132
-
133
-
134
-
135
-
136
-
137
-
138
-
139
-
140
-
141
-
142
-
143
-
144
-
145
-
146
-
147
-
148
-
149
-
150
-
151
-
152
-
153
-
154
-
155
-
156
-
157
-
158
-
159
-
160
-
161
-
162
-
163
-
164
-
165
-
166
-
167
-
168
 |
 |