Epson Stylus Pro 10000 - Photographic Dye Ink User Manual - Page 37
Setting Up on a Windows 95
 |
View all Epson Stylus Pro 10000 - Photographic Dye Ink manuals
Add to My Manuals
Save this manual to your list of manuals |
Page 37 highlights
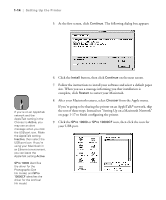
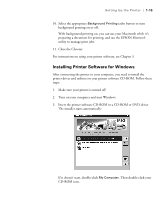
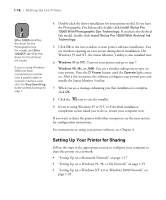
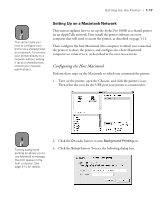
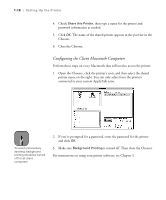
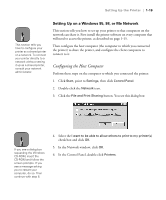
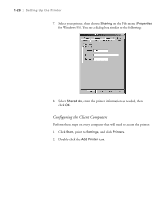
Setting Up the Printer | 1-19 Note This section tells you how to configure your printer as a shared printer on a network. To connect your printer directly to a network without setting it up as a shared printer, consult your network administrator. Setting Up on a Windows 95, 98, or Me Network This section tells you how to set up your printer so that computers on the network can share it. First install the printer software on every computer that will need to access the printer, as described on page 1-15. Then configure the host computer (the computer to which you connected the printer) to share the printer, and configure the client computers to connect to it. Configuring the Host Computer Perform these steps on the computer to which you connected the printer: 1. Click Start, point to Settings, then click Control Panel. 2. Double-click the Network icon. 3. Click the File and Print Sharing button. You see this dialog box: Note If you see a dialog box requesting the Windows CD-ROM, insert the CD-ROM and follow the screen prompts. If you see a message asking you to restart your computer, do so. Then continue with step 6. 4. Select the I want to be able to allow others to print to my printer(s) check box and click OK. 5. In the Network window, click OK. 6. In the Control Panel, double-click Printers. 1-19
-
 1
1 -
2
-
3
-
4
-
5
-
6
-
7
-
8
-
9
-
10
-
11
-
12
-
13
-
14
-
15
-
16
-
17
-
18
-
19
-
20
-
21
-
22
-
23
-
24
-
25
-
26
-
27
-
28
-
29
-
30
-
31
-
 32
32 -
 33
33 -
 34
34 -
 35
35 -
 36
36 -
 37
37 -
 38
38 -
 39
39 -
 40
40 -
 41
41 -
 42
42 -
43
-
44
-
45
-
46
-
47
-
48
-
49
-
50
-
51
-
52
-
53
-
54
-
55
-
56
-
57
-
58
-
59
-
60
-
61
-
62
-
63
-
64
-
65
-
66
-
67
-
68
-
69
-
70
-
71
-
72
-
73
-
74
-
75
-
76
-
77
-
78
-
79
-
80
-
81
-
82
-
83
-
84
-
85
-
86
-
87
-
88
-
89
-
90
-
91
-
92
-
93
-
94
-
95
-
96
-
97
-
98
-
99
-
100
-
101
-
102
-
103
-
104
-
105
-
106
-
107
-
108
-
109
-
110
-
111
-
112
-
113
-
114
-
115
-
116
-
117
-
118
-
119
-
120
-
121
-
122
-
123
-
124
-
125
-
126
-
127
-
128
-
129
-
130
-
131
-
132
-
133
-
134
-
135
-
136
-
137
-
138
-
139
-
140
-
141
-
142
-
143
-
144
-
145
-
146
-
147
-
148
-
149
-
150
-
151
-
152
-
153
-
154
-
155
-
156
-
157
-
158
-
159
-
160
-
161
-
162
-
163
-
164
-
165
-
166
-
167
-
168
 |
 |
