HP Jornada 680 HP Jornada 600 Series Handheld PC - (English) User's Guide - Page 51
Migrating data from non²Windows CE palmtops
 |
View all HP Jornada 680 manuals
Add to My Manuals
Save this manual to your list of manuals |
Page 51 highlights
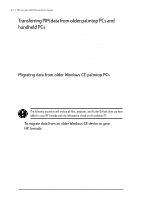
Chapter 3 | Connecting to your desktop PC | 45 4. Note the Communications, Owner, and World Clock alarm settings on your palmtop PC. Also note Options and User Preferences settings for third-party programs. (These settings are not restored automatically.) 5. Disconnect the palmtop PC. 6. If H/PC Explorer version 1.0 is set up on your desktop, uninstall it using the Remove Programs control panel. (For more information, refer to online Help on your desktop PC.) 7. Insert the Desktop Software for Microsoft Windows CE compact disc that came with your HP Jornada and set up Windows CE Services 2.2. (For more information, see the Installing Windows CE Services section in this chapter.) 8. Connect your HP Jornada to the desktop PC. 9. On your desktop PC, in the New Mobile Device Detected dialog box, click Restore to restore data to your HP Jornada from the backup file created in step 3. 10. Disconnect the sync cable from your HP Jornada or remove your device from the docking cradle, and then press the reset button on your HP Jornada to complete the restoration operation. 11. Reconnect the sync cable to your HP Jornada or place it in the docking cradle to reconnect to the desktop PC. In the New Mobile Device Detected dialog box, click Synchronize to establish a partnership and synchronize your data. Migrating data from non–Windows CE palmtops If your data is stored on an HP 100/200LX Palmtop PC or an HP OmniGo Organizer, you must first transfer the data to your desktop PC. Use the Hewlett-Packard PIM Translation Utility (for HP devices only) to import the data into Schedule+ 7.0a on your desktop PC. After you have imported the data into Schedule+, you can update the information on your HP Jornada by synchronizing with Schedule+ using Windows CE Services 2.2. The HP PIM Translation Utility is available on the HP Jornada Handheld PC compact disc included with your HP Jornada. This procedure migrates only Phone Book and Appointment Book data.
-
 1
1 -
2
-
3
-
4
-
5
-
6
-
7
-
8
-
9
-
10
-
11
-
12
-
13
-
14
-
15
-
16
-
17
-
18
-
19
-
20
-
21
-
22
-
23
-
24
-
25
-
26
-
27
-
28
-
29
-
30
-
31
-
32
-
33
-
34
-
35
-
36
-
37
-
38
-
39
-
40
-
41
-
42
-
43
-
44
-
45
-
 46
46 -
 47
47 -
 48
48 -
 49
49 -
 50
50 -
 51
51 -
 52
52 -
 53
53 -
 54
54 -
 55
55 -
 56
56 -
57
-
58
-
59
-
60
-
61
-
62
-
63
-
64
-
65
-
66
-
67
-
68
-
69
-
70
-
71
-
72
-
73
-
74
-
75
-
76
-
77
-
78
-
79
-
80
-
81
-
82
-
83
-
84
-
85
-
86
-
87
-
88
-
89
-
90
-
91
-
92
-
93
-
94
-
95
-
96
-
97
-
98
-
99
-
100
-
101
-
102
-
103
-
104
-
105
-
106
-
107
-
108
-
109
-
110
-
111
-
112
-
113
-
114
-
115
-
116
-
117
-
118
-
119
-
120
-
121
-
122
-
123
-
124
-
125
-
126
-
127
-
128
-
129
-
130
-
131
-
132
-
133
-
134
-
135
-
136
-
137
-
138
-
139
-
140
-
141
-
142
-
143
-
144
-
145
-
146
-
147
-
148
-
149
-
150
-
151
-
152
-
153
-
154
-
155
-
156
-
157
-
158
-
159
-
160
-
161
-
162
-
163
-
164
-
165
-
166
-
167
-
168
-
169
-
170
 |
 |