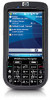
HP iPAQ 614c HP iPAQ 600 Business Navigator Series - Product Guide - Page 3

Table of contents - business navigator

Page 3 highlights

Table of contents 1 Register your HP iPAQ 2 Box contents 3 Components Front panel components ...3 Top and bottom panel components ...4 Left and right panel components ...5 Back panel components ...6 4 Set up your HP iPAQ Step 1: Remove the battery cover and insert the SIM card 7 Step 2: Install the battery and replace the battery cover 8 Step 3: Charge the battery ...9 Step 4: Turn on your HP iPAQ ...9 Find the serial and model number ...9 Status icons ...10 5 Learn the basics The Today screen ...12 Enter text ...12 Customize your HP iPAQ ...14 Device name ...14 Enter owner information ...14 Change the regional settings 14 Adjust the volume ...15 Change the power management settings 15 Dim or adjust the brightness of the backlight 15 Install and remove programs 16 Open and close programs 16 Set alarms and clocks ...17 Shortcut menus ...17 Display the clock in the title bar 17 Create and assign a category 17 Adjust the speed for scrolling through items in a list 18 View the Operating System (OS) information 18 Lock and unlock your HP iPAQ ...18 Battery saving tips ...19 6 Use your Business Navigator Use the keypad ...20 3-Way Thumb-Wheel ...20 iii

  • 1
  • 2
  • 3
  • 4
  • 5
  • 6
  • 7
  • 8
  • 9
  • 10
  • 11
  • 12
  • 13
  • 14
  • 15
  • 16
  • 17
  • 18
  • 19
  • 20
  • 21
  • 22
  • 23
  • 24
  • 25
  • 26
  • 27
  • 28
  • 29
  • 30
  • 31
  • 32
  • 33
  • 34
  • 35
  • 36
  • 37
  • 38
  • 39
  • 40
  • 41
  • 42
  • 43
  • 44
  • 45
  • 46
  • 47
  • 48
  • 49
  • 50
  • 51
  • 52
  • 53
  • 54
  • 55
  • 56
  • 57
  • 58
  • 59
  • 60
  • 61
  • 62
  • 63
  • 64
  • 65
  • 66
  • 67
  • 68
  • 69
  • 70
  • 71
  • 72
  • 73
  • 74
  • 75
  • 76
  • 77
  • 78
  • 79
  • 80
  • 81
  • 82
  • 83
  • 84
  • 85
  • 86
  • 87
  • 88
  • 89
  • 90
  • 91
  • 92
  • 93
  • 94
  • 95
  • 96
  • 97
  • 98
  • 99
  • 100
  • 101
  • 102
  • 103
  • 104
  • 105
  • 106
  • 107
  • 108
  • 109
  • 110
  • 111
  • 112
  • 113
  • 114
  • 115
  • 116
  • 117
  • 118
  • 119
  • 120
  • 121
  • 122
  • 123
  • 124
  • 125
  • 126
  • 127
  • 128
  • 129
  • 130
  • 131
  • 132
  • 133
  • 134
  • 135
  • 136
  • 137

Table of contents
1
Register your HP iPAQ
2
Box contents
3
Components
Front panel components
.......................................................................................................................
3
Top and bottom panel components
......................................................................................................
4
Left and right panel components
..........................................................................................................
5
Back panel components
.......................................................................................................................
6
4
Set up your HP iPAQ
Step 1: Remove the battery cover and insert the SIM card
..................................................................
7
Step 2: Install the battery and replace the battery cover
......................................................................
8
Step 3: Charge the battery
...................................................................................................................
9
Step 4: Turn on your HP iPAQ
.............................................................................................................
9
Find the serial and model number
........................................................................................................
9
Status icons
........................................................................................................................................
10
5
Learn the basics
The Today screen
..............................................................................................................................
12
Enter text
............................................................................................................................................
12
Customize your HP iPAQ
...................................................................................................................
14
Device name
......................................................................................................................
14
Enter owner information
.....................................................................................................
14
Change the regional settings
.............................................................................................
14
Adjust the volume
..............................................................................................................
15
Change the power management settings
..........................................................................
15
Dim or adjust the brightness of the backlight
.....................................................................
15
Install and remove programs
.............................................................................................
16
Open and close programs
.................................................................................................
16
Set alarms and clocks
........................................................................................................
17
Shortcut menus
..................................................................................................................
17
Display the clock in the title bar
.........................................................................................
17
Create and assign a category
............................................................................................
17
Adjust the speed for scrolling through items in a list
..........................................................
18
View the Operating System (OS) information
....................................................................................
18
Lock and unlock your HP iPAQ
..........................................................................................................
18
Battery saving tips
..............................................................................................................................
19
6
Use your Business Navigator
Use the keypad
..................................................................................................................................
20
3-Way Thumb-Wheel
.........................................................................................................................
20
iii