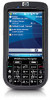
HP iPAQ 614c HP iPAQ 600 Business Navigator Series - Product Guide - Page 46
Basic settings, Photo settings, Video recorder, Record videos
 |
View all HP iPAQ 614c manuals
Add to My Manuals
Save this manual to your list of manuals |
Page 46 highlights
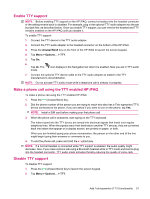
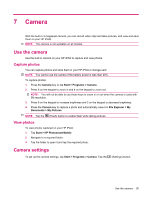
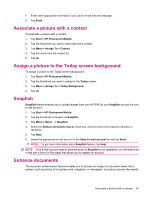
Basic settings You can set basic options for the camera. The settings on the Basic tab can be applied while taking photos and also while recording video clips. ● Enable Shutter Sound - Select this option to enable the shutter sound while clicking photos. ● Photo File Prefix - Specify a prefix name for the photos you click. ● Video File Prefix - Specify a prefix name for the video clips you record. ● Save file to - Specify a location on your HP iPAQ where you want to store your images and videos. You can use additional features, such as White Balance, Effect, Contrast, Brightness, Hue, Saturation, Flicker, and Sharpness. to enhance the appearance of your photos or videos. Photo settings Tap the Photo tab, to configure the required settings for capturing photos. ● Capture Mode - Enables you to change the mode for capturing photos. ◦ Normal - Align the focus rectangle with your object and press the Camera key located on the right-hand side of your HP iPAQ. When the focus rectangle turns green, press the Camera key again to capture the photo. NOTE: This is the default mode for capturing photos. ◦ Timer - Use this mode to capture self portraits. After you press the Camera key, a time delay of 10 seconds will be displayed in the focus rectangle. ◦ Burst - Use this mode to capture a set of 5 photos by pressing and holding the Camera key. ◦ Panorama horizontal - Use this mode to create horizontal panoramic images, such as vast landscapes and city skylines. Press the Camera key to shoot the leftmost photo first. When shooting the next photo, 1/3 of the previous photo is displayed on the left side of the screen. This helps match the previous photo when capturing the next photo. After capturing all photos, tap to stitch them. ◦ Panorama vertical - Use this mode to create vertical panoramic images, such as monuments and tall structures. Press the Camera key to shoot the top photo first. When shooting the next photo, 1/3 of the previous photo is displayed on the top of the screen. This helps match the previous photo when capturing the next photo. After capturing all photos, tap to stitch them. ● Resolution - Select a resolution for your photos from the available options:QVGA - 320 X 240, VGA - 640 X 480, 1M - 1280 X 960, 1.3M - 1280 X 1024, 2M - 1600 X 1200, and 3M - 2048 X 1536. ● Photo Quality: Select the quality of the photo as Low, Normal, or High. Video recorder Record videos You can use the built-in camcorder on your HP iPAQ to create short videos and share them with your friends and family. 36 Chapter 7 Camera
-
 1
1 -
2
-
3
-
4
-
5
-
6
-
7
-
8
-
9
-
10
-
11
-
12
-
13
-
14
-
15
-
16
-
17
-
18
-
19
-
20
-
21
-
22
-
23
-
24
-
25
-
26
-
27
-
28
-
29
-
30
-
31
-
32
-
33
-
34
-
35
-
36
-
37
-
38
-
39
-
40
-
 41
41 -
 42
42 -
 43
43 -
 44
44 -
 45
45 -
 46
46 -
 47
47 -
 48
48 -
 49
49 -
 50
50 -
 51
51 -
52
-
53
-
54
-
55
-
56
-
57
-
58
-
59
-
60
-
61
-
62
-
63
-
64
-
65
-
66
-
67
-
68
-
69
-
70
-
71
-
72
-
73
-
74
-
75
-
76
-
77
-
78
-
79
-
80
-
81
-
82
-
83
-
84
-
85
-
86
-
87
-
88
-
89
-
90
-
91
-
92
-
93
-
94
-
95
-
96
-
97
-
98
-
99
-
100
-
101
-
102
-
103
-
104
-
105
-
106
-
107
-
108
-
109
-
110
-
111
-
112
-
113
-
114
-
115
-
116
-
117
-
118
-
119
-
120
-
121
-
122
-
123
-
124
-
125
-
126
-
127
-
128
-
129
-
130
-
131
-
132
-
133
-
134
-
135
-
136
-
137
 |
 |