IBM 8669 Hardware Maintenance Manual - Page 26
Viewing the test log, Diagnostic error message tables, Recovering BIOS code, Utility, View Test Log
 |
UPC - 087944636496
View all IBM 8669 manuals
Add to My Manuals
Save this manual to your list of manuals |
Page 26 highlights
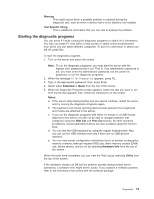
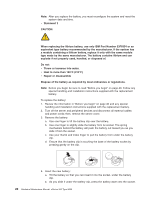
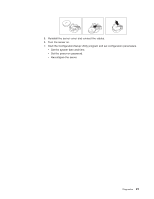
Viewing the test log The test log will not contain any information until after the diagnostic program has run. Note: If you already are running the diagnostic programs, begin with step 3 To view the test log: 1. Turn on the server and watch the screen. If the server is on, shut down the operating system and restart the server. 2. When the message F2 for Diagnostics appears, press F2. If a power-on password or administrator password is set, the server prompts you for it. Type in the appropriate password; then, press Enter. 3. When the Diagnostic Programs screen appears, select Utility from the top of the screen. 4. Select View Test Log from the list that appears; then, follow the instructions on the screen. The system maintains the test-log data while the server is powered on. When you turn off the power to the server, the test log is cleared. Diagnostic error message tables For descriptions of the error messages that might appear when you run the diagnostic programs, see "Diagnostic error codes" on page 87. Attention: If diagnostic error messages appear that are not listed in the tables, make sure that the server has the latest levels of BIOS, Integrated System Management Processor, ServeRAID, and diagnostics microcode installed. Recovering BIOS code If the BIOS code has become damaged, such as from a power failure during a flash update, you can recover the BIOS using the recovery boot block and a BIOS flash diskette. Note: You can obtain a BIOS flash diskette from one of the following sources: v Use the ServerGuide program to make a BIOS flash diskette. v Download a BIOS flash diskette from the World Wide Web. Go to http://www.ibm.com/pc/support/ and make the appropriate selections. The flash memory of the server contains a protected area that cannot be overwritten. The recovery boot block is a section of code in this protected area that enables the server to start up and to read a flash diskette. The flash utility recovers the system BIOS from the BIOS recovery files on the diskette. To recover the BIOS: 1. Turn off the server and peripheral devices and disconnect all external cables and power cords; then, remove the cover. 2. Locate the boot-block jumper block (J16) on the system board. 3. Place a jumper on pins 2 and 3 to enable BIOS backup page. 4. Insert the BIOS flash diskette into the diskette drive. 5. Restart the server. 16 Hardware Maintenance Manual: xSeries 342 Type 8669
-
 1
1 -
2
-
3
-
4
-
5
-
6
-
7
-
8
-
9
-
10
-
11
-
12
-
13
-
14
-
15
-
16
-
17
-
18
-
19
-
20
-
 21
21 -
 22
22 -
 23
23 -
 24
24 -
 25
25 -
 26
26 -
 27
27 -
 28
28 -
 29
29 -
 30
30 -
 31
31 -
32
-
33
-
34
-
35
-
36
-
37
-
38
-
39
-
40
-
41
-
42
-
43
-
44
-
45
-
46
-
47
-
48
-
49
-
50
-
51
-
52
-
53
-
54
-
55
-
56
-
57
-
58
-
59
-
60
-
61
-
62
-
63
-
64
-
65
-
66
-
67
-
68
-
69
-
70
-
71
-
72
-
73
-
74
-
75
-
76
-
77
-
78
-
79
-
80
-
81
-
82
-
83
-
84
-
85
-
86
-
87
-
88
-
89
-
90
-
91
-
92
-
93
-
94
-
95
-
96
-
97
-
98
-
99
-
100
-
101
-
102
-
103
-
104
-
105
-
106
-
107
-
108
-
109
-
110
-
111
-
112
-
113
-
114
-
115
-
116
-
117
-
118
-
119
-
120
-
121
-
122
-
123
-
124
-
125
-
126
-
127
-
128
-
129
-
130
-
131
-
132
-
133
-
134
-
135
-
136
-
137
-
138
-
139
-
140
-
141
-
142
-
143
-
144
-
145
-
146
-
147
-
148
-
149
-
150
-
151
-
152
-
153
-
154
-
155
-
156
 |
 |
