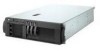
IBM 8669 Hardware Maintenance Manual - Page 63
Microprocessor installation
 |
UPC - 087944636496
View all IBM 8669 manuals
Add to My Manuals
Save this manual to your list of manuals |
Page 63 highlights
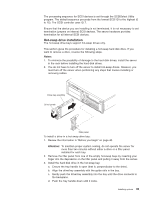
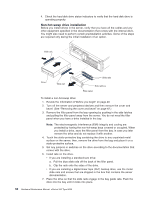
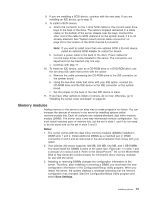
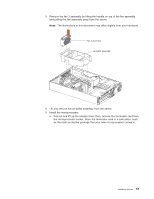
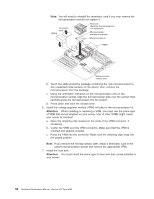
a. Turn the DIMM so that the pins align correctly with the connector. DIMM (second pair) b. Insert the DIMM into the connector by pressing on one edge of the DIMM and then the other edge of the DIMM. Be sure to press straight into the connector. Be sure that the retaining clips snap into the closed position. c. Make sure the retaining clips are in the closed position. If a gap exists between the DIMM and the retaining clips, the DIMM has not been properly installed. In this case, open the retaining clips and remove the DIMM; then, reinsert the DIMM. d. Repeat steps 5a through 5c for the second DIMM; then continue with step 6. 6. If you have other options to install or remove, do so now; otherwise, go to "Installing the server cover and bezel" on page 64. Microprocessor installation The server comes with one microprocessor installed on the system board. If you install an additional microprocessor, the server can operate as a symmetric multiprocessing (SMP) server. With SMP, certain operating systems and application programs can distribute the processing load between the microprocessors. Notes: 1. Before you install a new microprocessor, review the documentation that comes with the microprocessor, so that you can determine whether you need to update the server basic input/output system (BIOS). The latest level of BIOS for the server is available through the World Wide Web. 2. Obtain an SMP-capable operating system (optional). For a list of supported operating systems, see http://www.ibm.com/pc/us/compat/ on the World Wide Web. Installing options 53
-
 1
1 -
2
-
3
-
4
-
5
-
6
-
7
-
8
-
9
-
10
-
11
-
12
-
13
-
14
-
15
-
16
-
17
-
18
-
19
-
20
-
21
-
22
-
23
-
24
-
25
-
26
-
27
-
28
-
29
-
30
-
31
-
32
-
33
-
34
-
35
-
36
-
37
-
38
-
39
-
40
-
41
-
42
-
43
-
44
-
45
-
46
-
47
-
48
-
49
-
50
-
51
-
52
-
53
-
54
-
55
-
56
-
57
-
 58
58 -
 59
59 -
 60
60 -
 61
61 -
 62
62 -
 63
63 -
 64
64 -
 65
65 -
 66
66 -
 67
67 -
 68
68 -
69
-
70
-
71
-
72
-
73
-
74
-
75
-
76
-
77
-
78
-
79
-
80
-
81
-
82
-
83
-
84
-
85
-
86
-
87
-
88
-
89
-
90
-
91
-
92
-
93
-
94
-
95
-
96
-
97
-
98
-
99
-
100
-
101
-
102
-
103
-
104
-
105
-
106
-
107
-
108
-
109
-
110
-
111
-
112
-
113
-
114
-
115
-
116
-
117
-
118
-
119
-
120
-
121
-
122
-
123
-
124
-
125
-
126
-
127
-
128
-
129
-
130
-
131
-
132
-
133
-
134
-
135
-
136
-
137
-
138
-
139
-
140
-
141
-
142
-
143
-
144
-
145
-
146
-
147
-
148
-
149
-
150
-
151
-
152
-
153
-
154
-
155
-
156
 |
 |
