Lexmark CX317 User Guide - Page 180
Too many flash options installed [58], Too many trays attached [58], [Type] imaging kit low [84.xy]
 |
View all Lexmark CX317 manuals
Add to My Manuals
Save this manual to your list of manuals |
Page 180 highlights
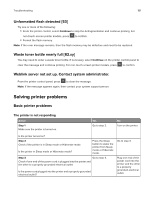
Troubleshooting 180 Too many flash options installed [58] 1 Turn off the printer. 2 Unplug the power cord from the electrical outlet. 3 Remove the extra flash memory. 4 Connect the power cord to a properly grounded electrical outlet. 5 Turn the printer back on. Too many trays attached [58] 1 Turn off the printer. 2 Unplug the power cord from the electrical outlet. 3 Remove the extra trays. 4 Connect the power cord to a properly grounded electrical outlet. 5 Turn the printer back on. [Type] imaging kit low [84.xy] Note: The type can be a black imaging kit, or a black and color imaging kit. You may need to order an imaging kit. If necessary, select Continue on the printer control panel to clear the message and continue printing. For non‑touch‑screen printer models, press to confirm. [Type] imaging kit nearly low [84.xy] Note: The type can be a black imaging kit, or a black and color imaging kit. If necessary, select Continue on the printer control panel to clear the message and continue printing. For non‑touch‑screen printer models, press to confirm. [Type] imaging kit very low, [x] estimated pages remain [84.xy] Note: The type can be a black imaging kit, or a black and color imaging kit. You may need to replace the imaging kit very soon. For more information, see the "Replacing supplies" section of the User's Guide. If necessary, select Continue on the printer control panel to clear the message and continue printing. For non‑touch‑screen printer models, press to confirm.
-
 1
1 -
2
-
3
-
4
-
5
-
6
-
7
-
8
-
9
-
10
-
11
-
12
-
13
-
14
-
15
-
16
-
17
-
18
-
19
-
20
-
21
-
22
-
23
-
24
-
25
-
26
-
27
-
28
-
29
-
30
-
31
-
32
-
33
-
34
-
35
-
36
-
37
-
38
-
39
-
40
-
41
-
42
-
43
-
44
-
45
-
46
-
47
-
48
-
49
-
50
-
51
-
52
-
53
-
54
-
55
-
56
-
57
-
58
-
59
-
60
-
61
-
62
-
63
-
64
-
65
-
66
-
67
-
68
-
69
-
70
-
71
-
72
-
73
-
74
-
75
-
76
-
77
-
78
-
79
-
80
-
81
-
82
-
83
-
84
-
85
-
86
-
87
-
88
-
89
-
90
-
91
-
92
-
93
-
94
-
95
-
96
-
97
-
98
-
99
-
100
-
101
-
102
-
103
-
104
-
105
-
106
-
107
-
108
-
109
-
110
-
111
-
112
-
113
-
114
-
115
-
116
-
117
-
118
-
119
-
120
-
121
-
122
-
123
-
124
-
125
-
126
-
127
-
128
-
129
-
130
-
131
-
132
-
133
-
134
-
135
-
136
-
137
-
138
-
139
-
140
-
141
-
142
-
143
-
144
-
145
-
146
-
147
-
148
-
149
-
150
-
151
-
152
-
153
-
154
-
155
-
156
-
157
-
158
-
159
-
160
-
161
-
162
-
163
-
164
-
165
-
166
-
167
-
168
-
169
-
170
-
171
-
172
-
173
-
174
-
 175
175 -
 176
176 -
 177
177 -
 178
178 -
 179
179 -
 180
180 -
 181
181 -
 182
182 -
 183
183 -
 184
184 -
 185
185 -
186
-
187
-
188
-
189
-
190
-
191
-
192
-
193
-
194
-
195
-
196
-
197
-
198
-
199
-
200
-
201
-
202
-
203
-
204
-
205
-
206
-
207
-
208
-
209
-
210
-
211
-
212
-
213
-
214
-
215
-
216
-
217
-
218
-
219
-
220
-
221
-
222
-
223
-
224
-
225
-
226
-
227
-
228
-
229
-
230
-
231
-
232
-
233
-
234
-
235
-
236
-
237
-
238
-
239
-
240
-
241
-
242
-
243
 |
 |