Lexmark CX317 User Guide - Page 56
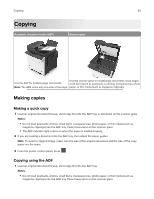
Copying using the scanner glass, Copying photos, Copying on specialty media, Copying on transparencies
 |
View all Lexmark CX317 manuals
Add to My Manuals
Save this manual to your list of manuals |
Page 56 highlights
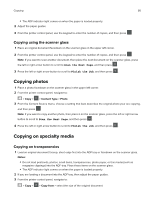
Copying 56 • The ADF indicator light comes on when the paper is loaded properly. 2 Adjust the paper guides. 3 From the printer control panel, use the keypad to enter the number of copies, and then press . Copying using the scanner glass 1 Place an original document facedown on the scanner glass in the upper left corner. 2 From the printer control panel, use the keypad to enter the number of copies, and then press . Note: If you want to scan another document, then place the next document on the scanner glass, press the left or right arrow button to scroll to Scan the Next Page, and then press . 3 Press the left or right arrow button to scroll to Finish the Job, and then press . Copying photos 1 Place a photo facedown on the scanner glass in the upper left corner. 2 From the printer control panel, navigate to: > Copy > > Content Type > Photo 3 From the Content Source menu, choose a setting that best describes the original photo your are copying, and then press . Note: If you want to copy another photo, then place it on the scanner glass, press the left or right arrow button to scroll to Scan the Next Page, and then press . 4 Press the left or right arrow button to scroll to Finish the Job, and then press . Copying on specialty media Copying on transparencies 1 Load an original document faceup, short edge first into the ADF tray or facedown on the scanner glass. Notes: • Do not load postcards, photos, small items, transparencies, photo paper, or thin media (such as magazine clippings) into the ADF tray. Place these items on the scanner glass. • The ADF indicator light comes on when the paper is loaded properly. 2 If you are loading a document into the ADF tray, then adjust the paper guides. 3 From the printer control panel, navigate to: > Copy > > Copy from > select the size of the original document
-
 1
1 -
2
-
3
-
4
-
5
-
6
-
7
-
8
-
9
-
10
-
11
-
12
-
13
-
14
-
15
-
16
-
17
-
18
-
19
-
20
-
21
-
22
-
23
-
24
-
25
-
26
-
27
-
28
-
29
-
30
-
31
-
32
-
33
-
34
-
35
-
36
-
37
-
38
-
39
-
40
-
41
-
42
-
43
-
44
-
45
-
46
-
47
-
48
-
49
-
50
-
 51
51 -
 52
52 -
 53
53 -
 54
54 -
 55
55 -
 56
56 -
 57
57 -
 58
58 -
 59
59 -
 60
60 -
 61
61 -
62
-
63
-
64
-
65
-
66
-
67
-
68
-
69
-
70
-
71
-
72
-
73
-
74
-
75
-
76
-
77
-
78
-
79
-
80
-
81
-
82
-
83
-
84
-
85
-
86
-
87
-
88
-
89
-
90
-
91
-
92
-
93
-
94
-
95
-
96
-
97
-
98
-
99
-
100
-
101
-
102
-
103
-
104
-
105
-
106
-
107
-
108
-
109
-
110
-
111
-
112
-
113
-
114
-
115
-
116
-
117
-
118
-
119
-
120
-
121
-
122
-
123
-
124
-
125
-
126
-
127
-
128
-
129
-
130
-
131
-
132
-
133
-
134
-
135
-
136
-
137
-
138
-
139
-
140
-
141
-
142
-
143
-
144
-
145
-
146
-
147
-
148
-
149
-
150
-
151
-
152
-
153
-
154
-
155
-
156
-
157
-
158
-
159
-
160
-
161
-
162
-
163
-
164
-
165
-
166
-
167
-
168
-
169
-
170
-
171
-
172
-
173
-
174
-
175
-
176
-
177
-
178
-
179
-
180
-
181
-
182
-
183
-
184
-
185
-
186
-
187
-
188
-
189
-
190
-
191
-
192
-
193
-
194
-
195
-
196
-
197
-
198
-
199
-
200
-
201
-
202
-
203
-
204
-
205
-
206
-
207
-
208
-
209
-
210
-
211
-
212
-
213
-
214
-
215
-
216
-
217
-
218
-
219
-
220
-
221
-
222
-
223
-
224
-
225
-
226
-
227
-
228
-
229
-
230
-
231
-
232
-
233
-
234
-
235
-
236
-
237
-
238
-
239
-
240
-
241
-
242
-
243
 |
 |
