Lexmark CX317 User Guide - Page 218
Scan job was not successful, Step 6, Append time stamp, Overwrite existing, file, Append, time stamp
 |
View all Lexmark CX317 manuals
Add to My Manuals
Save this manual to your list of manuals |
Page 218 highlights
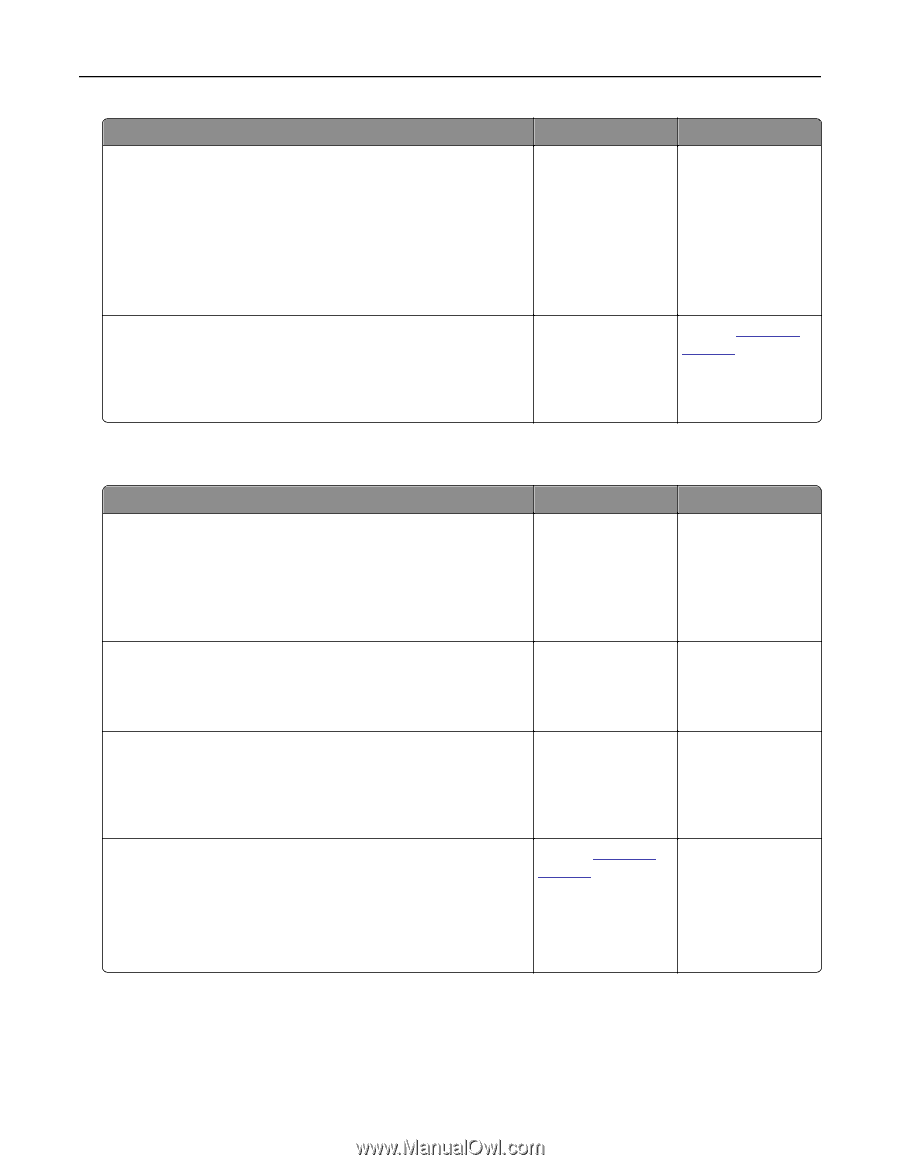
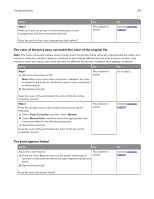
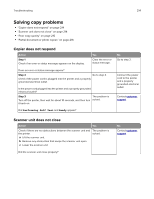
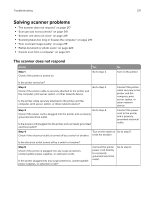
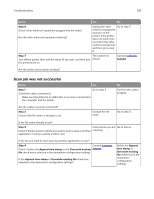
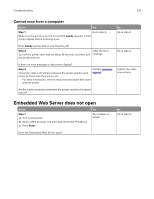
Troubleshooting 218 Action Yes No Step 6 Check other electrical equipment plugged into the outlet. Are the other electrical equipment working? Unplug the other Go to step 7. electrical equipment and turn on the printer. If the printer does not work, then reconnect the other electrical equipment and then go to step 6. Step 7 The problem is Turn off the printer, then wait for about 10 seconds, and then turn solved. the printer back on. Contact customer support. Are the printer and scanner working? Scan job was not successful Action Yes Step 1 Go to step 2. Check the cable connections. Make sure the Ethernet or USB cable is securely connected to the computer and the printer. No Connect the cables properly. Are the cables securely connected? Step 2 Check if the file name is already in use. Change the file name. Go to step 3. Is the file name already in use? Step 3 Close the file you are Go to step 4. Check if the document or photo you want to scan is open in another scanning. application or being used by another user. Is the file you want to scan open by another application or user? Step 4 Contact customer Check if either the Append time stamp or the Overwrite existing support. file check box is selected in the destination configuration settings. Is the Append time stamp or Overwrite existing file check box selected in the destination configuration settings? Select the Append time stamp or Overwrite existing file check box in the destination configuration settings.
-
 1
1 -
2
-
3
-
4
-
5
-
6
-
7
-
8
-
9
-
10
-
11
-
12
-
13
-
14
-
15
-
16
-
17
-
18
-
19
-
20
-
21
-
22
-
23
-
24
-
25
-
26
-
27
-
28
-
29
-
30
-
31
-
32
-
33
-
34
-
35
-
36
-
37
-
38
-
39
-
40
-
41
-
42
-
43
-
44
-
45
-
46
-
47
-
48
-
49
-
50
-
51
-
52
-
53
-
54
-
55
-
56
-
57
-
58
-
59
-
60
-
61
-
62
-
63
-
64
-
65
-
66
-
67
-
68
-
69
-
70
-
71
-
72
-
73
-
74
-
75
-
76
-
77
-
78
-
79
-
80
-
81
-
82
-
83
-
84
-
85
-
86
-
87
-
88
-
89
-
90
-
91
-
92
-
93
-
94
-
95
-
96
-
97
-
98
-
99
-
100
-
101
-
102
-
103
-
104
-
105
-
106
-
107
-
108
-
109
-
110
-
111
-
112
-
113
-
114
-
115
-
116
-
117
-
118
-
119
-
120
-
121
-
122
-
123
-
124
-
125
-
126
-
127
-
128
-
129
-
130
-
131
-
132
-
133
-
134
-
135
-
136
-
137
-
138
-
139
-
140
-
141
-
142
-
143
-
144
-
145
-
146
-
147
-
148
-
149
-
150
-
151
-
152
-
153
-
154
-
155
-
156
-
157
-
158
-
159
-
160
-
161
-
162
-
163
-
164
-
165
-
166
-
167
-
168
-
169
-
170
-
171
-
172
-
173
-
174
-
175
-
176
-
177
-
178
-
179
-
180
-
181
-
182
-
183
-
184
-
185
-
186
-
187
-
188
-
189
-
190
-
191
-
192
-
193
-
194
-
195
-
196
-
197
-
198
-
199
-
200
-
201
-
202
-
203
-
204
-
205
-
206
-
207
-
208
-
209
-
210
-
211
-
212
-
 213
213 -
 214
214 -
 215
215 -
 216
216 -
 217
217 -
 218
218 -
 219
219 -
 220
220 -
 221
221 -
 222
222 -
 223
223 -
224
-
225
-
226
-
227
-
228
-
229
-
230
-
231
-
232
-
233
-
234
-
235
-
236
-
237
-
238
-
239
-
240
-
241
-
242
-
243
 |
 |