Lexmark CX317 User Guide - Page 194
Gray background on prints, Step 2, Warning-Potential Damage
 |
View all Lexmark CX317 manuals
Add to My Manuals
Save this manual to your list of manuals |
Page 194 highlights
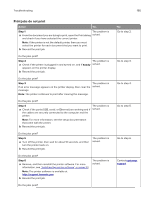
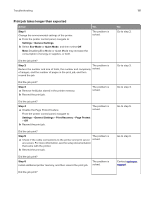
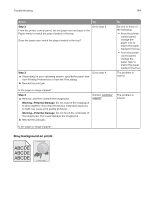
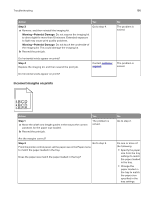
Troubleshooting 194 Action Yes Step 2 Go to step 3. From the printer control panel, set the paper size and type in the Paper menu to match the paper loaded in the tray. Does the paper size match the paper loaded in the tray? Step 3 a Depending on your operating system, specify the paper size from Printing Preferences or from the Print dialog. b Resend the print job. Go to step 4. No Do one or more of the following: • From the printer control panel, change the paper size to match the paper loaded in the tray. • From the printer control panel, change the paper type to match the paper loaded in the tray. The problem is solved. Is the page or image clipped? Step 4 a Remove, and then reinstall the imaging kit. Warning-Potential Damage: Do not expose the imaging kit to direct light for more than 10 minutes. Extended exposure to light may cause print quality problems. Warning-Potential Damage: Do not touch the underside of the imaging kit. This could damage the imaging kit. b Resend the print job. Contact customer support. The problem is solved. Is the page or image clipped? Gray background on prints Leading edge ABCDE ABCDE ABCDE Trailing edge
-
 1
1 -
2
-
3
-
4
-
5
-
6
-
7
-
8
-
9
-
10
-
11
-
12
-
13
-
14
-
15
-
16
-
17
-
18
-
19
-
20
-
21
-
22
-
23
-
24
-
25
-
26
-
27
-
28
-
29
-
30
-
31
-
32
-
33
-
34
-
35
-
36
-
37
-
38
-
39
-
40
-
41
-
42
-
43
-
44
-
45
-
46
-
47
-
48
-
49
-
50
-
51
-
52
-
53
-
54
-
55
-
56
-
57
-
58
-
59
-
60
-
61
-
62
-
63
-
64
-
65
-
66
-
67
-
68
-
69
-
70
-
71
-
72
-
73
-
74
-
75
-
76
-
77
-
78
-
79
-
80
-
81
-
82
-
83
-
84
-
85
-
86
-
87
-
88
-
89
-
90
-
91
-
92
-
93
-
94
-
95
-
96
-
97
-
98
-
99
-
100
-
101
-
102
-
103
-
104
-
105
-
106
-
107
-
108
-
109
-
110
-
111
-
112
-
113
-
114
-
115
-
116
-
117
-
118
-
119
-
120
-
121
-
122
-
123
-
124
-
125
-
126
-
127
-
128
-
129
-
130
-
131
-
132
-
133
-
134
-
135
-
136
-
137
-
138
-
139
-
140
-
141
-
142
-
143
-
144
-
145
-
146
-
147
-
148
-
149
-
150
-
151
-
152
-
153
-
154
-
155
-
156
-
157
-
158
-
159
-
160
-
161
-
162
-
163
-
164
-
165
-
166
-
167
-
168
-
169
-
170
-
171
-
172
-
173
-
174
-
175
-
176
-
177
-
178
-
179
-
180
-
181
-
182
-
183
-
184
-
185
-
186
-
187
-
188
-
 189
189 -
 190
190 -
 191
191 -
 192
192 -
 193
193 -
 194
194 -
 195
195 -
 196
196 -
 197
197 -
 198
198 -
 199
199 -
200
-
201
-
202
-
203
-
204
-
205
-
206
-
207
-
208
-
209
-
210
-
211
-
212
-
213
-
214
-
215
-
216
-
217
-
218
-
219
-
220
-
221
-
222
-
223
-
224
-
225
-
226
-
227
-
228
-
229
-
230
-
231
-
232
-
233
-
234
-
235
-
236
-
237
-
238
-
239
-
240
-
241
-
242
-
243
 |
 |