Lexmark X5450 User's Guide - Page 120
Phone Line Busy, Dialing and Sending
 |
View all Lexmark X5450 manuals
Add to My Manuals
Save this manual to your list of manuals |
Page 120 highlights
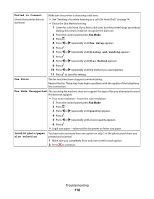
No photo/paper size selection has been made. You have not selected any of the options on step 2 of the photo proof sheet you printed and scanned. 1 Make sure you completely fill in your selected circle or circles. 2 Press to continue. No photo files found No supported images have been found on the memory card or flash drive you inserted. The printer will read photos created using the JPEG format. For more information, see the documentation that came with the digital camera. No proof sheet information. The photo proof sheet you printed and scanned is no longer valid. You may have removed the memory card or flash drive from the printer, or turned off the printer, before scanning the photo proof sheet. For more information, see "Printing photos stored on a memory device using the proof sheet" on page 58. Phone Line Busy (change redial settings) The printer automatically redials three times at 3-minute intervals. You can change the default settings to redial up to five times at intervals up to 8 minutes. To change the redial settings: 1 From the control panel, press Fax Mode. 2 Press . 3 Press or repeatedly until Fax Setup appears. 4 Press . 5 Press or repeatedly until Dialing and Sending appears. 6 Press . 7 Press . 8 To change the number of times the printer will redial: a Press or repeatedly until Redial Attempts appears. b Press . c Press or repeatedly until the setting you want appears. d Press . 9 To change the length of time between redials: a Press or repeatedly until Redial Time appears. b Press . c Press or repeatedly until the setting you want appears. d Press . Phone Line Busy (schedule to resend fax at a later time) See "Sending a broadcast fax at a scheduled time" on page 73. Troubleshooting 120
-
 1
1 -
2
-
3
-
4
-
5
-
6
-
7
-
8
-
9
-
10
-
11
-
12
-
13
-
14
-
15
-
16
-
17
-
18
-
19
-
20
-
21
-
22
-
23
-
24
-
25
-
26
-
27
-
28
-
29
-
30
-
31
-
32
-
33
-
34
-
35
-
36
-
37
-
38
-
39
-
40
-
41
-
42
-
43
-
44
-
45
-
46
-
47
-
48
-
49
-
50
-
51
-
52
-
53
-
54
-
55
-
56
-
57
-
58
-
59
-
60
-
61
-
62
-
63
-
64
-
65
-
66
-
67
-
68
-
69
-
70
-
71
-
72
-
73
-
74
-
75
-
76
-
77
-
78
-
79
-
80
-
81
-
82
-
83
-
84
-
85
-
86
-
87
-
88
-
89
-
90
-
91
-
92
-
93
-
94
-
95
-
96
-
97
-
98
-
99
-
100
-
101
-
102
-
103
-
104
-
105
-
106
-
107
-
108
-
109
-
110
-
111
-
112
-
113
-
114
-
 115
115 -
 116
116 -
 117
117 -
 118
118 -
 119
119 -
 120
120 -
 121
121 -
 122
122 -
 123
123 -
 124
124 -
 125
125 -
126
-
127
-
128
-
129
-
130
-
131
-
132
-
133
-
134
-
135
-
136
-
137
 |
 |