Lexmark X5450 User's Guide - Page 62
Printing photos using the computer, Printing photos stored on a memory device using Fast Pics
 |
View all Lexmark X5450 manuals
Add to My Manuals
Save this manual to your list of manuals |
Page 62 highlights
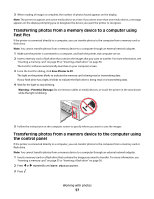
Printing photos using the computer Notes: • To print photos or images from a Web page, see "Printing photos or images from a Web page" on page 51. • To use advanced photo-editing options, see "Using the Photo Editor" on page 39. Printing photos stored on a memory device using Fast Pics 1 Load paper. For best results, use photo or glossy paper with the glossy or printable side facing you. (If you are not sure which side is the printable side, see the instructions that came with the paper.) 2 Insert a memory card or flash drive that contains images you want to print. For more information, see "Inserting a memory card" on page 55 or "Inserting a flash drive" on page 56. The Fast Pics dialog appears. 3 From the dialog that appears, click on each photo that you want to print. 4 Select the size for each photo, the paper size in the printer, and the number of copies. 5 Click Print Now. Printing photos stored on the computer using the Imaging Studio 1 Load photo or heavyweight matte paper with the glossy or printable side facing you. (If you are not sure which side is the printable side, see the instructions that came with the paper.) 2 From the desktop, double-click the Imaging Studio icon. 3 Click Print Photos. 4 Click Change Folders. 5 From the directory, select the folder where your photos are stored. 6 Click OK. 7 From the dialog that appears, click each photo that you want to print. 8 Select the size for each photo, the paper size in the printer, and the number of copies. 9 Click Print Now. Creating and printing a scrapbook or album page 1 Load paper. For best results, use photo or heavyweight matte paper, with the glossy or printable side facing you. (If you are not sure which side is the printable side, see the instructions that came with the paper.) 2 From the desktop, double-click the Imaging Studio icon. 3 Click Print Album Page. 4 Click Show Folders. 5 From the directory in the right panel, select the folder where your photos are stored. 6 Close the directory in the right panel. 7 From the Paper Size drop-down menu, select a paper size. Working with photos 62
-
 1
1 -
2
-
3
-
4
-
5
-
6
-
7
-
8
-
9
-
10
-
11
-
12
-
13
-
14
-
15
-
16
-
17
-
18
-
19
-
20
-
21
-
22
-
23
-
24
-
25
-
26
-
27
-
28
-
29
-
30
-
31
-
32
-
33
-
34
-
35
-
36
-
37
-
38
-
39
-
40
-
41
-
42
-
43
-
44
-
45
-
46
-
47
-
48
-
49
-
50
-
51
-
52
-
53
-
54
-
55
-
56
-
 57
57 -
 58
58 -
 59
59 -
 60
60 -
 61
61 -
 62
62 -
 63
63 -
 64
64 -
 65
65 -
 66
66 -
 67
67 -
68
-
69
-
70
-
71
-
72
-
73
-
74
-
75
-
76
-
77
-
78
-
79
-
80
-
81
-
82
-
83
-
84
-
85
-
86
-
87
-
88
-
89
-
90
-
91
-
92
-
93
-
94
-
95
-
96
-
97
-
98
-
99
-
100
-
101
-
102
-
103
-
104
-
105
-
106
-
107
-
108
-
109
-
110
-
111
-
112
-
113
-
114
-
115
-
116
-
117
-
118
-
119
-
120
-
121
-
122
-
123
-
124
-
125
-
126
-
127
-
128
-
129
-
130
-
131
-
132
-
133
-
134
-
135
-
136
-
137
 |
 |