Lexmark X5450 User's Guide - Page 29
Menu item, Action, To save Paper Size, Paper Type, or Photo Size settings
 |
View all Lexmark X5450 manuals
Add to My Manuals
Save this manual to your list of manuals |
Page 29 highlights
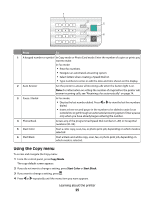
3 Press . 4 Press or repeatedly until the submenu item you want or the setting you want appears. 5 Press . Note: Pressing selects a setting. An * appears next to the selected setting. 6 To go into additional submenus and settings, repeat step 4 and step 5 as needed. 7 If needed, press repeatedly to return to the previous menus and make other setting selections. 8 Press Start Color or Start Black. Menu item Action Proof Sheet Print and then scan a proof sheet: • for all photos on the memory card • for the most recent 20 photos • by date For more information, see "Printing photos stored on a memory device using the proof sheet" on page 58. Print Photos Print photos directly from a memory card or flash drive. Save Photos • Save photos stored on a memory card or flash drive to the computer. • Copy photos from a memory card to a flash drive. Photo Effects1 Apply red-eye reduction, color effects, or automatic image enhancement to your photos. Paper Size1 2 Specify the size of the paper loaded. Photo Size1 2 Specify the size photo you want. Layout1 Center one photo on a page, or specify the number of photos to print on a page. Quality1 Adjust the quality of printed photos. Paper Type1 2 Specify the type of paper loaded. Tools • Maintenance - View ink levels. - Clean cartridges. - Align cartridges. - Print a test page. • Device Setup-Customize printer setup settings. • Defaults-Reset printer settings to factory defaults. 1 Setting will return to factory default setting when a memory card or flash drive is removed. 2 Setting must be saved individually. For more information, see Note below table. Note: To save Paper Size, Paper Type, or Photo Size settings: Learning about the printer 29
-
 1
1 -
2
-
3
-
4
-
5
-
6
-
7
-
8
-
9
-
10
-
11
-
12
-
13
-
14
-
15
-
16
-
17
-
18
-
19
-
20
-
21
-
22
-
23
-
 24
24 -
 25
25 -
 26
26 -
 27
27 -
 28
28 -
 29
29 -
 30
30 -
 31
31 -
 32
32 -
 33
33 -
 34
34 -
35
-
36
-
37
-
38
-
39
-
40
-
41
-
42
-
43
-
44
-
45
-
46
-
47
-
48
-
49
-
50
-
51
-
52
-
53
-
54
-
55
-
56
-
57
-
58
-
59
-
60
-
61
-
62
-
63
-
64
-
65
-
66
-
67
-
68
-
69
-
70
-
71
-
72
-
73
-
74
-
75
-
76
-
77
-
78
-
79
-
80
-
81
-
82
-
83
-
84
-
85
-
86
-
87
-
88
-
89
-
90
-
91
-
92
-
93
-
94
-
95
-
96
-
97
-
98
-
99
-
100
-
101
-
102
-
103
-
104
-
105
-
106
-
107
-
108
-
109
-
110
-
111
-
112
-
113
-
114
-
115
-
116
-
117
-
118
-
119
-
120
-
121
-
122
-
123
-
124
-
125
-
126
-
127
-
128
-
129
-
130
-
131
-
132
-
133
-
134
-
135
-
136
-
137
 |
 |
