Lexmark X5450 User's Guide - Page 57
Transferring photos from a memory device to a computer using Fast Pics, Save Photos to PC
 |
View all Lexmark X5450 manuals
Add to My Manuals
Save this manual to your list of manuals |
Page 57 highlights
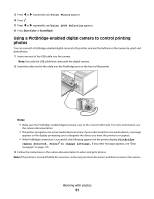
3 When reading of images is complete, the number of photos found appears on the display. Note: The printer recognizes one active media device at a time. If you insert more than one media device, a message appears on the display prompting you to designate the device you want the printer to recognize. Transferring photos from a memory device to a computer using Fast Pics If the printer is connected directly to a computer, you can transfer photos to the computer from a memory card or flash drive. Note: You cannot transfer photos from a memory device to a computer through an external network adapter. 1 Make sure the printer is connected to a computer, and both the printer and computer are on. 2 Insert a memory card or flash drive that contains the images that you want to transfer. For more information, see "Inserting a memory card" on page 55 or "Inserting a flash drive" on page 56. The Fast Pics software automatically launches on your computer screen. 3 From the Fast Pics dialog, click Save Photos to PC. The light on the printer blinks to indicate the memory card is being read or transmitting data. If your flash drive has a light, it blinks to indicate the flash drive is being read or is transmitting data. 4 Wait for the light to stop blinking. Warning-Potential Damage: Do not remove cables or media devices, or touch the printer in the area shown while the light is blinking. 5 Follow the instructions on the computer screen to specify where you want to save the images. Transferring photos from a memory device to the computer using the control panel If the printer is connected directly to a computer, you can transfer photos to the computer from a memory card or flash drive. Note: You cannot transfer photos from a memory device to a computer through an external network adapter. 1 Insert a memory card or a flash drive that contains the images you want to transfer. For more information, see "Inserting a memory card" on page 55 or "Inserting a flash drive" on page 56. 2 Press or repeatedly until Save Photos appears. 3 Press . Working with photos 57
-
 1
1 -
2
-
3
-
4
-
5
-
6
-
7
-
8
-
9
-
10
-
11
-
12
-
13
-
14
-
15
-
16
-
17
-
18
-
19
-
20
-
21
-
22
-
23
-
24
-
25
-
26
-
27
-
28
-
29
-
30
-
31
-
32
-
33
-
34
-
35
-
36
-
37
-
38
-
39
-
40
-
41
-
42
-
43
-
44
-
45
-
46
-
47
-
48
-
49
-
50
-
51
-
 52
52 -
 53
53 -
 54
54 -
 55
55 -
 56
56 -
 57
57 -
 58
58 -
 59
59 -
 60
60 -
 61
61 -
 62
62 -
63
-
64
-
65
-
66
-
67
-
68
-
69
-
70
-
71
-
72
-
73
-
74
-
75
-
76
-
77
-
78
-
79
-
80
-
81
-
82
-
83
-
84
-
85
-
86
-
87
-
88
-
89
-
90
-
91
-
92
-
93
-
94
-
95
-
96
-
97
-
98
-
99
-
100
-
101
-
102
-
103
-
104
-
105
-
106
-
107
-
108
-
109
-
110
-
111
-
112
-
113
-
114
-
115
-
116
-
117
-
118
-
119
-
120
-
121
-
122
-
123
-
124
-
125
-
126
-
127
-
128
-
129
-
130
-
131
-
132
-
133
-
134
-
135
-
136
-
137
 |
 |