Nokia N72 User Guide - Page 34
Adjust color and lighting, Shooting modes, Image setup
 |
View all Nokia N72 manuals
Add to My Manuals
Save this manual to your list of manuals |
Page 34 highlights
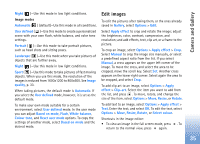
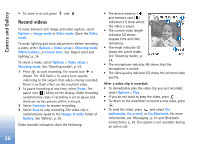
Camera and Gallery pixels in an image. The more pixels, the more detailed the picture is, and the more memory it consumes. Add to album-Select whether you want to save the image to a certain album in the gallery. If you select Yes, a list of available albums opens. Extended zoom-Select On if you want to achieve maximum zoom but are prepared to accept lower image resolution. Show captured image-Select Yes if you want to see the captured image after it is taken, or No if you want to continue taking pictures immediately. Default image name-Set a default name for the images you are going to take. You can replace the date with your own text (for example, 'Holiday_2006'). Memory in use-Select where to store your images. Adjust color and lighting To enable the camera to reproduce colors and lighting more accurately, or to add effects to your pictures or videos, select Options > Image setup or Video setup, and select from the following options: Shooting mode-select a mode for the environment in which you are taking pictures. See 'Shooting modes', p. 34. Every mode uses its own lighting settings that have been adjusted according to a certain kind of environment. Flash (images and camera only)-Set the flash to Automatic, On/forced, or Off. See 'The flash', p. 33. White balance-Select the current lighting condition from the list. This allows the camera to reproduce colors more accurately. Colour tone-Select a color effect from the list. The display changes to match any settings made, showing you how the change affects the pictures or videos. The settings return to the default settings when you close the camera. If you select a new mode, the settings are replaced by the settings of the selected mode. See 'Shooting modes', p. 34. If you need to change the setup settings, you can change them after selecting a mode. Shooting modes Shooting modes help you to find the right color and lighting settings for the current environment. Select a mode for taking pictures or recording video clips from a modes list. The settings of each mode have been set according to a certain style or environment in which the pictures are taken. Select Options > Image setup/Video setup > Shooting mode: Video modes Normal ( )(default)-Use this mode in all conditions. 34
-
 1
1 -
2
-
3
-
4
-
5
-
6
-
7
-
8
-
9
-
10
-
11
-
12
-
13
-
14
-
15
-
16
-
17
-
18
-
19
-
20
-
21
-
22
-
23
-
24
-
25
-
26
-
27
-
28
-
 29
29 -
 30
30 -
 31
31 -
 32
32 -
 33
33 -
 34
34 -
 35
35 -
 36
36 -
 37
37 -
 38
38 -
 39
39 -
40
-
41
-
42
-
43
-
44
-
45
-
46
-
47
-
48
-
49
-
50
-
51
-
52
-
53
-
54
-
55
-
56
-
57
-
58
-
59
-
60
-
61
-
62
-
63
-
64
-
65
-
66
-
67
-
68
-
69
-
70
-
71
-
72
-
73
-
74
-
75
-
76
-
77
-
78
-
79
-
80
-
81
-
82
-
83
-
84
-
85
-
86
-
87
-
88
-
89
-
90
-
91
-
92
-
93
-
94
-
95
-
96
-
97
-
98
-
99
-
100
-
101
-
102
-
103
-
104
-
105
-
106
-
107
-
108
-
109
-
110
-
111
-
112
-
113
-
114
-
115
-
116
-
117
-
118
-
119
-
120
 |
 |