Ricoh Aficio SP 9100DN Software Guide - Page 288
Print file from Web Image Monitor. For details, see Web Image Monitor Help.
 |
View all Ricoh Aficio SP 9100DN manuals
Add to My Manuals
Save this manual to your list of manuals |
Page 288 highlights
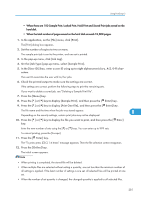
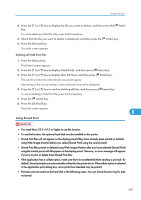
8. Mac OS Configuration 4. In the [User ID:] box, enter a user ID using up to eight alphanumeric (a-z, A-Z, 0-9) characters. File Name can also be set. The user ID associates the user with his/her jobs. 5. After making the necessary settings, click [Print]. The document file is saved in the printer. To print the document, perform the following steps. To delete the document, see "Deleting a Hold Print File". 6. Press the [Menu] key. The [Menu] screen appears. 7. Press the [ ] or [ ] to display key [Hold Print], and then press the [ Enter] key. 8. Press the [ ] or [ ] to display key [Print One File], and then press the [ Enter] key. The file name and the time when the job was stored appear. Depending on the security settings, certain print jobs may not be displayed. 9. Select the file you want to print using the [ ] or [ ] key, and then press the [ Enter] key. To cancel printing, press the [Escape]. 10. Press the [ Enter] key. The "To print, press [ESC] 1-4 times" message appears. Then the file selection screen reappears. 11. Press the [Online] key. 8 The initial screen appears. • When printing is completed, the stored file is deleted. • To stop printing after printing has started, press the [Job Reset] key. The file is deleted. • For details about setting printer drivers, see the printer driver Help. You can also print or delete a Hold Print file from Web Image Monitor. For details, see Web Image Monitor Help. Deleting a selected Hold Print file only 1. Press the [Menu] key. The [Menu] screen appears. 2. Press the [ ] or [ ] key to display [Hold Print], and then press the [ Enter] key. 3. Press the [ ] or [ ] key to display [Delete One File], and then press the [ Enter] key. The file name and the time when the job was stored appear. Depending on the security settings, certain print jobs may not be displayed. 286
-
 1
1 -
2
-
3
-
4
-
5
-
6
-
7
-
8
-
9
-
10
-
11
-
12
-
13
-
14
-
15
-
16
-
17
-
18
-
19
-
20
-
21
-
22
-
23
-
24
-
25
-
26
-
27
-
28
-
29
-
30
-
31
-
32
-
33
-
34
-
35
-
36
-
37
-
38
-
39
-
40
-
41
-
42
-
43
-
44
-
45
-
46
-
47
-
48
-
49
-
50
-
51
-
52
-
53
-
54
-
55
-
56
-
57
-
58
-
59
-
60
-
61
-
62
-
63
-
64
-
65
-
66
-
67
-
68
-
69
-
70
-
71
-
72
-
73
-
74
-
75
-
76
-
77
-
78
-
79
-
80
-
81
-
82
-
83
-
84
-
85
-
86
-
87
-
88
-
89
-
90
-
91
-
92
-
93
-
94
-
95
-
96
-
97
-
98
-
99
-
100
-
101
-
102
-
103
-
104
-
105
-
106
-
107
-
108
-
109
-
110
-
111
-
112
-
113
-
114
-
115
-
116
-
117
-
118
-
119
-
120
-
121
-
122
-
123
-
124
-
125
-
126
-
127
-
128
-
129
-
130
-
131
-
132
-
133
-
134
-
135
-
136
-
137
-
138
-
139
-
140
-
141
-
142
-
143
-
144
-
145
-
146
-
147
-
148
-
149
-
150
-
151
-
152
-
153
-
154
-
155
-
156
-
157
-
158
-
159
-
160
-
161
-
162
-
163
-
164
-
165
-
166
-
167
-
168
-
169
-
170
-
171
-
172
-
173
-
174
-
175
-
176
-
177
-
178
-
179
-
180
-
181
-
182
-
183
-
184
-
185
-
186
-
187
-
188
-
189
-
190
-
191
-
192
-
193
-
194
-
195
-
196
-
197
-
198
-
199
-
200
-
201
-
202
-
203
-
204
-
205
-
206
-
207
-
208
-
209
-
210
-
211
-
212
-
213
-
214
-
215
-
216
-
217
-
218
-
219
-
220
-
221
-
222
-
223
-
224
-
225
-
226
-
227
-
228
-
229
-
230
-
231
-
232
-
233
-
234
-
235
-
236
-
237
-
238
-
239
-
240
-
241
-
242
-
243
-
244
-
245
-
246
-
247
-
248
-
249
-
250
-
251
-
252
-
253
-
254
-
255
-
256
-
257
-
258
-
259
-
260
-
261
-
262
-
263
-
264
-
265
-
266
-
267
-
268
-
269
-
270
-
271
-
272
-
273
-
274
-
275
-
276
-
277
-
278
-
279
-
280
-
281
-
282
-
 283
283 -
 284
284 -
 285
285 -
 286
286 -
 287
287 -
 288
288 -
 289
289 -
 290
290 -
 291
291 -
 292
292 -
 293
293 -
294
-
295
-
296
-
297
-
298
-
299
-
300
-
301
-
302
-
303
-
304
-
305
-
306
-
307
-
308
-
309
-
310
-
311
-
312
-
313
-
314
-
315
-
316
-
317
-
318
-
319
-
320
-
321
-
322
-
323
-
324
-
325
-
326
-
327
-
328
-
329
-
330
-
331
-
332
-
333
-
334
-
335
-
336
-
337
-
338
-
339
-
340
-
341
-
342
-
343
-
344
 |
 |
