Ricoh Aficio SP 9100DN Software Guide - Page 315
Installing the Server Certificate (Certificate Issued by a Certificate Authority), Enabling SSL
 |
View all Ricoh Aficio SP 9100DN manuals
Add to My Manuals
Save this manual to your list of manuals |
Page 315 highlights
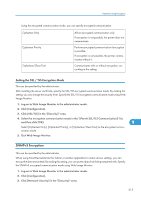
Protection Using Encryption • If you apply for two certificates simultaneously, the certificate authority may not appear in the certificates. When you install these certificates, be sure to take notes of the certificate contents and the order in which the certificates were installed. • Using Web Image Monitor, you can create the contents of the server certificate but you cannot send the application. • Click [Cancel Request] to cancel the request for the server certificate. • For details about the displayed items and selectable items, see Web Image Monitor Help. Installing the Server Certificate (Certificate Issued by a Certificate Authority) Install the server certificate using Web Image Monitor. This section explains the use of a certificate issued by a certificate authority as the server certificate. Enter the server certificate contents issued by the certificate authority. 1. Log on to Web Image Monitor in the administrator mode. 2. Click [Configuration], and then click [Device Certificate] in the "[Security]" area. The [Device Certificate] page appears. 3. Click [Install]. 4. Enter the contents of the server certificate. In the Device Certificate Request box, enter the contents of the server certificate received from the certificate authority. 5. Click [OK]. 9 [Installed] appears under [Certificate Status] to show that a server certificate for the printer has been installed. 6. Quite Web Image Monitor. • For details about the displayed items and selectable items, see Web Image Monitor Help. Enabling SSL After installing the server certificate in the printer, enable the SSL setting. This procedure is used for a self-signed certificate or a certificate issued by a certificate authority. 1. Log on to Web Image Monitor in the administrator mode. 2. Click [Configuration], and then click [SSL/TLS] in the "[Security]" area. 313
-
 1
1 -
2
-
3
-
4
-
5
-
6
-
7
-
8
-
9
-
10
-
11
-
12
-
13
-
14
-
15
-
16
-
17
-
18
-
19
-
20
-
21
-
22
-
23
-
24
-
25
-
26
-
27
-
28
-
29
-
30
-
31
-
32
-
33
-
34
-
35
-
36
-
37
-
38
-
39
-
40
-
41
-
42
-
43
-
44
-
45
-
46
-
47
-
48
-
49
-
50
-
51
-
52
-
53
-
54
-
55
-
56
-
57
-
58
-
59
-
60
-
61
-
62
-
63
-
64
-
65
-
66
-
67
-
68
-
69
-
70
-
71
-
72
-
73
-
74
-
75
-
76
-
77
-
78
-
79
-
80
-
81
-
82
-
83
-
84
-
85
-
86
-
87
-
88
-
89
-
90
-
91
-
92
-
93
-
94
-
95
-
96
-
97
-
98
-
99
-
100
-
101
-
102
-
103
-
104
-
105
-
106
-
107
-
108
-
109
-
110
-
111
-
112
-
113
-
114
-
115
-
116
-
117
-
118
-
119
-
120
-
121
-
122
-
123
-
124
-
125
-
126
-
127
-
128
-
129
-
130
-
131
-
132
-
133
-
134
-
135
-
136
-
137
-
138
-
139
-
140
-
141
-
142
-
143
-
144
-
145
-
146
-
147
-
148
-
149
-
150
-
151
-
152
-
153
-
154
-
155
-
156
-
157
-
158
-
159
-
160
-
161
-
162
-
163
-
164
-
165
-
166
-
167
-
168
-
169
-
170
-
171
-
172
-
173
-
174
-
175
-
176
-
177
-
178
-
179
-
180
-
181
-
182
-
183
-
184
-
185
-
186
-
187
-
188
-
189
-
190
-
191
-
192
-
193
-
194
-
195
-
196
-
197
-
198
-
199
-
200
-
201
-
202
-
203
-
204
-
205
-
206
-
207
-
208
-
209
-
210
-
211
-
212
-
213
-
214
-
215
-
216
-
217
-
218
-
219
-
220
-
221
-
222
-
223
-
224
-
225
-
226
-
227
-
228
-
229
-
230
-
231
-
232
-
233
-
234
-
235
-
236
-
237
-
238
-
239
-
240
-
241
-
242
-
243
-
244
-
245
-
246
-
247
-
248
-
249
-
250
-
251
-
252
-
253
-
254
-
255
-
256
-
257
-
258
-
259
-
260
-
261
-
262
-
263
-
264
-
265
-
266
-
267
-
268
-
269
-
270
-
271
-
272
-
273
-
274
-
275
-
276
-
277
-
278
-
279
-
280
-
281
-
282
-
283
-
284
-
285
-
286
-
287
-
288
-
289
-
290
-
291
-
292
-
293
-
294
-
295
-
296
-
297
-
298
-
299
-
300
-
301
-
302
-
303
-
304
-
305
-
306
-
307
-
308
-
309
-
 310
310 -
 311
311 -
 312
312 -
 313
313 -
 314
314 -
 315
315 -
 316
316 -
 317
317 -
 318
318 -
 319
319 -
 320
320 -
321
-
322
-
323
-
324
-
325
-
326
-
327
-
328
-
329
-
330
-
331
-
332
-
333
-
334
-
335
-
336
-
337
-
338
-
339
-
340
-
341
-
342
-
343
-
344
 |
 |
