Tripp Lite 0SU70032 Owner's Manual for 0SU70030 / 0SU70032 KVM Switches 933207 - Page 27
Configuring the Network Settings
 |
View all Tripp Lite 0SU70032 manuals
Add to My Manuals
Save this manual to your list of manuals |
Page 27 highlights
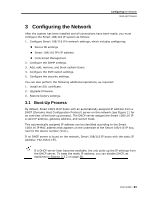
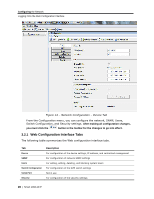
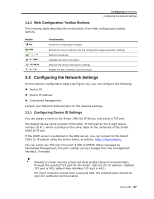
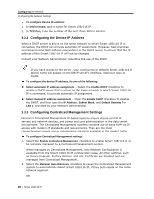
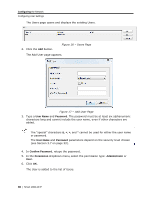
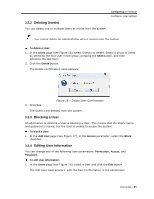
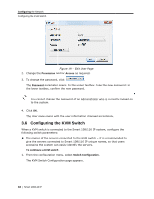
Configuring the Network Configuring the Network Settings 3.2.2 Web Configuration Toolbar Buttons The following table describes the functionality of the Web configuration toolbar buttons. Button Functionality Saves the configuration changes Reloads the device settings into the configuration page parameter settings Reboots the device Upgrades the device firmware Restores the device with factory settings Installs the SSL certificate onto the device 3.3 Configuring the Network Settings On the network configuration page (see Figure 14), you can configure the following: Device ID Device IP address Centralized Management Consult your Network Administrator for the network settings. 3.3.1 Configuring Device ID Settings You can assign a name to the Smart 108/116 IP device, and select a TCP port. The default device name consists of the letter 'D' followed by the 6-digit device number (D.N.), which is printed on the silver label on the underside of the Smart 108/116 IP box. If the DHCP server is published in the DNS server, you can connect to the Smart 108/116 IP system using the device name, as follows: https://DeviceName. You can select any TCP port from port # 800 to 65535. When managed by Centralized Management, the port number can be changed from the management interface, if needed. Firewall or router security access list must enable inbound communication through the selected TCP port for the Smart 108/116 IP's IP address. (Default TCP port is 900; default Web interface TCP port is 443.) For client computer access from a secured LAN, the selected ports should be open for outbound communication. User Guide | 27
-
 1
1 -
2
-
3
-
4
-
5
-
6
-
7
-
8
-
9
-
10
-
11
-
12
-
13
-
14
-
15
-
16
-
17
-
18
-
19
-
20
-
21
-
 22
22 -
 23
23 -
 24
24 -
 25
25 -
 26
26 -
 27
27 -
 28
28 -
 29
29 -
 30
30 -
 31
31 -
 32
32 -
33
-
34
-
35
-
36
-
37
-
38
-
39
-
40
-
41
-
42
-
43
-
44
-
45
-
46
-
47
-
48
-
49
-
50
-
51
-
52
-
53
-
54
-
55
-
56
-
57
-
58
-
59
-
60
-
61
-
62
-
63
-
64
-
65
-
66
-
67
-
68
-
69
-
70
-
71
-
72
-
73
-
74
-
75
-
76
-
77
-
78
-
79
-
80
-
81
-
82
-
83
-
84
-
85
-
86
 |
 |
