Tripp Lite 0SU70032 Owner's Manual for 0SU70030 / 0SU70032 KVM Switches 933207 - Page 52
Synchronizing, g Mouse Pointers
 |
View all Tripp Lite 0SU70032 manuals
Add to My Manuals
Save this manual to your list of manuals |
Page 52 highlights
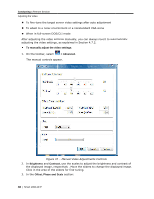
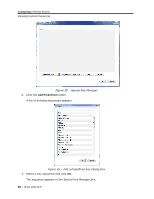
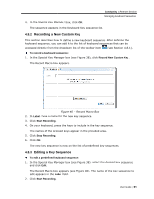
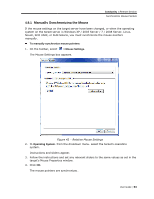
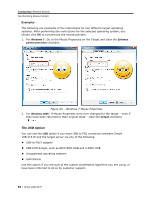
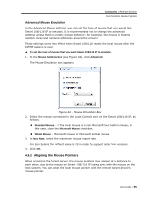
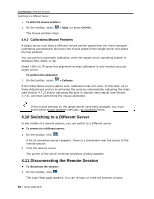
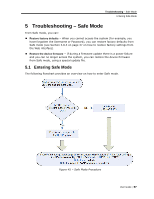
Conducting a Remote Session Synchronizing Mouse Pointers 3. On your keyboard, press the keys to include in the key sequence. The names of the pressed keys appear in the provided area. 4. Click Stop Recording. 5. Click OK. The key sequence definition is updated in the system. 4.8.4 Deleting Key Sequence(s) You can delete a single or multiple key sequences from the system. To delete a keyboard sequence: 1. In the Special Key Manager box (see Figure 38), select the desired key sequence(s) to delete. Select a group of keys by selecting the first key in the group, pressing the Shift button, and then selecting the last key. 2. Click Delete. The delete confirmation box appears. Figure 41 - Delete Key(s) Confirmation Box 4.9 Synchronizing Mouse Pointers For best mouse performance and superior customer experience, Minicom recommends that you set certain mouse settings in the target operating system. This applies to all targets running Windows, such as XP, Windows 7, Windows Server 2003, and Windows Server 2008. When working at the client computer, two mouse pointers appear - one of the client computer and one of the target server; the former is on top of the latter. The mouse pointers should be synchronized. The following explains what to do if they are not synchronized. Before synchronizing mouse pointers, adjust the video of the target server (see Section 4.7); otherwise, mouse synchronization may not work. 52 | Smart 108/116 IP
-
 1
1 -
2
-
3
-
4
-
5
-
6
-
7
-
8
-
9
-
10
-
11
-
12
-
13
-
14
-
15
-
16
-
17
-
18
-
19
-
20
-
21
-
22
-
23
-
24
-
25
-
26
-
27
-
28
-
29
-
30
-
31
-
32
-
33
-
34
-
35
-
36
-
37
-
38
-
39
-
40
-
41
-
42
-
43
-
44
-
45
-
46
-
 47
47 -
 48
48 -
 49
49 -
 50
50 -
 51
51 -
 52
52 -
 53
53 -
 54
54 -
 55
55 -
 56
56 -
 57
57 -
58
-
59
-
60
-
61
-
62
-
63
-
64
-
65
-
66
-
67
-
68
-
69
-
70
-
71
-
72
-
73
-
74
-
75
-
76
-
77
-
78
-
79
-
80
-
81
-
82
-
83
-
84
-
85
-
86
 |
 |
