Uniden BCD325P2 Owners Manual - Page 77
Using Startup Keys
 |
View all Uniden BCD325P2 manuals
Add to My Manuals
Save this manual to your list of manuals |
Page 77 highlights
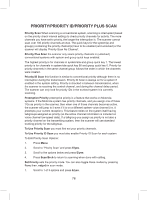
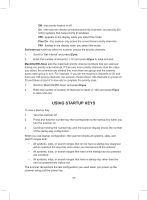
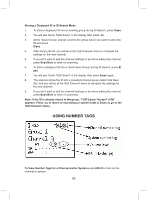
Off - the priority feature is off. On - the scanner checks conventional priority channels, and priority IDs within systems that have priority ID enabled. PRI - appears in the display when you select this mode. Plus On - the scanner only scans the conventional priority channels. PRI - flashes in the display when you select this mode. Set Internval sets how often the scanner checks the priority channels. 1. Scroll to 'Set Interval' and press E/yes. 2. Enter the number of seconds (1-10) and press E/yes to save and exit. MaxCHs/PRI-Scan sets the maximum priority channel numbers that are scanned during one priority scan interrupt. If there are more priority channels than the value you select, the channels are divided into more than one group and the scanner scans each group in turn. For example, if you set the maximum channels to 20 and there are 100 priority channels, the scanner checks those 100 channels in groups of 20 and takes a total of 5 intervals to complete the priority scan. 1. Scroll to 'MaxCHs/PRI-Scan' and press E/yes. 2. Enter the number of number of channels to check (1-100) and press E/yes to save and exit. USING STARTUP KEYS To Use a Startup Key: 1. Turn the scanner off. 2. Press and hold the number key that corresponds to the startup key when you turn the scanner on. 3. Continue holding the number key until the scanner display shows the number of the startup key configuration. When you use startup configuration, the scanner checks all systems, sites, and search ranges and: • All systems, sites, or search ranges that do not have a startup key assigned will be scanned the way they were when you last turned off the scanner. • All systems, sites, or search ranges that have a the startup key you pressed are unlocked. • All systems, sites, or search ranges that have a startup key other than the one you pressed are locked out. The scanner remembers the last configuration you used when you power up the scanner using just the power key. 77
-
 1
1 -
2
-
3
-
4
-
5
-
6
-
7
-
8
-
9
-
10
-
11
-
12
-
13
-
14
-
15
-
16
-
17
-
18
-
19
-
20
-
21
-
22
-
23
-
24
-
25
-
26
-
27
-
28
-
29
-
30
-
31
-
32
-
33
-
34
-
35
-
36
-
37
-
38
-
39
-
40
-
41
-
42
-
43
-
44
-
45
-
46
-
47
-
48
-
49
-
50
-
51
-
52
-
53
-
54
-
55
-
56
-
57
-
58
-
59
-
60
-
61
-
62
-
63
-
64
-
65
-
66
-
67
-
68
-
69
-
70
-
71
-
 72
72 -
 73
73 -
 74
74 -
 75
75 -
 76
76 -
 77
77 -
 78
78 -
 79
79 -
 80
80 -
 81
81 -
 82
82 -
83
-
84
-
85
-
86
-
87
-
88
-
89
-
90
-
91
-
92
-
93
-
94
-
95
-
96
-
97
-
98
-
99
-
100
-
101
-
102
-
103
-
104
-
105
-
106
-
107
-
108
-
109
-
110
-
111
-
112
-
113
-
114
-
115
-
116
-
117
-
118
-
119
-
120
-
121
-
122
-
123
-
124
-
125
-
126
-
127
-
128
-
129
-
130
-
131
-
132
 |
 |
