Brother International HS-5300 Service Manual - Page 52
Adjustment, Lubrication, Cleaning, Printer, Packing
 |
View all Brother International HS-5300 manuals
Add to My Manuals
Save this manual to your list of manuals |
Page 52 highlights
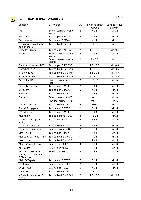
4.16.1 PE Sensor ASSY, Regist Sensor Actuator 2 and 3 and Regist Sensor Actuator Spring 4.17 Power Supply PCB ASSY 4.18 Fan 80 4.19 PA Motor ASSY 4.20 Main Frame ASSY 4.20.1 Solenoid PH 1 ASSY and PH 2 ASSY 4.20.2 Cam Home Position SW ASSY 4.20.3 Cover Open SW ASSY 4.21 Print Head 4.22 Upper Nip Plate Unit 4.22.1 Upper Nip Plate Unit 4.22.2 Baffle Plate 4.22.3 Nip Release Lever 4.22.4 Upper Nip Roller ASSY 4.22.5 MED Sensor PT380 ASSY 4.23 Main Frame ASSY 4.23.1 DR Board Cover 4.23.2 Pressure Roller 4.23.3 Chute 1 ASSY 4.23.4 Feed Roller H 4.23.5 Lower MED Sensor (Photo diode side) 4.24 Carriage ASSY 4.25 FFC Cable 4.26 CR Beam ASSY 4.27 Lower Nip Holder ASSY 4.28 Air Duct ASSY 4.28.1 Air Duct ASSY 4.29 Upper PA Roller ASSY 4.30 Lower PA Roller ASSY 6. ADJUSTMENT 5.1 Head Gap 5.2 Head Gap and Parallel Alignment 5.3 Head Drive Voltage Adjustment 5.4 Offset, TOF and LF Adjustment 6. LUBRICATION 7. CLEANING THE PRINTER 7.1 Cleaning the Platen 7.2 Cleaning the Sheet Feeder 8. PACKING III-31 III-32 III-34 III-35 III-38 III-38 III-41 III-41 III-42 III-47 III-47 III-48 III-49 III-51 III-52 III-54 III-54 III-54 III-55 III-55 III-57 III-58 III-63 III-65 III-66 III-66 III-66 III-67 III-68 III-69 III-69 III-70 III-72 III-73 III-74 III-78 III-78 III-80 III-81
-
 1
1 -
2
-
3
-
4
-
5
-
6
-
7
-
8
-
9
-
10
-
11
-
12
-
13
-
14
-
15
-
16
-
17
-
18
-
19
-
20
-
21
-
22
-
23
-
24
-
25
-
26
-
27
-
28
-
29
-
30
-
31
-
32
-
33
-
34
-
35
-
36
-
37
-
38
-
39
-
40
-
41
-
42
-
43
-
44
-
45
-
46
-
 47
47 -
 48
48 -
 49
49 -
 50
50 -
 51
51 -
 52
52 -
 53
53 -
 54
54 -
 55
55 -
 56
56 -
 57
57 -
58
-
59
-
60
-
61
-
62
-
63
-
64
-
65
-
66
-
67
-
68
-
69
-
70
-
71
-
72
-
73
-
74
-
75
-
76
-
77
-
78
-
79
-
80
-
81
-
82
-
83
-
84
-
85
-
86
-
87
-
88
-
89
-
90
-
91
-
92
-
93
-
94
-
95
-
96
-
97
-
98
-
99
-
100
-
101
-
102
-
103
-
104
-
105
-
106
-
107
-
108
-
109
-
110
-
111
-
112
-
113
-
114
-
115
-
116
-
117
-
118
-
119
-
120
-
121
-
122
-
123
-
124
-
125
-
126
-
127
-
128
-
129
-
130
-
131
-
132
-
133
-
134
-
135
-
136
-
137
-
138
-
139
-
140
-
141
-
142
-
143
-
144
-
145
-
146
-
147
-
148
-
149
-
150
-
151
-
152
-
153
-
154
-
155
-
156
-
157
-
158
-
159
-
160
-
161
-
162
-
163
-
164
-
165
-
166
-
167
-
168
 |
 |
