HP Officejet J3500 User Guide - Page 47
Scan, Scan an original, Scan an original to a program on a computer - install printer
 |
View all HP Officejet J3500 manuals
Add to My Manuals
Save this manual to your list of manuals |
Page 47 highlights
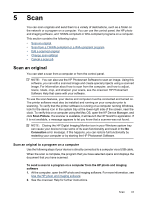
5 Scan You can scan originals and send them to a variety of destinations, such as a folder on the network or a program on a computer. You can use the control panel, the HP photo and imaging software, and TWAIN-compliant or WIA-compliant programs on a computer. This section contains the following topics: • Scan an original • Scan from a TWAIN-compliant or a WIA-compliant program • Edit a scanned original • Change scan settings • Cancel a scan job Scan an original You can start a scan from a computer or from the control panel. NOTE: You can also use the HP Photosmart Software to scan an image. Using this software, you can edit a scanned image and create special projects using a scanned image. For information about how to scan from the computer, and how to adjust, resize, rotate, crop, and sharpen your scans, see the onscreen HP Photosmart Software Help that came with your software. To use the scan features, your device and computer must be connected and turned on. The printer software must also be installed and running on your computer prior to scanning. To verify that the printer software is running on a computer running Windows, look for the device icon in the system tray at the lower-right side of the screen, near the clock. To verify this on a computer using the Mac OS, open the HP Device Manager, and click Scan Picture. If a scanner is available, it will launch the HP ScanPro application. If it is not available, a message appears to let you know that a scanner was not found. NOTE: Closing the HP Digital Imaging Monitor icon in your Windows system tray can cause your device to lose some of its scan functionality and result in the No Connection error message. If this happens, you can restore full functionality by restarting your computer or by starting the HP Photosmart Software. Scan an original to a program on a computer Use the following steps if your device is directly connected to a computer via a USB cable. When the scan is complete, the program that you have selected opens and displays the document that you have scanned. To send a scan to a program on a computer from the HP photo and imaging software 1. At the computer, open the HP photo and imaging software. For more information, see Use the HP photo and imaging software. 2. See the onscreen Help for further instructions. Scan 43
-
 1
1 -
2
-
3
-
4
-
5
-
6
-
7
-
8
-
9
-
10
-
11
-
12
-
13
-
14
-
15
-
16
-
17
-
18
-
19
-
20
-
21
-
22
-
23
-
24
-
25
-
26
-
27
-
28
-
29
-
30
-
31
-
32
-
33
-
34
-
35
-
36
-
37
-
38
-
39
-
40
-
41
-
 42
42 -
 43
43 -
 44
44 -
 45
45 -
 46
46 -
 47
47 -
 48
48 -
 49
49 -
 50
50 -
 51
51 -
 52
52 -
53
-
54
-
55
-
56
-
57
-
58
-
59
-
60
-
61
-
62
-
63
-
64
-
65
-
66
-
67
-
68
-
69
-
70
-
71
-
72
-
73
-
74
-
75
-
76
-
77
-
78
-
79
-
80
-
81
-
82
-
83
-
84
-
85
-
86
-
87
-
88
-
89
-
90
-
91
-
92
-
93
-
94
-
95
-
96
-
97
-
98
-
99
-
100
-
101
-
102
-
103
-
104
-
105
-
106
-
107
-
108
-
109
-
110
-
111
-
112
-
113
-
114
-
115
-
116
-
117
-
118
-
119
-
120
-
121
-
122
-
123
-
124
-
125
-
126
-
127
-
128
-
129
-
130
-
131
-
132
-
133
-
134
-
135
-
136
-
137
-
138
-
139
-
140
-
141
-
142
-
143
-
144
-
145
-
146
-
147
-
148
-
149
-
150
-
151
-
152
-
153
-
154
-
155
-
156
-
157
-
158
-
159
-
160
-
161
-
162
-
163
-
164
-
165
-
166
-
167
-
168
-
169
-
170
-
171
-
172
-
173
-
174
-
175
-
176
-
177
-
178
-
179
-
180
-
181
-
182
-
183
-
184
-
185
-
186
 |
 |