HP Scitex LX600 HP Scitex LX Printer Family - Maintenance and troubleshooting - Page 23
Check the printheads, Clean the carriage cover, Hardware maintenance
 |
View all HP Scitex LX600 manuals
Add to My Manuals
Save this manual to your list of manuals |
Page 23 highlights
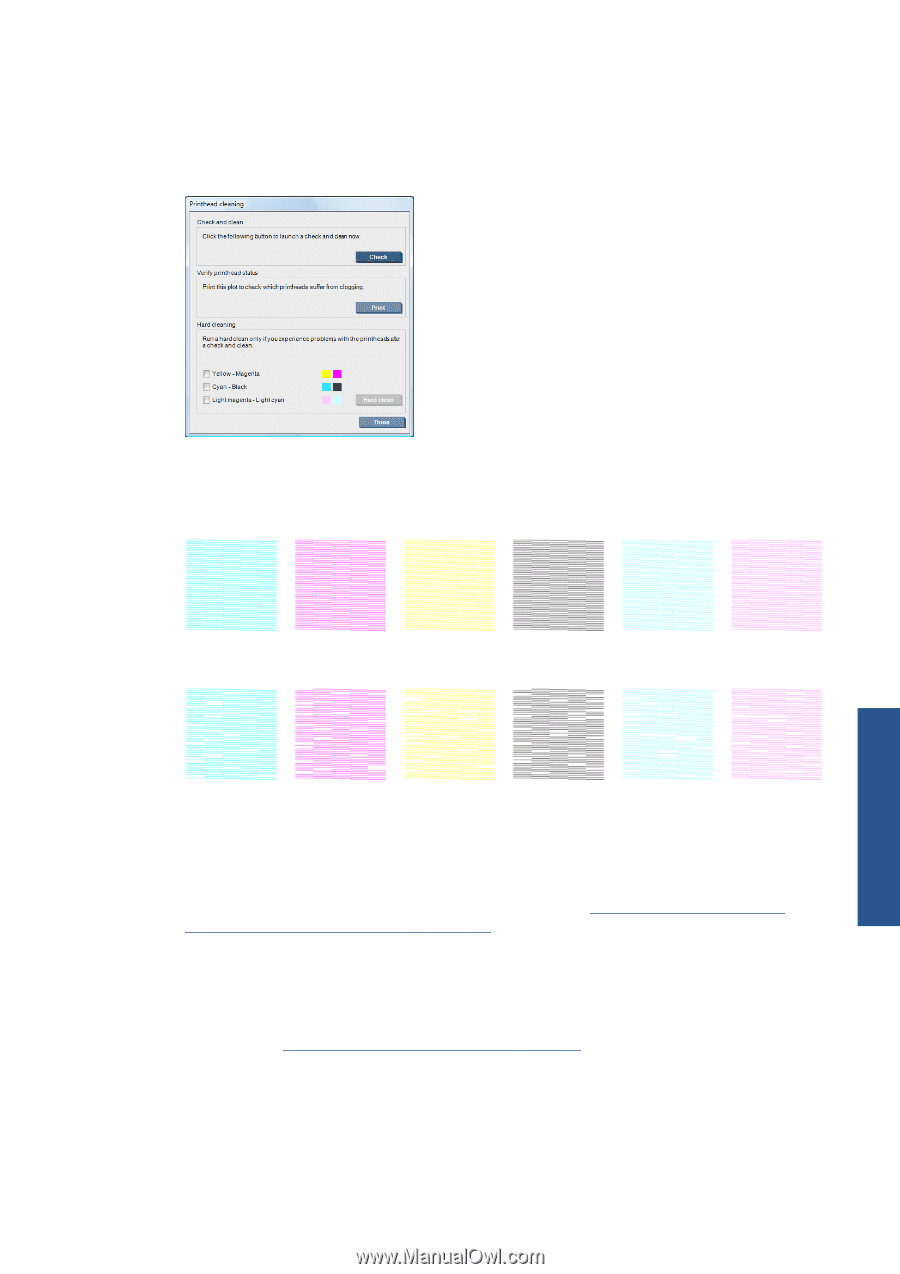
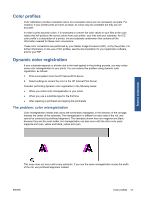
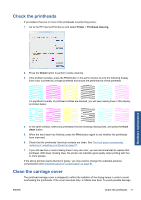
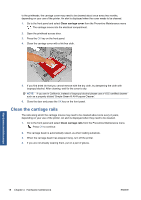
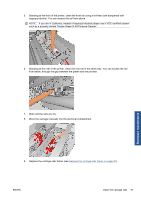
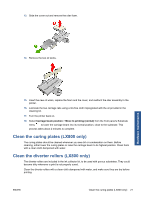
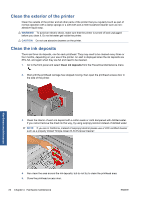
Check the printheads If you believe that one or more of the printheads is performing poorly: 1. Go to the HP Internal Print Server and select Printer > Printhead cleaning. Hardware maintenance 2. Press the Check button to perform routine cleaning. 3. If the problem persists, press the Print button in the same window to print the following display. Each color is printed by a single printhead and shows the performance of that printhead. If a significant number of printhead nozzles are blocked, you will see missing lines in this display, as shown below. 4. In the same window, select any printheads that are showing missing lines, and press the Hard clean button. 5. When the hard clean has finished, press the Print button again to see whether the printheads have improved. 6. Check that the printheads' electrical contacts are clean. See The front panel recommends replacing or reseating a printhead on page 57. 7. If you still see five or more missing lines in any one color, you are recommended to replace that printhead. With fewer missing lines, the printer can maintain good quality when printing with four or more passes. If the above printout seems blurred or grainy, you may need to change the substrate-advance compensation (see Substrate-advance compensation on page 8). Clean the carriage cover The printhead carriage cover is designed to reflect the radiation of the drying lamps in order to avoid overheating the printheads. If the cover becomes dirty, it reflects less heat. To avoid possible damage ENWW Check the printheads 17
-
 1
1 -
2
-
3
-
4
-
5
-
6
-
7
-
8
-
9
-
10
-
11
-
12
-
13
-
14
-
15
-
16
-
17
-
 18
18 -
 19
19 -
 20
20 -
 21
21 -
 22
22 -
 23
23 -
 24
24 -
 25
25 -
 26
26 -
 27
27 -
 28
28 -
29
-
30
-
31
-
32
-
33
-
34
-
35
-
36
-
37
-
38
-
39
-
40
-
41
-
42
-
43
-
44
-
45
-
46
-
47
-
48
-
49
-
50
-
51
-
52
-
53
-
54
-
55
-
56
-
57
-
58
-
59
-
60
-
61
-
62
-
63
-
64
-
65
-
66
-
67
-
68
-
69
-
70
-
71
-
72
-
73
-
74
-
75
-
76
-
77
-
78
 |
 |